VLC Frame-by-Frame Tutorial: 2 Ways to View and Move a Video
VLC is one of the best media players you can download for free on Windows, Mac, and Linux. It has gained a lot of users over the years because of its special features, including VLC frame-by-frame function. This function lets you see the details in a frame from a video clip and precisely take a screenshot. This post shows the guide on how to use VLC’s frame-by-frame and how to activate it with shortcuts.
Guide List
How to Go Frame by Frame on VLC Preview Frame by Frame as VLC Alternative FAQs about Frame by Frame on VLCHow to Go Frame by Frame on VLC
VLC Media Player is known for having a user-friendly interface, but it can be more advanced if you know your way around it. When it comes to frame-by-frame in VLC, you can use it with two methods. Here’s how to elaborate on the feature of the media player.
1. Use Shortcut
This step will show how you can use the VLC frame-by-frame feature using only a shortcut on your keyboard. You can also use the following instruction to change the hotkey for this feature.
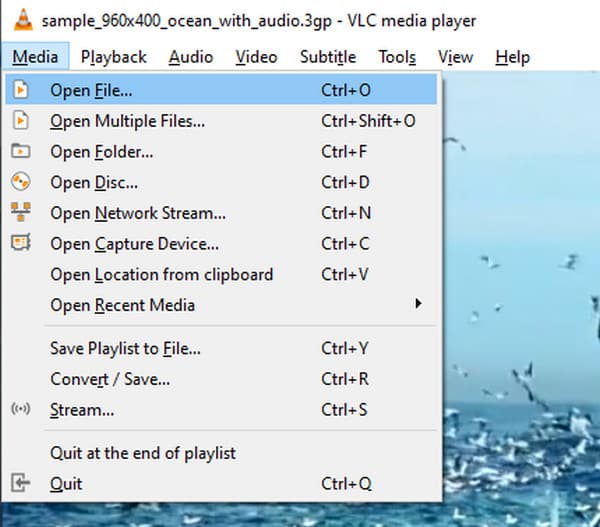
Step 1.Launch VLC Media Player and open the "Media" menu. Click the "Open File" button to upload the video you want to watch. Pause the video and proceed to the next step.
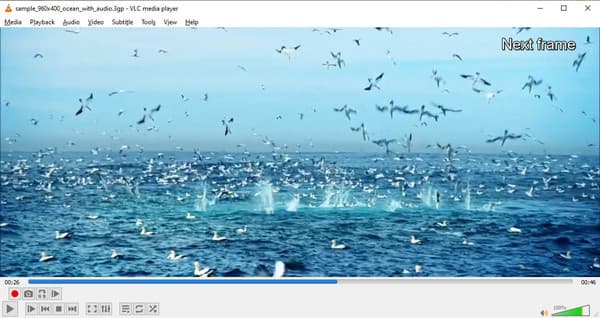
Step 2.Press the "E" key on your keyboard, and the word "Next Frame" will appear in the upper alright corner. Keep tapping the "E" button until you reach the frame you need. Use a screenshot app to capture the frame from the video clip.
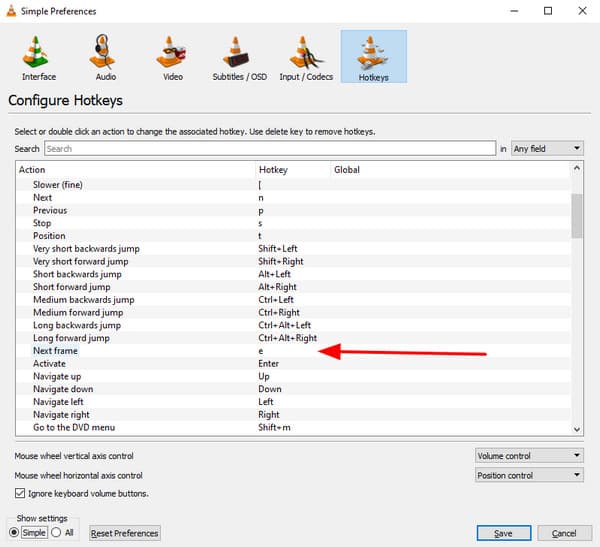
Step 3.To change the shortcut key of frame-by-frame in VLC, go to the "Tools" menu and open "Preferences." Navigate through the "Hotkeys" tab and search for the "Next Frame" option.
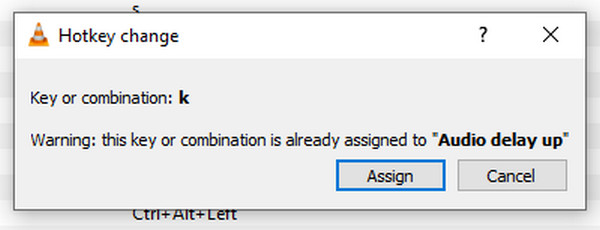
Step 4.When a dialog box appears, double-tap "Next Frame" and press the desired button as the new shortcut for the feature. Click the "Assign" button to confirm your action.
2. Use the Onscreen Button
Alternatively, you can find the VLC frame-by-frame feature on your screen. Here’s how you can find and activate it.
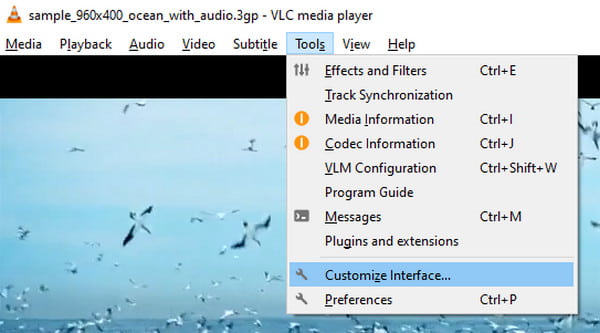
Step 1.Upload the video file to the media player’s interface. Pause the clip and go to the "Tools" menu. Choose the "Customize Interface" option from the dropdown list.
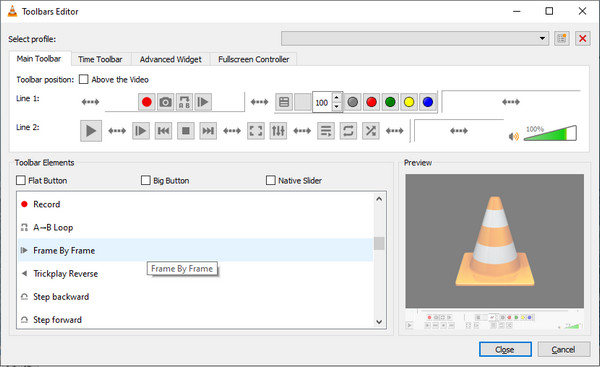
Step 2.When the "Toolbars Editor" window opens, search for Frame by Frame in VLC by scrolling through the "Toolbar Elements" menu.
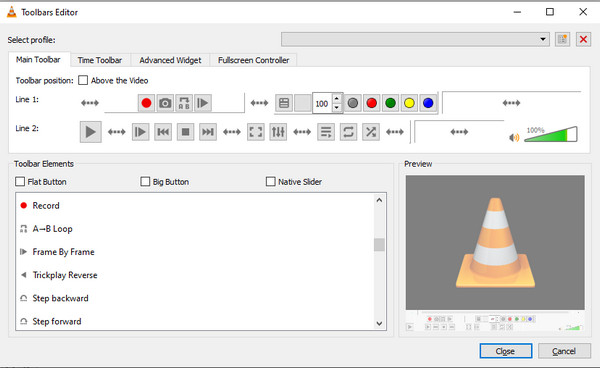
Step 3.Drag and drop the feature to Line 2, and place it near the Play button so you can access it anytime. Click the "Close" button to save the changes.
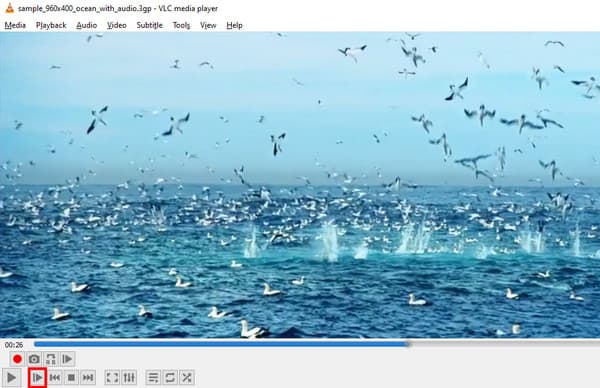
Step 4.After editing, you can see the "Frame-by-frame" feature on the main interface. Click on it, and the video will automatically pause and show the next frame. You can also trim a video in VLC after finding the desired frame.
Preview Frame by Frame as VLC Alternative
VLC only has a limited feature for video editing, but you can use AnyRec Video Converter with its Next Frame option to view frame-by-frame of VLC videos. Its Next Frame option can be found along Play, Pause, Previous, and Forward Second control, along with the Split feature to create segments of clips. For editing, the Video Converter offers various tools, including effects, filters, a video watermark maker, an audio booster, and more. Furthermore, you can change the output settings, such as the video/audio format, resolution, encoder, etc. Download the best VLC alternative to see frame-by-frame videos on Windows and macOS.
Next frame function to check videos frame by frame like VLC.
Built-in Snapshot to capture one video frame with hotkeys.
Over essential tools for video, image, and audio editing.
Best for creating video collages and movies with preset themes.
100% Secure
100% Secure
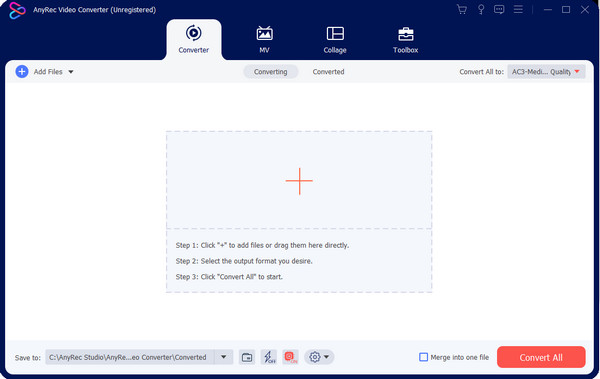
Step 1.Free download the software and install it on your device. Once the app is running, click the "Add" button to upload the video from your folder. Click the "Cut" button (Scissors) under the uploaded video to see VLC videos frame by frame.
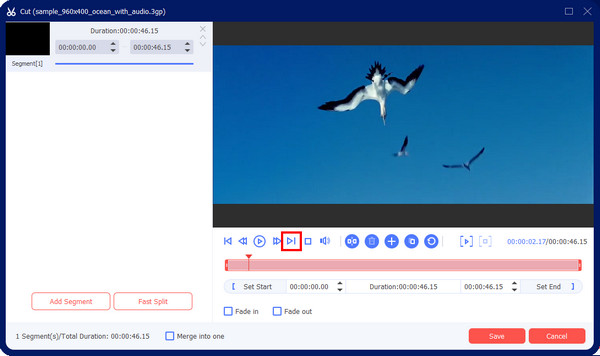
Step 2.Click the "Pause" button to stop the video from playing. Then, click the "Next Frame" button to play the footage frame by frame. You can also create clip segments or trim them in this window to remove unwanted parts. Click the "Play" button to preview the result. Save the changes and go back to the main menu.
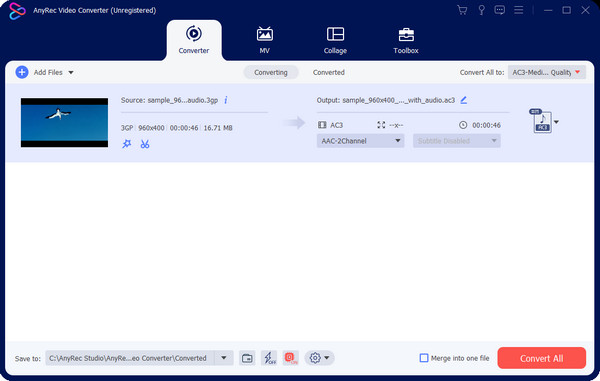
Step 3.Choose the output format from the "Format" menu or edit the "Custom Profile" for a new encoder, resolution, etc. Choose a location folder in the "Save To" menu. Finally, click the "Convert All" button to export the video.
FAQs about Frame by Frame on VLC
-
1. How to take a screenshot of the frame on VLC?
The easiest way to capture the frame is to simultaneously press "Shift + S" on Windows or Linux. If you are using Mac, press "Command + Alt + S" on your keyboard. You can also find the "Take a Screenshot" feature on the "Video" menu of VLC Media Player.
-
2. Where to find the Frame-by-Frame feature on VLC Windows?
The key is already at Line 1 by default. If you look at the controls below the interface, you will see the first rows of controls, and the Next Frame feature is usually placed at the end part of Line 1. If you don’t find it, you can add the feature from the Customize Interface.
-
3. How to see the number of video frames on VLC Media Player?
Upload the video on the media player and proceed to the "Tools" menu. Click the "Media Information" button, and a dialog box will appear. Go to the "Statistics" tab, and you will see the number of frames under the "Video" section.
-
4. How to change the screenshot directory on VLC?
After using the frame-by-frame on VLC, you can take a screenshot with VLC built-in Snapshot option. Navigate to "Preferences" under the "Tool" menu. From the "Simple Preferences" window, go to the "Video" tab. Click the "Browse" button for the "Directory" menu and choose a new folder. Save the changes once done.
-
5. Can you save a screenshot of VLC Next Frame in JPEG format?
Yes. The default screenshot format for VLC is PNG. To change it, go to "Preferences" and open the Video tab. Open the "Format" dropdown list under the "Video Snapshots" menu and choose the new output format. Click the "Save" button to save the changes.
Conclusion
To conclude, the VLC Frame-by-Frame function is a helpful option to see the details of the video. It can also capture the frame as an image and save it as JPEG, BMP, PNG, etc. While the media player is accessible, it has not many editing tools. So, an alternative like AnyRec Video Converter is a go-to since it also has a Next Frame feature with functions to enhance, improve, and create original videos. Try the free trial version to see its awesome offers!
100% Secure
100% Secure
