How to Remove Background in Photopea of All Images [Tutorial]
"How to remove background in Photopea?" Well, Photopea offers free photo editing services through its equipped photo editing features, including those that can remove background. These features are Photopea’s Magic Wand, Magic Cut, and an option to remove it manually. If you are unfamiliar with these features, continue exploring this post! This post listed three workable ways to remove bg in Photopea using those features. Explore each of them now.
Guide List
2 Magic Tools to Remove Background in Photopea How to Manually Remove Picture Background Best Photopea Alternative to Replace Background FAQs2 Magic Tools to Remove Background in Photopea
You may start exploring this post’s three featured ways, "How to remove background in Photopea," with Magic Wand and Magic Cut features. So, without further delay, explore each of them and see which provides the easiest way to remove the photo’s background.
How to remove bg in Photopea using Magic Wand:
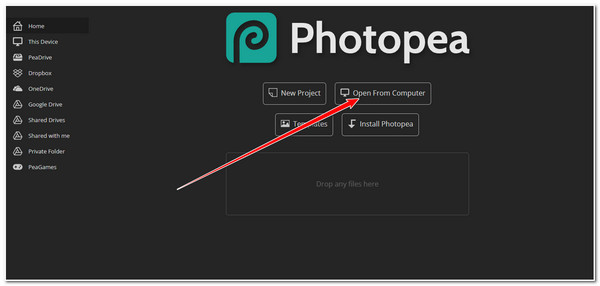
Step 1.Run your computer browser, access the Photopea website, and select the "Open From Computer" option to import the photo you want to remove from the background.
Step 2.Then, click the "Magic Wand" button on the left panel and select the background from your photo. Next, press the "Delete" key to eliminate the selected background.

Tips
If there are still specific background parts left, execute Step 2 again until you are able to eliminate the entire background.
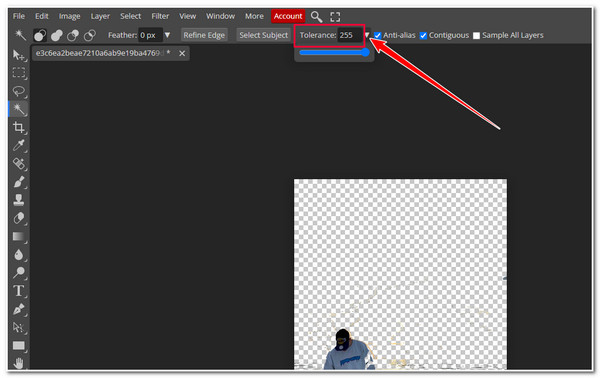
Step 3.Adjust the "Tolerance" and increase the value. You can also decrease it to deselect the parts of the photo. Once done, click the "File" tab and select the "Export as" option.
Steps on how to remove bg in Photopea using the Magic Cut feature:
Step 1.On your computer browser, access Photopea’s website and click the "Open From Computer" button to import the photo you want to remove from the background.
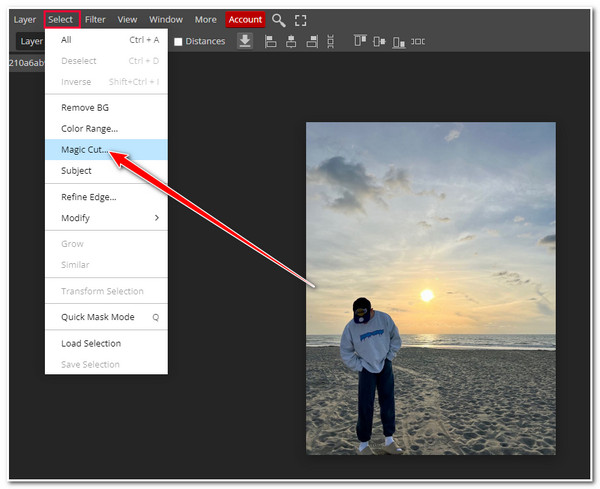
Step 2. After that, click on the photo’s background, click the "Select" tab at the top right area, and select the "Magic Cut" option.
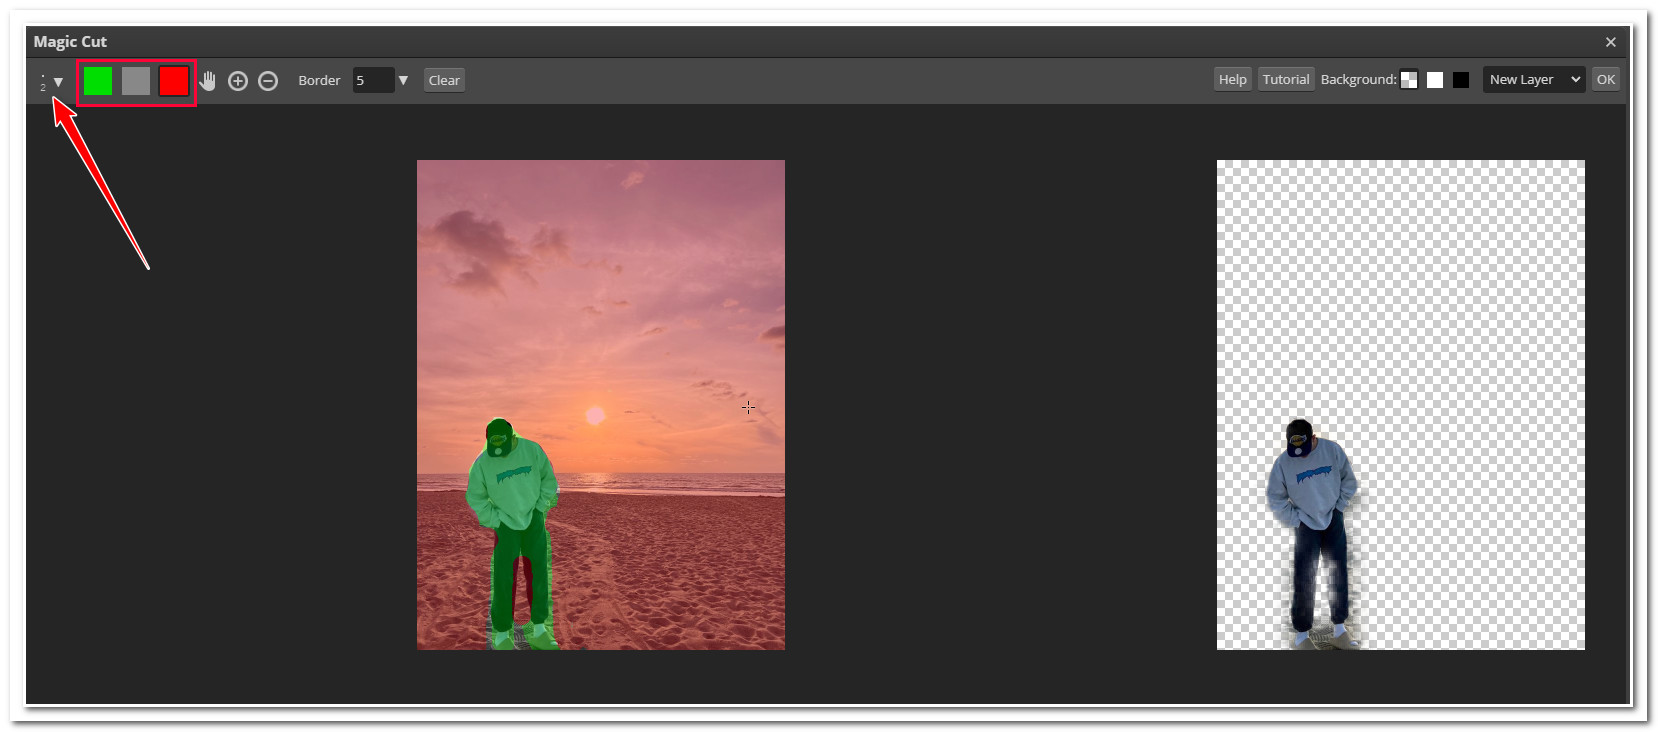
Step 3.On the new window, click the "Red box" at the top left corner and brush off the background. Click the "Green box" and brush the subject.
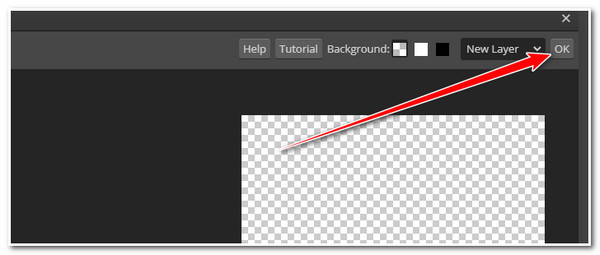
Step 4.Once satisfied with the result, click the "OK" button to save the alterations and remove image background in Photopea. Then, click the "File" tab and choose "Export as" to save your work.
If you brushed a wrong area, click the "Grey box" and brush that area to erase it. You can also alter the brush size by clicking the dropdown button at the top left corner.
How to Manually Remove Picture Background
Aside from using Magic Wand and Magic Cut, Photopea lets you manually remove the photo’s background using another tool/feature. Now, here are the steps to do background removal with Photopea manually using another feature.
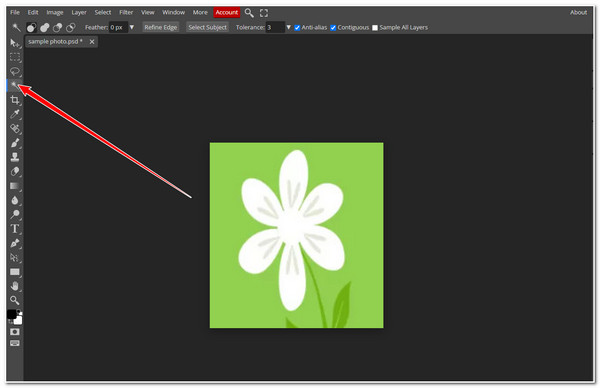
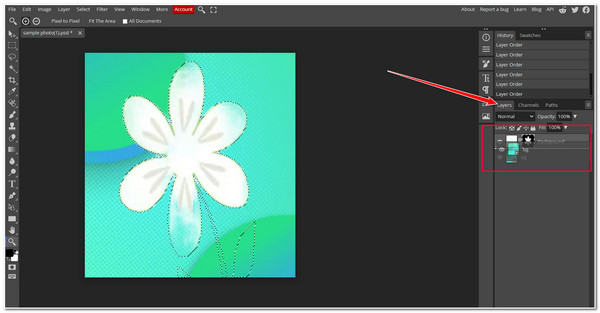
Step 1.Access the Photopea website and select the "Open From Computer" option to import the photo you want to eliminate the backdrop. Then, select the "Magic Wand" option.
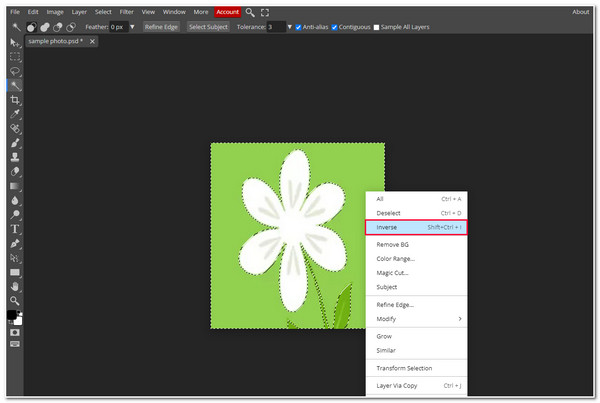
Step 1.Then, select the subject precisely, right-click, and select the "Inverse" option. Finally, click the "Delete" key to eliminate the background with Photopea.
Step 3.Once done, click the "File" tab at the top left corner and select the "Export as" option. Then, choose your preferred image format. Finally, wait until the downloading process is done.

Bonus Tips to Add New Background in Photopea
Step 1.Click the "File" tab at the top left corner and select the "Open & Place" option to change the photo background. Then, select the new background and click the "Open" button to import it.

Step 2.Next, resize the new background and press the "Enter" key. Then, drag the new background’s layer underneath the subject’s layer in the "Layer" section.
Best Photopea Alternative to Replace Background
If you are having a hard time executing precisely the above ways on how to remove bg in Photopea due to your photo, try to use the AnyRec Free Background Remover Online. Compared to Photopea, this tool is more straightforward and offers excellent output quality. It supports the ability to detect and automatically select the subject for you without manually selecting it on your own. Moreover, it also enables you to add a new background to your photo immediately after the subject is separated from its background.
- Equipped with auto-select to remove background quickly.
- Allow you to redefine the subject edges for more precise selection.
- Support preview that lets you see the changes in real time.
- Change the background with local templates and customized colors.
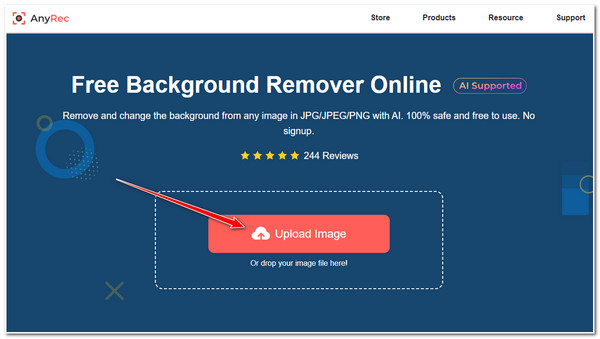
Step 1.Access the AnyRec Free Background Remover Online website on your browser and click the "Upload Image" button to import the photo you want to remove from the background.
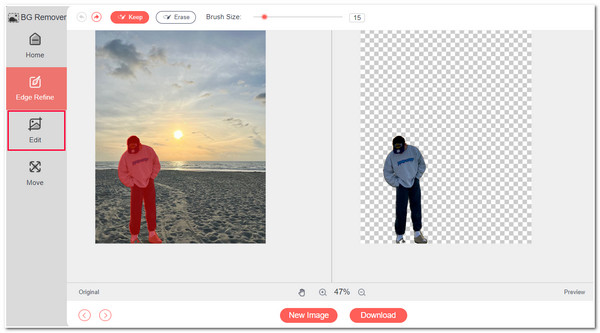
Step 2.Next, this Photopea alternative will remove the background with automatic selection of the subject. Of course, you can still redefine the edges for a more precise selection. After that, click the "Edit" tab on the left pane.
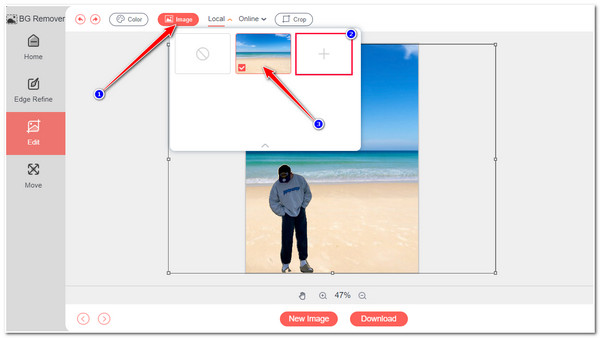
Step 3.On the new window, click the "Image" button, click the "Add" button, and choose a background you want to use as a backdrop. Then, click the new background.
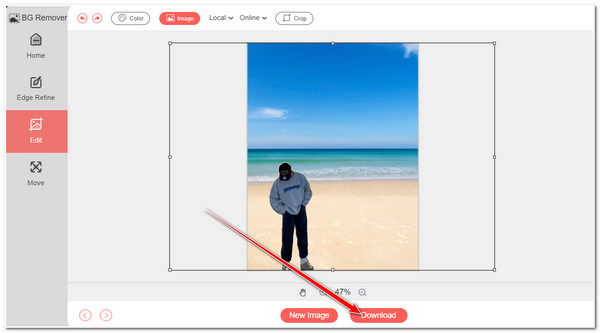
Step 4.Once the subject is overlaid with the new background, click the "Download" button to save/export the output. You can easily use it to remove background for Amazon products.
FAQs
-
Does Photopea embed a watermark on its output?
No. Even though this photo editor tool offers a free photo editing service, it doesn’t embed any watermark on its output.
-
Does Photopea support batch processing?
No. Currently, Photopea doesn’t support batch processing, unlike the other photo editors available on the market. You need to remove each of your photos’ backgrounds using its features.
-
Can I use all Photopea features for free?
Yes. You can utilize all of the Photopea-supported features for free. It supports anything you would expect from a classic or primary photo editor tool and is free.
-
Does Photopea offer a paid version?
Yes. Photopea offers a paid version, which is called the Premium version. This version enables you to use the Photopea without any advertisement and offers other benefits. This version costs $5 per month.
-
Is it safe to use Photopea?
Yes. Photopea is safe to use. It can secure your data while you are editing a photo. It also ensures that your data are not shared anywhere, which makes it a trustworthy platform.
Conclusion
Those are the three workable ways how to remove background in Photopea! You can easily remove a photo’s background efficiently through these workable ways! If you have difficulty brushing your subject's edges on Photopea, AnyRec Free Background Remover Online can be a good alternative! With this tool’s auto-select feature and easy-to-use edges redefine features, you can quickly, easily, and efficiently separate your photo’s subject from its background!