How to Record Console Gameplay of All Highlights without Capture Card
If you want to become a professional console gameplay YouTuber, recording console gameplay with high quality is necessary for you. Although most consoles, including Switch, PS4, Xbox, etc., support recording gameplay through the default screen recorders, most have time limitations and low-quality settings. Moreover, you need to extract the recordings from your console via an external SD card. Thus, a professional screen recorder is needed to record console gameplay with/without a capture card. Keep reading to learn about 4 ways to record on your console and save the recordings on your computer.
Guide List
The Professional Way to Record Console Gameplay with High Quality How to Record Console Gameplay on Switch, PS4, Xbox without Capture Card FAQs about Recording Console Gameplay on Windows/MacThe Professional Way to Record Console Gameplay with High Quality
Switch only captures the last 30 seconds of your gameplay, and Xbox/PS4 only supports recording console gameplay within 60 minutes. In this way, AnyRec Screen Recorder with a professional gameplay recorder is the best for you. It supports customizable output settings, like 1080p resolution and 60 fps frame rate, which can keep the high quality. Moreover, you can use the hotkeys to start and pause recordings at any time to record console gameplay with all highlights.

Record console gameplay with the full screen or the desired region freely.
Adjust the output settings, including the resolution, quality, format, and frame rate.
Customizable hotkeys to help you start and stop recording highlights at any time.
Additional functions like real-time drawings, task schedule, history recordings, etc.
100% Secure
100% Secure
Step 1.Free download and launch "AnyRec Screen Recorder" on your Windows/Mac. Connect your Switch/Xbox/PS4 to the capture card and capture card to the computer via two HDMI cables. Please ensure the capture card supports 1080p and 60fps streaming. Then, click the "Game Recorder" button on the main interface to record console gameplay.

Step 2.Run the gameplay on your console and press the "Downward" arrow to choose the capture screen. Then you can adjust the system sound and microphone settings. You can also turn on the noise cancellation to improve the audio quality.
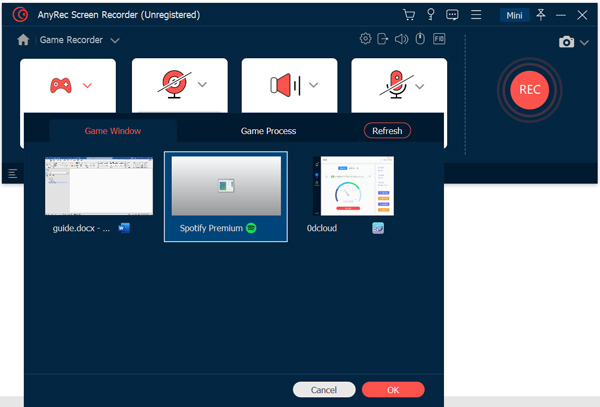
Step 3.Click the "Menu" button and click the "Preferences" button. Then click the "Output" button to change the settings. Then you can set the settings to "Lossless Quality" and 60 fps frame rate to ensure the high-quality output. Then click the "OK" button to save the changes and click the "REC" button to start recording console gameplay.

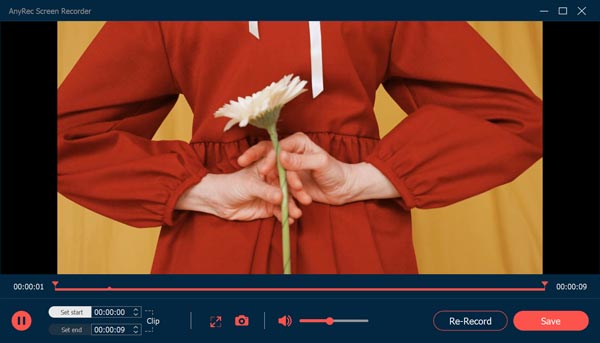
Step 4.In the popping-up window, you can click the "Stop" button to finish recording console gameplay. Then clip the unwanted parts and click the "Save" button to export the console gameplay recording.
How to Record Console Gameplay on Switch, PS4, Xbox without Capture Card
If you don’t want to use the capture card, the default screen recorder on Switch, PS4, and Xbox can also help you record console gameplay easily. But you should note that they have a time limitation and only export low-quality recordings. Learn the detailed steps below:
1. How to record console gameplay on Switch with the last 30 seconds
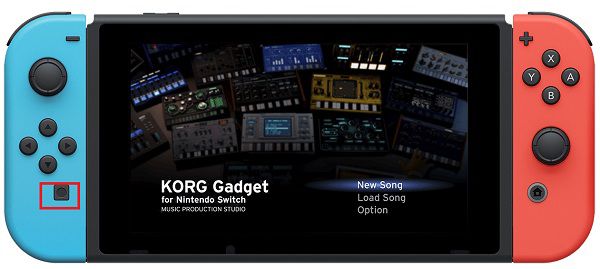
Step 1.Run the gameplay on your Switch. When you just cleared gameplay or experienced beautiful scenery, you can press the Capture button to start recording console gameplay of the last 30 seconds.
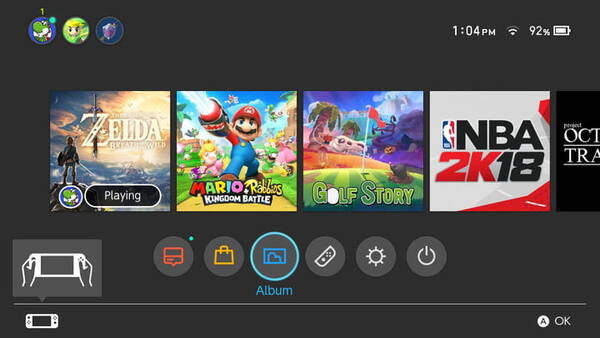
Step 2.Go back to the main interface of Switch and press the "Album" button to see all the recordings. Then, you need to use an SD card to copy your recordings to your computer.
2. How to record console gameplay on Xbox through Game DVR
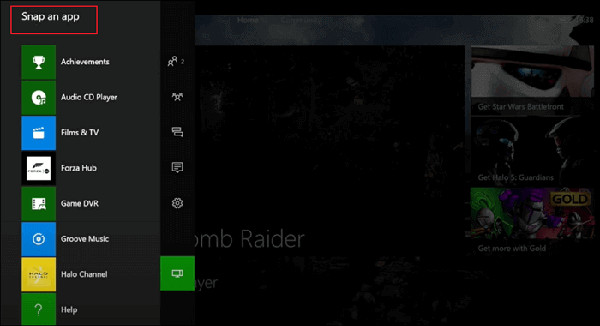
Step 1.Launch your gameplay on Xbox, and press the "Xbox" button twice to open a toolbox window. Press the "Snap an app" menu to press the "Game DVR" button.
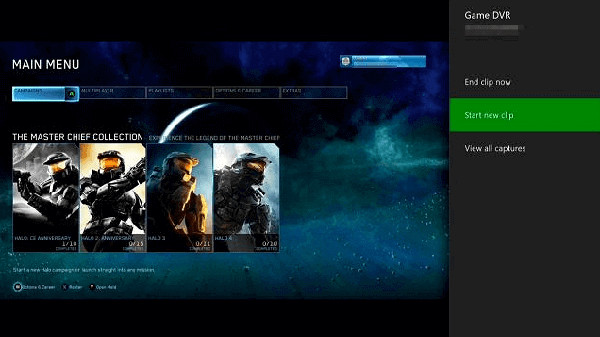
Step 2.There are two modes to record console gameplay on Xbox. The "End clip now" mode will save the last 30 seconds, and the "Start new clip" mode will help you record on Xbox from now on.
3. How to record console gameplay on PS4/PS5
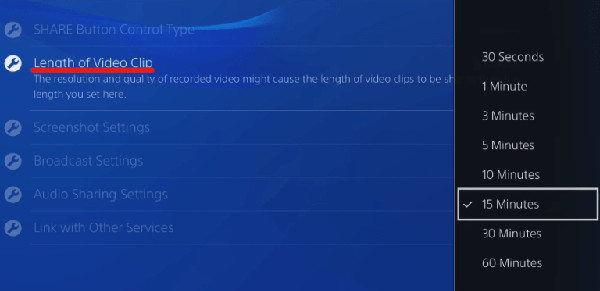
Step 1.Open PS4/5 and press the "Settings" button first. Then press the "Share and Broadcast Settings" button from "Share". Here you can adjust the time of recording console gameplay from 30 seconds to 60 minutes.
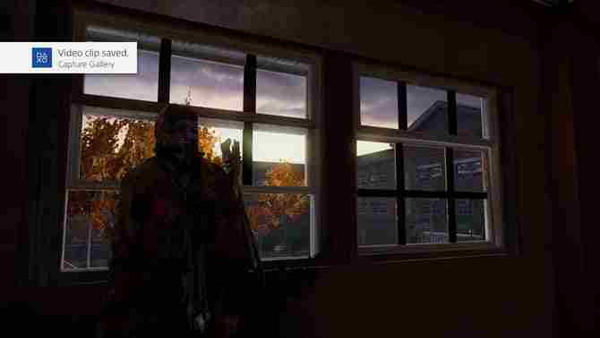
Step 2.Then, press the "Save Video Clip" button from "Share" again. And the last 15 minutes are saved by default. You can see the "Video Clip Saved" message on the screen.
FAQs about Recording Console Gameplay on Windows/Mac
-
1. Can I record console gameplay on Windows/Mac without a capture card?
No, you can’t. Since one monitor can only connect to one console, so you need to keep the original computer console connected to record console gameplay. In this way, a capture card is needed to stream your gameplay on the monitor.
-
2. How to record console gameplay on Switch for longer than 30 seconds?
The default screen recorder can’t achieve this. Thus, you need to rely on professional screen recorders on Windows/Mac to record console gameplay without time limitations. AnyRec Screen Recorder is one of the best-recommended tools for you.
-
3. What settings should I adjust to record console gameplay with high quality?
To keep the high quality of your gameplay recordings, you can adjust the resolution, frame rate, and video format. Resolution is fixed by the screen size, like 1080p or 4K. As for the frame rate, you’d better keep the 60 fps to keep fluent.
Conclusion
Here you have known how to record console gameplay with high quality. Whether you want to record on Switch, Xbox, or PS4/5, you can use the default screen recorder to capture gameplay without a capture card. However, the maximum time is 60 minutes. Thus, you should use AnyRec Screen Recorder to record all console gameplay without limitations.
100% Secure
100% Secure
