How to Take and Crop a Screenshot on Mac [3 Easy Ways]
If you want to capture specific details, it is suggested to crop a screenshot on Mac in the custom region. Or you can use an image editor to crop and remove unwanted elements from a captured screenshot. No matter whether you want to crop images during or after screenshotting, you can get detailed steps here.
Guide List
How to Crop and Edit a Screenshot on Mac How to Take and Crop a Screenshot on Mac How to Crop an Existing Screenshot on Mac (After Capturing)How to Crop and Edit a Screenshot on Mac
AnyRec Screen Recorder is a beginner-friendly screen capture program for all Mac users. You can take screenshots in full screen, selected program window, or any part on the Mac screen in a rectangle. Meanwhile, you can add text, shapes, lines, and annotations while cropping a Mac screenshot. Moreover, you can record screen video, selected window, and webcam on Mac flexibly within the program.

Screenshot any area, browser, or program window on Mac.
Annotate your screenshots with text, arrows, and more.
Set hotkeys to screenshot on Mac while recording.
Save Mac screenshots as JPG, PNG, TIFF, BMP, and GIF.
100% Secure
100% Secure
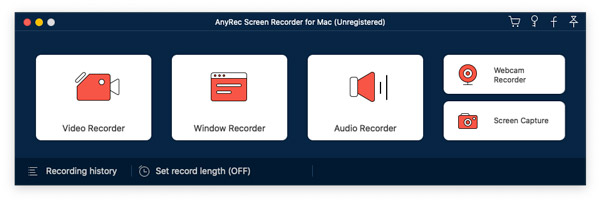
1. Open AnyRec Screen Recorder for Mac. Click the "Screen Capture" button to access the Mac crop screenshot tool.
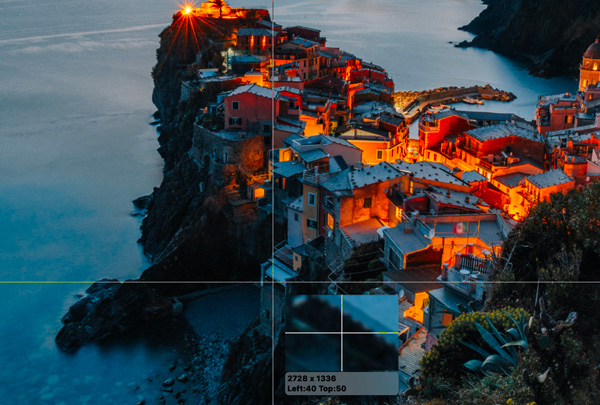
2. Hover your mouse above the specific area you want to capture. Drag and drop the crosshair with your left-click mouse. Later, add your annotation in custom size and color.
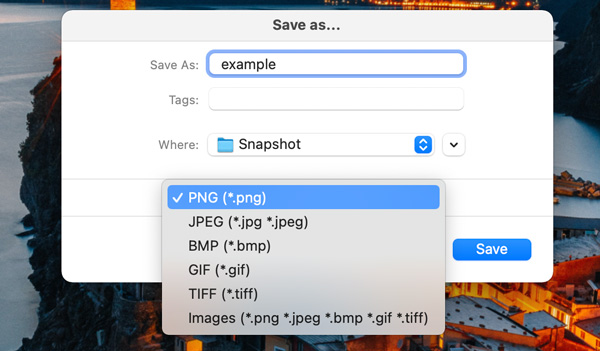
3. Click the "Copy to Clipboard" or "Save" button. In the "Save as…" window, select the output image format and destination folder. At last, confirm with the "Save" button to take a cropped screenshot on Mac successfully.
100% Secure
100% Secure
How to Take and Crop a Screenshot on Mac
You can also choose a free screenshot cropper from the following recommendations.
Grab app: Use the Selection mode to crop a Mac screenshot in JPEG, PNG, and TIFF format. It is good for macOS 10.13 and earlier users.
Shift + Command + 4: A hot Mac crop screenshot shortcut choice. You can get the cropped screenshot in PNG on desktop named Screen Shot [date] at [time]. png. (recommended)
- 1. Press Shift, Command, and 4 keys on your keyboard.
- 2. When the pointer turns into a crosshair, drag on the exact portion with the left-click mouse to crop a MacBook screenshot.
- 3. The moment you release the left-click mouse, you can see the thumbnail of this cropped screenshot in the lower right corner. Click on it to get the built-in screenshot editor.
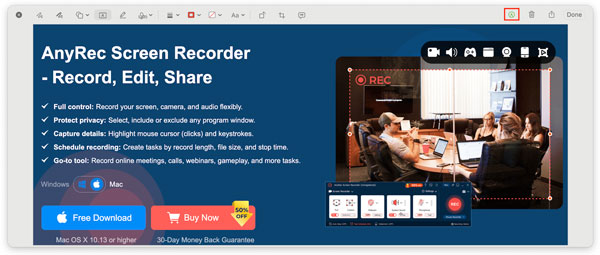
- 4. Click the "Show Markup Toolbar" button with the pencil icon on the top right corner. All photo editing tools show.
- 5. Find and click the "Crop" button. Drag the corner to adjust the image cropping area.
- 6. At last, click the "Done" button to crop an image on MacBook.
How to Crop an Existing Screenshot on Mac (After Capturing)
The thumbnail of the captured screenshot exists for several seconds. If you don't click it, you can find the screenshot on desktop. Use the built-in photo editing programs to crop part of a screenshot on Mac.
Crop and Straighten a Screenshot on Mac with Photos
- 1. Go to Launchpad to find and open the Photos app.
- 2. Drag and drop your screenshot into Photos. Then, double-click on it.
- 3. Click the "Edit" button on the top right corner. Switch to the "Crop" section.
- 4. Rotate your image with "Straighten", "Vertical", "Horizontal", and "Flip" buttons.
- 5. Crop this screenshot with multiple aspect ratios, including 16:9, 4:3, 4:5, 5:7, 3:5, 3:2, freeform, original, and custom.
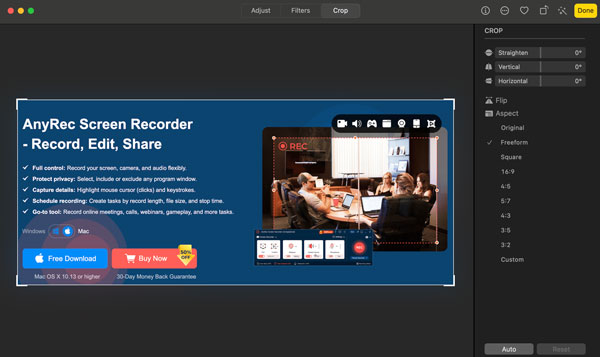
If you want to take multiple Mac screenshots while keeping the same aspect ratio, or take a screenshot on Mac while keeping the aspect ratio of the capture area, you can use the Photos app to deal with it.
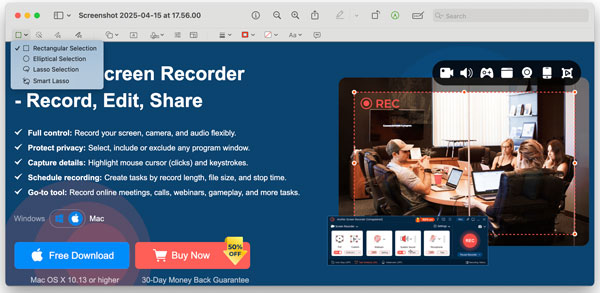
Crop a Screenshot on Mac After Saving with Preview
- 1. Find your screenshot. Right-click on it. Click "Open with" followed by "Preview".
- 2. Click the "Show Markup Toolbar" button on the top right corner.
- 3. Later, click the down arrow icon next to the "Crop" button on the top left corner.
- 4. Click the "Rectangular Selection" option from the dropdown list.
- 5. Drag with the crosshair on your image.
- 6. Click the "Crop to Selection" button to crop your photo.
- 7. Save your cropped picture manually.
Conclusion
That's all to crop a screenshot on MacBook Air and Pro. You can use AnyRec Screen Recorder to take screenshots and record on Mac with flexible editing tools. Or you can screenshot and crop on Mac with the combination of Shift+Command+5 and Photos/Preview. Click the Free Download button below to start a free trial now!
100% Secure
100% Secure