The Best 4 Methods to Crop the Screenshots on Windows 7/8/10/11
How to crop a screenshot on Windows 7/8/10/11? When you are talking about an interesting thing with your friends or explaining important knowledge with an image, you may want to take the screenshots on your Windows to share them with others. Windows has its own snapshot tools as mobiles, so you can try the built-in shortcuts or snipping tools to take and crop screenshots on Windows. However, the default tools only support capturing the full screen without any editing functions, which need you to use other tools to edit and crop the screenshots on Windows.
Thus, this article will introduce the easiest way to capture and crop the screenshots with customized settings on Windows 7/8/10. Of course, you can learn three default ways with detailed steps for quick screen capture.
Guide List
The Easiest Way to Crop a Screenshot with Customized Region 3 Default Methods to Take Screenshots on Windows 7/8/10/11 FAQs of Cropping a Screenshot on Windows 7/8/10The Easiest Way to Crop a Screenshot with Customized Region
To crop a screenshot on Windows with the customized region and settings, you'd better choose AnyRec Screen Recorder. Unlike the built-in shortcuts on Windows, you can select the desired region or window to crop the screenshot on Windows freely. And after taking the screenshots, you can edit them with different shapes, lines, and texts. Moreover, it provides a shortcut to take screenshots at any time according to your need.

Capture and crop screenshots on Windows with simple clicks.
Provide full screen and selected region for you to choose freely.
Editing tools with multiple shapes, lines, arrows, texts, etc.
Shortcut to crop a screenshot on Windows anywhere and anytime.
Customize the output parameters to keep high quality.
100% Secure
100% Secure
Then you can follow the detailed steps to crop a screenshot on Windows 7/8/10/11.
Step 1.Free download and launch AnyRec Screen Recorder on your Windows. Then you can click the "Snapshot" button on the right to start taking screenshots. Or you can simply press the "Ctrl+Alt+C" buttons on your keyboard to crop the screenshot on Windows quickly.

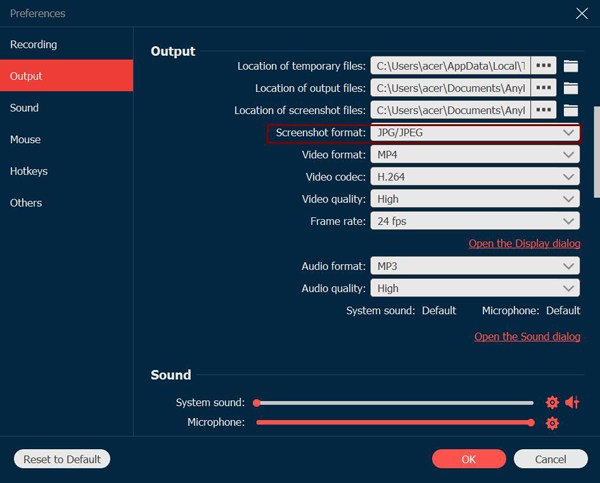
If you want to change the shortcuts, you can click the "Menu" button and click the "Preferences" item. And then, click the "Hotkeys" pane and adjust the shortcuts to the desired ones. You can also choose the "Output" option to change the image format and quality.
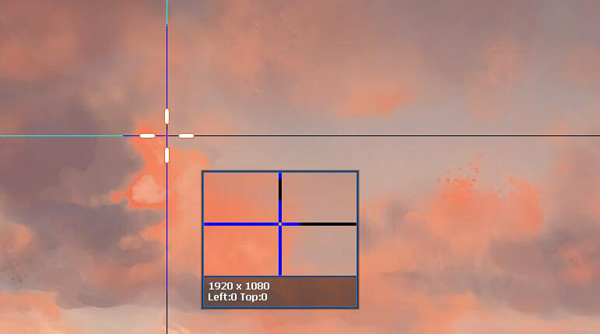
Step 2.Now you can select the desired region or windows to capture. Through the first click, you can determine the top left corner. You can also pull the borderline to crop the screenshots on Windows further.
Step 3.After that, a toolbox will pop up with multiple editing tools. You can add rectangles, ellipses, arrows, lines, texts, callouts, and blur effects with different colors. It also provides the "Undo" button to withdraw the editing.

Step 4.At last, click the "Save" button in the right of the toolbox and choose the desired file folder in the popping-up window. Then click the "Open" button to save the screenshots on your Windows.
100% Secure
100% Secure
Further Reading
3 Default Methods to Crop Screenshots on Windows 7/8/10/11
There are three snipping tools for cropping the screenshots on Windows(screenshot on Windows 11). And each has its advantages and disadvantages. Keep reading and learn about how to use them to crop screenshots.
Method 1: Print Screen button for quick screenshot capture.
Print Screen is a shortcut on the keyboard to take the screenshots on Windows at any time. But it only captures the full screen and has no function to crop the screenshot on Windows. You should rely on other editors to adjust more settings.
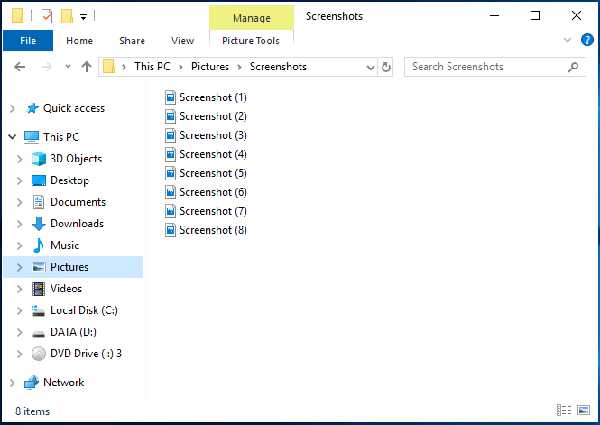
Step 1.Start the desired window and press the "PrtSc" button at the top of your keyboard. Then the full screen is captured, and it is saved on the "Screenshots" folder under the default "Pictures" folder.
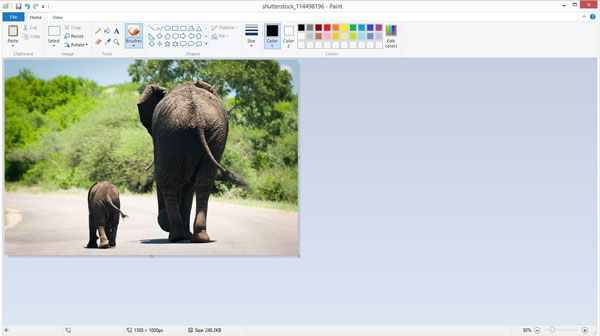
Step 2.To crop the screenshot on Windows, you should launch the "Paint" software on your computer and press "Ctrl+V" to input the screenshot taken just now. Then you can crop the image and edit it with multiple shapes, lines, and texts.
Step 3.At last, click the "Save" button at the top left corner and choose the desired storage path to save.
Further Reading
Method 2: Crop a screenshot on Windows with Snip&Sketch
Snip&Sketch is a relatively professional built-in snipping tool (Windows 11 snipping tool) to take and crop screenshots on Windows. It supports taking the screenshots with the customized region and provides editing features, but you can only save them in PNG format with larger sizes than JPG.
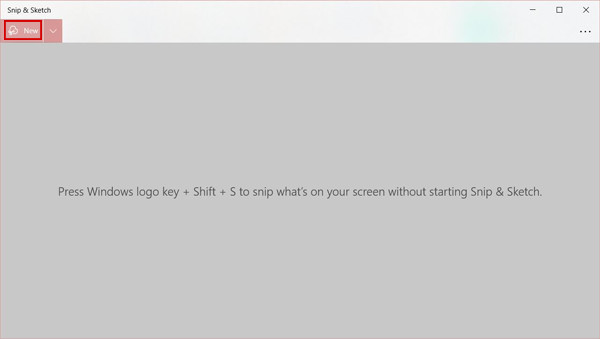
Step 1.Click the "Windows" menu and scroll down to find the "Snip&Sketch" software. After launching this program, you can click the "New" button at the top left corner or press the "Ctrl+N" button to start the screenshot tool.
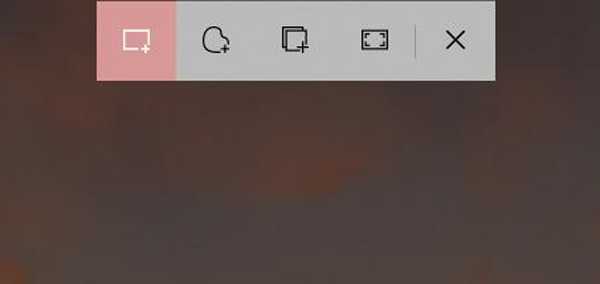
Step 2.In the toolbox, you can choose the full screen, windows, or selected region with different shapes. Then you can crop the screenshot freely according to your need.
Step 3.Then the screenshot will be shown on the software. And you can use different pens to edit the screenshot. After that, click the "Save" button to choose the desired local folder to save.
Further Reading
Method 3: Crop a screenshot on Windows 7/8/10/11 with Game Bar
It is actually a default screen recorder for gameplay. But it also supports taking screenshots easily. Without any editing functions, you should also rely on the Paint software to crop screenshots on Windows.
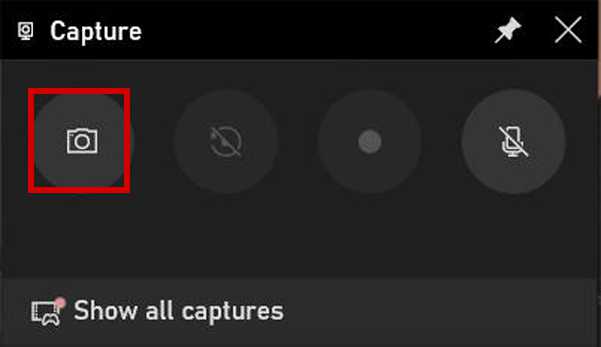
Step 1.Press the "Window+G" buttons on your keyboard to launch the Game Bar software. Find the Capture box and click the "Take Screenshots" button to capture the full screen. Pressing the "Windows+Alt+PrtSc" buttons is also useful.
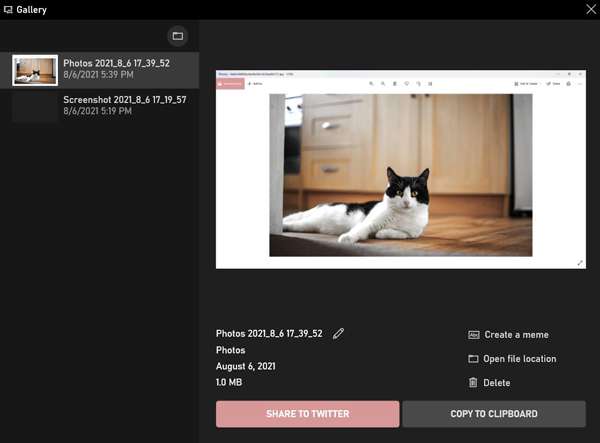
Step 2.Click the "Show All Captures" button to check the image information. You can choose to click the "Copy to Clipboard" button and then paste it into the "Paint" software to crop screenshots on Windows.
Further Reading
FAQs of Cropping a Screenshot on Windows 7/8/10/11
-
1. Where do the screenshots taken by PrtSc saved?
When you have taken a screenshot on Windows with PrtSc, it is saved in the clipboard, and you can paste it to Paint. At the same time, it is saved on your computer. You can click the "My Computer" app and open the "Picture" file. Then you can find them on the "Screenshots" file.
-
2. How to crop the screenshots on Windows as JPG through Snip&Sketch?
Actually, Snip&Sketch can only save the screenshots in PNG format. To crop a screenshot on Windows as JPG, you can rely on the professional screen capture - AnyRec Screen Recorder.
-
3. Can I take and crop a part screenshot on Windows through the built-in tools?
Although there are three built-in screen capture tools on Windows, you can only use Snip&Sketch to crop a part screenshot on Windows. And the other two easy-to-use tools only support full screen.
Conclusion
This article has introduced four easy methods to crop the screenshots on Windows 7/8/10/11. Since the built-in tools only support full-screen capture without customized settings, you should use the Paint software to crop the screenshots further. Thus, you'd better use the professional AnyRec Screen Recorder, which can help you take and crop the screenshots on Windows/Mac easily.
100% Secure
100% Secure
 How to Take a Screenshot on an Acer Laptop? [Effective Methods to Try]