How to Take/Save/Send/Share/Find FaceTime Screenshots | for Beginners
There is no official Screenshot option in FaceTime. If you want to keep the interesting moments permanently, you can use third-party FaceTime screenshots tools.
Some people may want to take FaceTime live photos instead. Well, FaceTime will notify others when you take a live photo during a FaceTime call via this feature. It also requires all attendees enable FaceTime live photos.
Don’t worry about that. This article provides multiple ways to take screenshots during video calls. You can keep or get rid of FaceTime screenshot notificaitons freely. It depends on you.
Now, let’s how to capture screenshots on your phone or computer together.
Guide List
How to Take FaceTime Screenshots on iPhone/iPad/Mac How to Take a Live Photo on FaceTime Video Call The Best Way to Record and Screenshot FaceTime without Notification FAQs of Taking A Screenshot on FaceTimeHow to Take FaceTime Screenshots on iPhone/iPad/Mac
You can simply use the built-in screenshot tools on your iPhone/iPad/Mac to take FaceTime screenshots at any time. Here you can learn the screenshot buttons and shortcuts on your devices.
1. How to Take FaceTime screenshots on iPhone/iPad
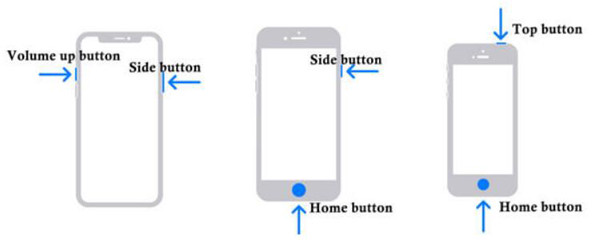
Different iPhone/iPad supports different buttons to take FaceTime screenshots. There are five main models of iPhone and iPad with unique screenshot shortcuts. iPhone (3 models):
Screenshot FaceTime on iPhone (Up to iPhone 15):
For iPhone without a Home button (higher than iPhone X), press the "Side" button and the "Volume Up" button at the same time.
For iPhone with a Touch ID (iPhone 8 or later), you should press the "Side" button and the "Home" button together to capture FaceTime screenshots.
For iPhone with a Top button, just press the "Top" button and the "Home" button at the same time.
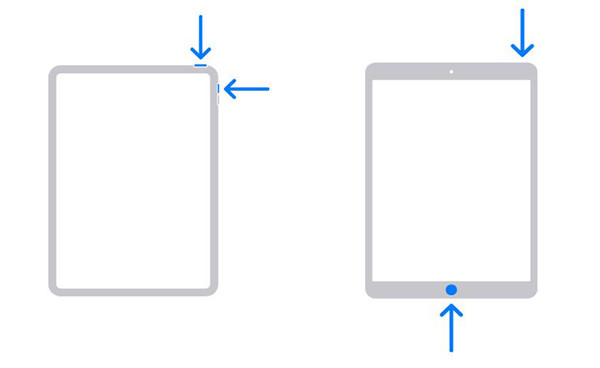
Screenshot FaceTime on iPad (Up to iPad Air 5th):
If your iPad has a Home button, you should press the "Top" and "Home" buttons together to capture Facetime screenshots.
For iPad without a Home button, please press the "Top" button and the "Volume Up" button at the same time.
After taking screenshots of FaceTime calls, these images will be saved in your Photos automatically, and you can edit or share them further. (Maybe you want to know how to fix iPhone iPad screenshots not working.)
2. How to capture screenshots of FaceTime on Mac
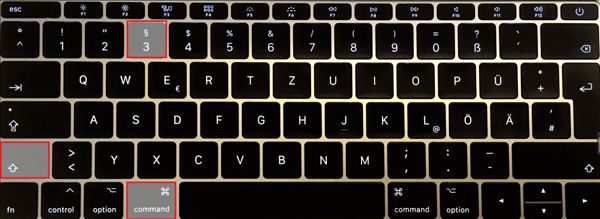
Mac also provides several shortcuts to take FaceTime screenshots in different modes, including the whole screen, selected window, and customized region.
Press the "Command+Shift+3" buttons to take fast screenshots of the entire screen on your Mac.
By pressing the "Command+Shift+4" buttons at the same time, you can customize the area to capture FaceTime screenshots.
To take FaceTime screenshots with a selected window on your Mac, you need to press the "Command+Shift+4+Space" buttons simultaneously.Also, you can check what to do about screenshot on Mac not working here.
How to Take a Live Photo on FaceTime Video Call
For most countries, you can capture live photos in a FaceTime call with a person or group. Just make sure all of you have enabled FaceTime live photo feature.
For iOS 18 Users:
- 1. Go to Settings. Choose FaceTime.
- 2. Select which personal you want to capture. (optional)
- 3. Then tap "Take Picture" to take a live FaceTime photo on iPhone.
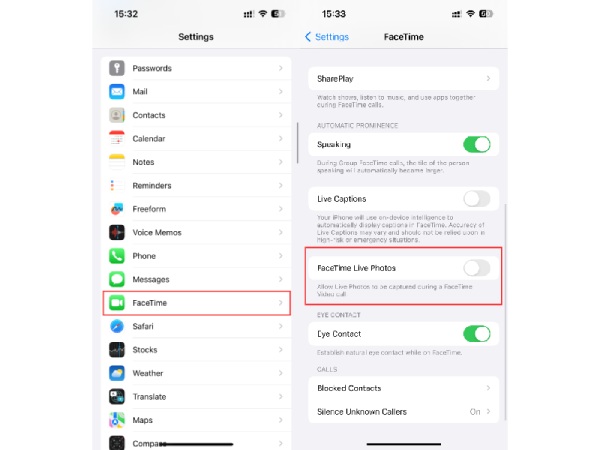
Where do FaceTime screenshots go: You can find FaceTime photos in your Photos app.
For macOS Sonoma 14 Users:
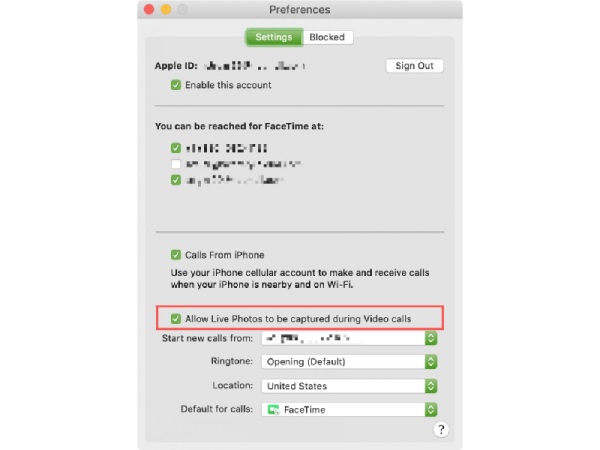
- 1. Open FaceTime app. Click the "Preferences" button from the top FaceTime. Then click the "Settings" tab.
- 2. Enable the "Allow Live Photos to be captured during video calls" checkbox.
- 3. Open Photos app. (You just need to open it for the first time about FaceTime live photo setup.)
- 4. Go back to the FaceTime app. Make a FaceTime call as usual.
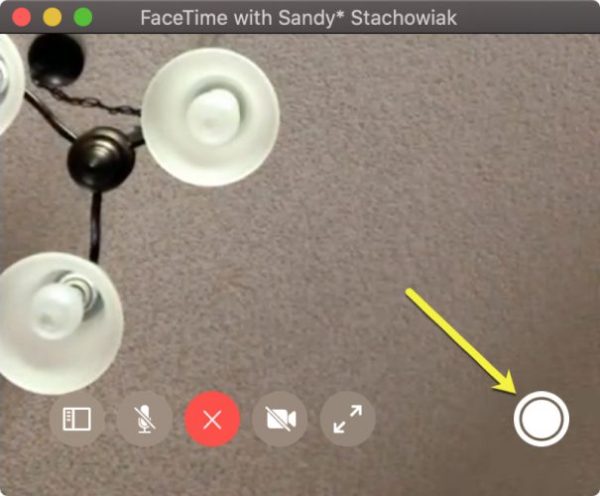
- 5. Select the FaceTime window (in one-to-one call) or double-click the tile of the person (in a group call).
- 6. Tap the "Take Picture" button take a live FaceTime Photo on Mac.
Where do FaceTime screenshots go: You can find and browse all captured FaceTime photos in Photos.
What to Do When You Encounter FaceTime Screenshots Not Working
- 1. Make sure everyone in this FaceTime call has enabled FaceTime Live Photos.
- 2. Turn off and on the FaceTime or iCloud Photos app.
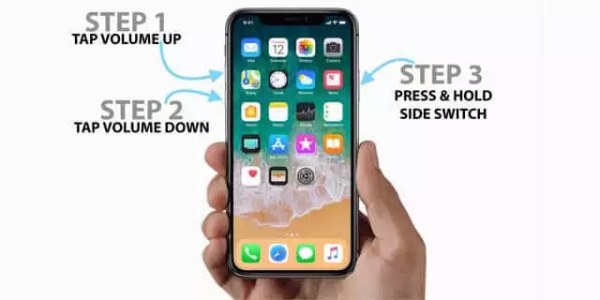
- 3. Restart your iPhone or Mac.
- 4. Check if your iPhone/Mac runs out of storage space.
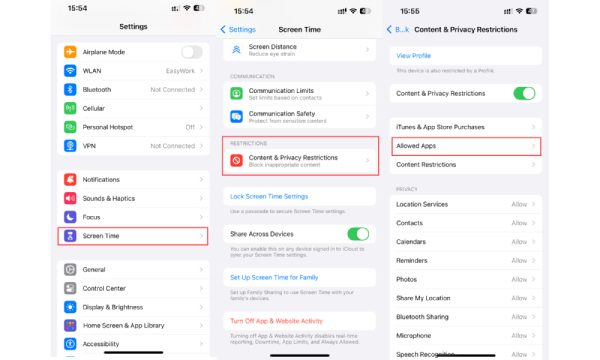
- 5. Remove privacy restrictions by tapping the "Settings", "Screen Time", "Content & Privacy Restrictions", and "Allowed Apps" buttons.
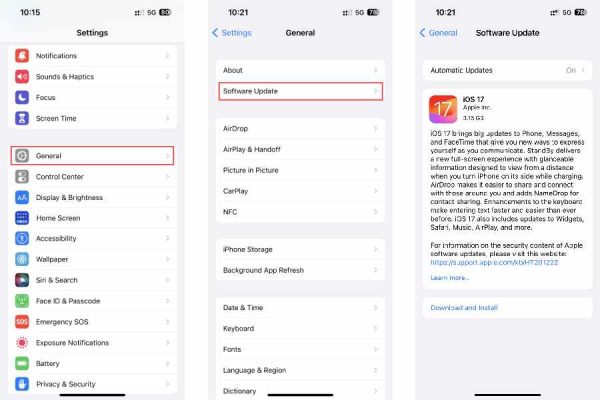
- 6. Update to iOS 15 and later.
- 7. Use reliable screen capture software.
The Best Way to Screenshot FaceTime without Notification
Since it's a little embarrassing to notify other members that you are taking screenshots on FaceTime, you'd better use AnyRec Screen Recorder to capture FaceTime screenshots in private. It's a professional screen capture to help you record the whole screen or take screenshots on Mac and Windows with customized areas.

Record FaceTime calls and take FaceTime screenshots with high quality.
Add drawing tools and shapes to your FaceTime screenshot in any size and color.
Set custom hotkeys to take FaceTime screenshots at any time.
Save your screenshots to JPG/JPEG, PNG, TIFF, BMP, and GIF.
100% Secure
100% Secure
Step 1.Free download AnyRec Screen Recorder on your computer and launch it. Click the "Snapshot" button on the main interface to start the screenshot tool to take FaceTime screenshots. Or you can press the hotkey - "Ctrl+Alt+C" on the keyboard to capture the screen quickly.

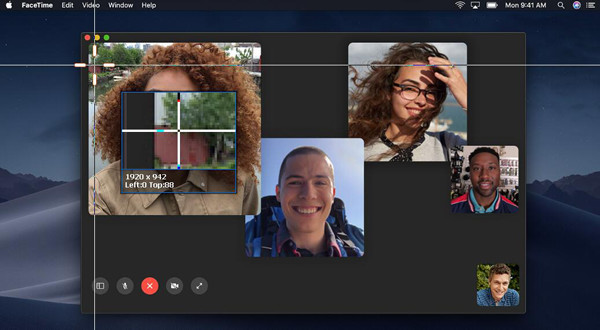
Step 2.Then your mouse will become a cursor move to select the desired regions according to your need. Just left-click your mouse to determine the starting point and then drag it to choose and capture a rectangle screen of FaceTime call.
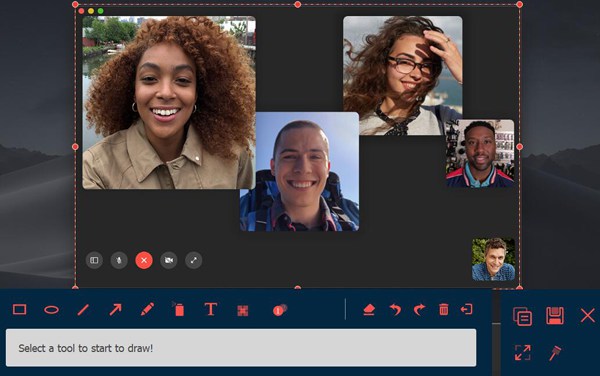
Step 3.After you take screenshots on FaceTime call, a toolbox with additional functions will pop up. You can crop the screenshot further and edit it by adding lines, shapes, callouts, texts, etc. With these functional tools, you can take annotations freely according to your need. Then click the "Save" button to choose the desired folder to save the screenshots.
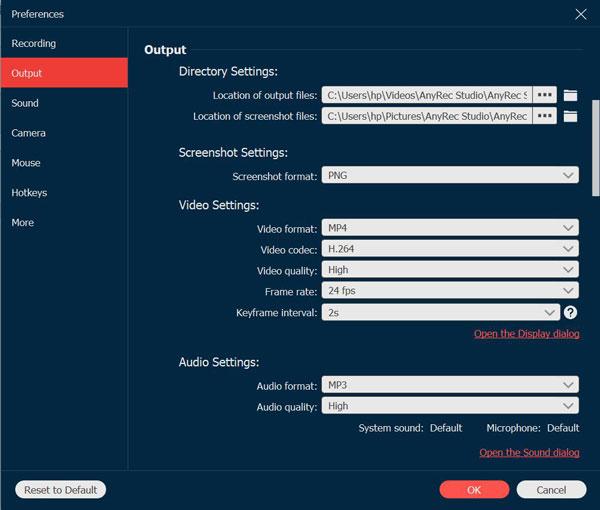
Step 4.Before the mentioned steps, you can change the output format of the FaceTime screenshots. Click the "Menu" button on the main interface and click the "Preferences" menu item. Then click the "Output" tab in the left pane and change the image format in the Screenshot Format menu.
FAQs of Taking A Screenshot on FaceTime
-
1. Can you tell if someone takes screenshots or live photos of FaceTime?
Yes, you can. Taking FaceTime screenshots will create a shutter sound, and you can hear it through the call. And if someone is taking the live photos of FaceTime, you will be notified that “(name) took a FaceTime photo” on the screen.
-
2. Where are my FaceTime screenshots saved?
If you use the built-in screen capture to take FaceTime screenshots on your iPhone/iPad, you can find your screenshots on the Photos app.
-
3. How to take live photos of FaceTime call?
At first, you should go to the Settings app and find the FaceTime app. Then scroll down to click the "FaceTime Live Photos" button at the bottom. In this way, when you have a video call on FaceTime, you can click the "Camera" button at the left bottom corner to take a FaceTime photo.
Conclusion
After reading this article, you have got the full guide to take FaceTime screenshots and live photos on your iPhone/iPad/Mac. To capture FaceTime without notification, please download AnyRec Screen Recorder to help you. Please contact us if you have any questions about capturing FaceTime screenshots.
