Install Error - 0x80070103: 6 Simple Ways to Fix this Issue!
You probably already felt frustrated and slightly worried after encountering the install error 0x80070103 during the Windows 11/10 update. It is reasonable to feel frustrated and anxious when you only want to update your Windows 11/10, but that error suddenly kicks in! Well, there are potential roots of this issue’s occurrence, and thankfully, there are six reliable ways to fix the "install error - 080070103" issue! So, without any further ado, start diving below.
Guide List
Why Do You Encounter Install Error 0x80070103 6 Efficient Ways to Fix Install Error 0x80070103 FAQsWhy Do You Encounter Install Error 0x80070103
As mentioned earlier, there are potential causes that trigger this 0x80070103 install error when you try to update your Windows 11/10. It kicks in when Windows 11/10 tries to install a driver on the current system during the updating process. Here are several factors that cause the install error 0x80070103 to occur.
- System files are corrupted or damaged.
- Drivers that are being updated are currently active or in use.
- Update cache data is corrupted or damaged.
- Update services are stopped or turned off.
- Windows 11/10 is trying to install a non-compatible driver version.
6 Efficient Ways to Fix Install Error 0x80070103
Now that you have discovered the potential causes of the 0x80070103 install error, it is time to explore this post’s six efficient fixes to address the issue! So, without further delay, examine each of them and see which helps you!
1. Run the Windows Troubleshooter
The first solution to address the install error 0x80070103 issue is to run Windows Troubleshooter. This program can identify problems, such as system and configuration issues on Windows.
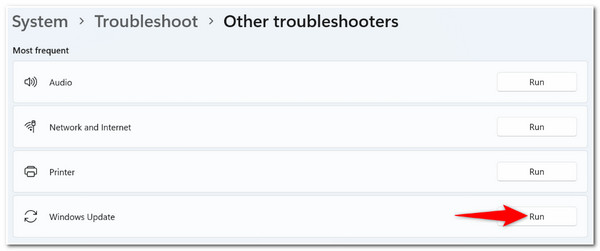
To run Windows Troubleshooter, press the "Windows + I" keys on your keyboard, search for "Troubleshoot" from the system menu, and click it. Then, select the "Other troubleshooters" option and click the "Run" button of the "Windows Update" option.
2. Delete Temporary Files
Another solution to troubleshoot the 0x80070103 install error is to delete the temporary files. Temporary files that are related to Windows updates are also capable of preventing the normal update installation process. So, deleting them can somehow fix the problem.
Step 1.Press the "Windows + R" keys to access the "Run" window. Then, on the search bar, type the "%temp%" and press the "Enter" key.
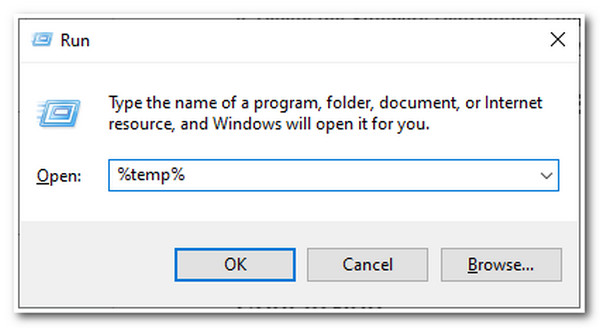
Type the "%temp%" without including the quotation marks.
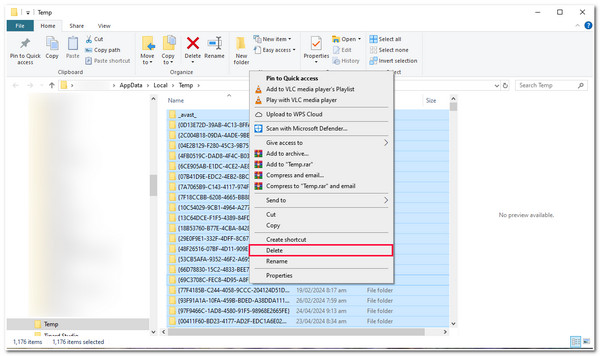
Step 2.Next, press the "Ctrl + A" keys to highlight all files. Then, right-click and choose the "Delete" option. Finally, restart your computer and check if the 0x80070103 error persists.
3. Restart the Update Process
Apart from deleting temporary files, you can also fix the install error 0x80070103 by restarting the update process. By doing this, you could fix the issues and corrupt files that trigger the error to appear and affect the update process.
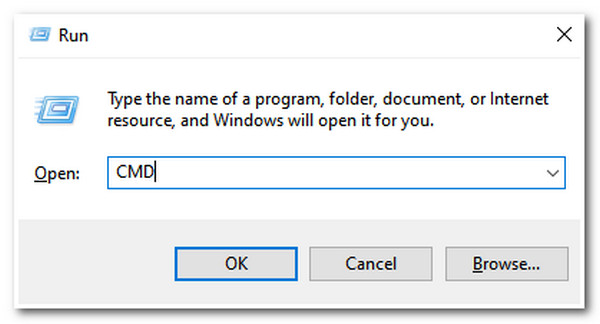
Step 1.Press the "Windows + R" keys to launch the "Run" window. Then, type the "CMD" on the search bar and press the "Ctrl + Shift + Enter" keys to launch an elevated Command Prompt.
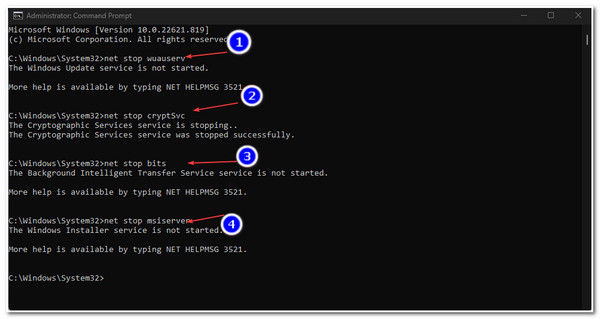
Step 2.After that, enter the following commands written below and press "Enter" after entering each: net stop wuauserv, net stop cryptSvc, net stop bits, & net stop msiserver command.
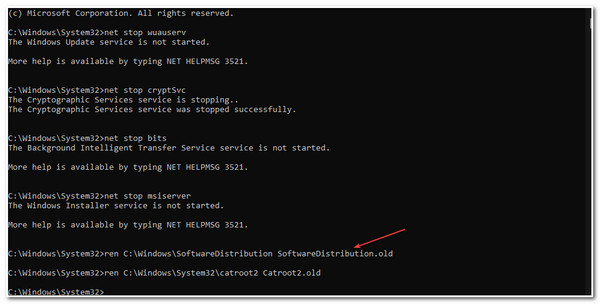
Step 3.Next, type these commands below to rename the SoftwareDistribution and press the "Enter" key after each.
C:WindowsSoftwareDistribution SoftwareDistribution.old
ren C:WindowsSystem32catroot2 Catroot2.old
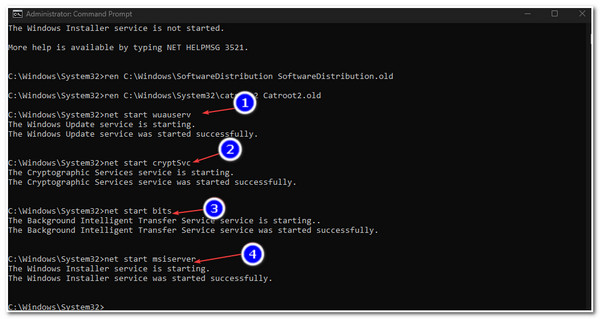
Step 4.Then, run these commands below to fix 0x80070103 install error. Once you are done typing them, restart your computer and check whether the issue will still appear.
net start wuauserv
net start cryptSvc
net start bits
net start msiserver
4. Run SFC and DISM to Fix
Another way to address the install error - 0x80070103 is to run the SFC and DISM. If the error’s occurrence is due to damaged or corrupted system files, then running SFC and DISM is a great way to fix them. DISM will restore the system image, and then SFC will use it to look for any inconsistencies and repair them.
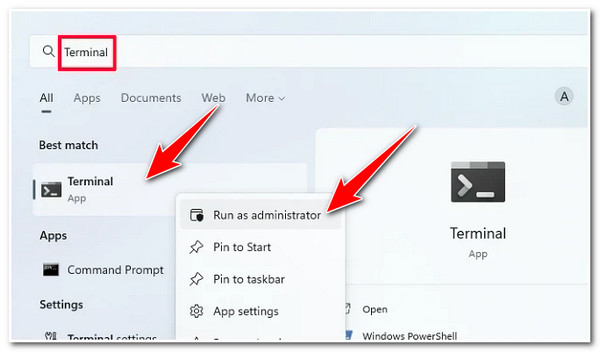
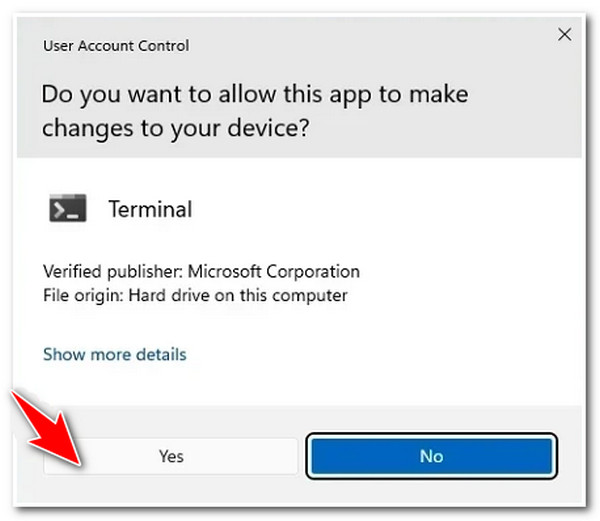
Step 1.Head to the Start menu by clicking the "Windows" button, typing the "Terminal" in the search bar, right-clicking on it, and choosing the "Run as administrator" option.
Step 2.After that, on the "User Account Control" window, click the "Yes" button. Otherwise, please enter the required credentials if you are not logged into an admin account.
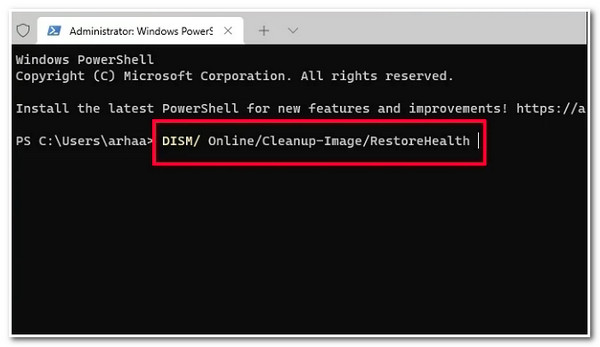
Step 3.Then, click the dropdown button and select the "Command Prompt" option. After that, type the "DISM/ Online/ Cleanup-Image/ RestoreHealth" command and press the "Enter" key.
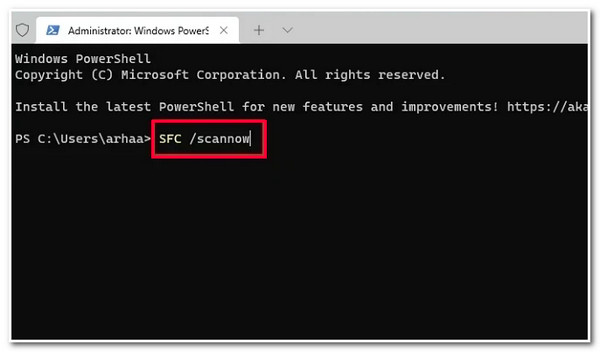
Step 4.Next, type the "SFC /scannow" command and press "Enter" on your keyboard. Then, restart your Windows computer and check if the 0x80070103 error still persists.
5. Delete the Software Distribution Folder
If the install error 0x80070103 issue still bothers you, try to delete the Software Distribution folder. This folder contains temporary files required to install updates on your computer. Deleting this folder gives you a great chance of fixing the issue.
Step 1.Look for the "Command Prompt" on your Windows computer using the "Search bar". Next, right-click on it and choose "Run as administrator" from the list of options.
Step 2.After that, run these commands individually and press enter for each: net stop wuauserv, net stop cryptSvc, net stop bits, and net stop msiserver.
Step 3.Then, navigate to the "C:WindowsSoftwareDistribution" and delete all the folders and files stored on it.
Step 4.Once you are done emptying the folder, restart your computer and enter these commands: net start wuauserv, net start cryptSvc, net start bits, and net start msiserver.
Step 5.Finally, rerun the Windows Update and check whether the install error - 0x80070103 persists. If it is, then perform the last solution.
6. Update Your Windows 11/10 Manually
The last solution you can do to fix install error 0x80070103 is to update your Windows 11/10 manually. You can update your Windows 11/10 from the Microsoft Catalog website. Now, how will you do this? Here are the steps you must follow:
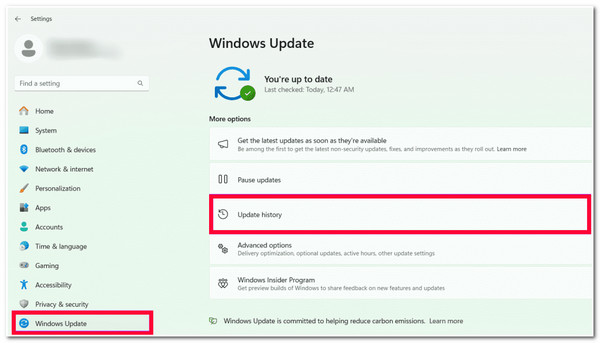
Step 1.Access the "Settings" via pressing the "Windows + I" keys on your keyboard. Then, click the "Windows" update. Then, navigate to the "Update history" and identify failed install numbers.
Step 2.After that, copy the failed update number, head to the Microsoft Update Catalog, paste the failed number, and search for the update.
Step 3.Next, download the update, launch the installer by double-clicking on it, and proceed with the update without 0x80070103 install error.
FAQs
-
Is the install error - 0x80070103 harmful?
No. This error is not harmful; you can live with it since it will not affect your system’s functionality. However, if you are annoyed by this prompt (error), you can fix it through this post’s six featured solutions.
-
Is it safe to delete temporary files?
Yes. It is safe to eliminate temporary files on your Windows computer. Most of the time, these files are automatically deleted. In that case, there’s nothing for you to worry about deleting temporary files.
-
Can I type the command again if I mistyped it?
Yes. You can retype the command/code again if you mistakenly type an incorrect command. You must enter the command/code again and press Enter.
-
Is it safe to clear the Software Distribution folder?
Yes. It is safe to clear. The Software Distribution folder also contains temporary files needed to install new updates. Windows will always re-download and re-create all necessary files and components if the Software Distribution folder is removed/deleted.
-
Where can I find the Microsoft Update Catalog?
You can access the Microsoft Update Catalog using your computer browser. Type in the Microsoft Update Catalog on the search bar and press Enter on your browser. Then, click the first result, which is the Microsoft Update Catalog. And that’s it!
Conclusion
That’s it! Those are the six reliable ways to fix the install error - 0x80070103 issue. Through these ways, you can efficiently eliminate the issue and update your Windows 11/10 without any problems! Ensure you follow the instructions above to achieve the desired outcome, especially with the commands. It would help if you typed them correctly on your command prompt to avoid errors that might affect the whole process. So, if you just read the above solutions to 0x80070103 install error, start your journey of executing them and see which one will work on your end!