Upscale Images with GIMP (Increase Low-Resolution Images)
Many people use GIMP to upscale images on Windows, Mac, and Linux. Though GIMP has an outdated interface, it is a good choice for photo editing. You can find 1446 reviews at G2 and 235K members in the GIMP Reddit forum. Recently, GIMP 3.0 RC3 has been released in February 2025, which takes two decades from GIMP2.x. Anyway, if you are a fan of GIMP image upscaler, you just come to the right place.
Guide List
4 Ways to Upscale an Image with GIMP Get GIMP Alternative to Upscale Images Online Advanced Tips to Upscale and Sharpen Images with GIMP FAQs4 Ways to Upscale an Image with GIMP
By using GIMP, you can enlarge low-resolution images for printing, upscale pictures for web use, and even enhance pixelated photos. By the way, you can adjust interpolation options in GIMP for better results with "LoHalo & NoHalo", "Cubic", "Linear", and "None". If you want to keep the updated image in high quality, just choose "LoHalo & NoHalo". To upscale an image in GIMP successfully, follow 4 solutions below.
1. Upscale the Whole Photo (Change Aspect Ratio)
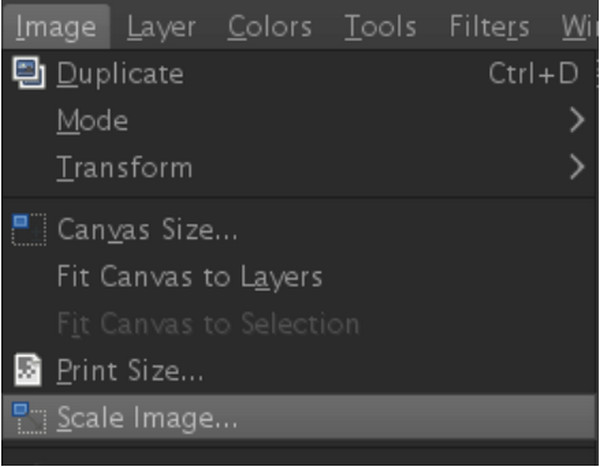
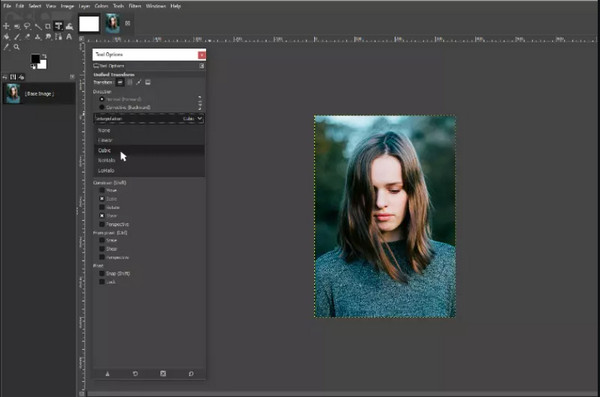
Step 1.Open the app and upload the photo you want to edit. From the "Image" menu, click the "Scale Image" option. Navigate to the "Interpolation" control and choose a desired interpolation method.
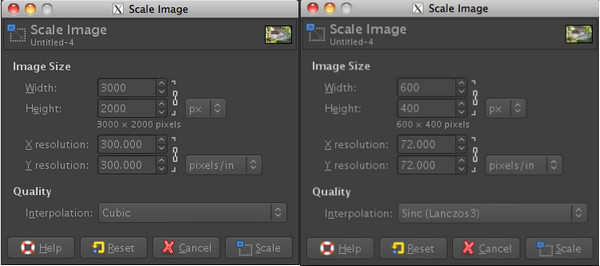
Step 2.Put the pixels for the "Width" and "Height" controls. Then, proceed to input resolution, which can be 72 pixels if you work on a web image. Click the "Scale" button to scale images proportionally and maintain aspect ratio.
2. Enlarge a Layer (Keep the Original Aspect Ratio)
Step 1.After uploading a file on GIMP, click the "Toolbox" button with a small square stacked on a giant square. Then, choose the scaling layers option from the Toolbox.
Step 2.Select a corner handle around the layer, then drag it away to scale it up. After that, press the "Ctrl" key and hold it to keep the width height ratio constant.
3. Use the Selection option
Step 1.Import a photo into GIMP. Select the "Rectangle" option from the "Toolbox" menu. Drag the canvas to the desired region and press the "Enter" button to confirm the selection.
Step 2.From the "Toolbox" menu, click the "Scale" button and choose the red square icon to specify the selection scaling option. With the selection region, you can upscale it with the growing border. Click the "Scale" button to start upscaling.
4. Path Upscaling
Step 1.This method is different from the rest. First, you have to create a new document in any size. Open the Toolbox menu and choose the Paths tool with the nib pen icon. Create a vector point with your mouse and drag until you draw another vector point.
Step 2.Then, open the "Paths" panel and select the "Stroke" dialog box with the paintbrush icon. Press "Enter" to apply the default parameters. Proceed to upscale the image with the Scale tool from the "Toolbox" menu. Don’t forget to click the "Scale" button to complete the task.
Upscale Images Online with GIMP Alternative - AnyRec AI Image Upscaler
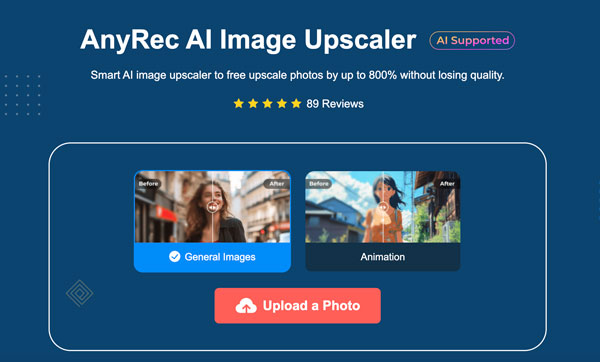
Since you can enlarge images with GIMP, is it necessary to use AnyRec AI Image Upscaler as an alternative? Well, the answer is Yes. Based on its AI technology, you can upscale images up to 800% without soft edges or blurriness. This online image upscaler can sharpen images during upscaling automatically. What's more, AnyRec AI Image Upscaler update a new version with photo to cartoon tool. So you can upscale and cartoonize image online here. That's why you should choose AnyRec AI Image Upscaler instead of GIMP for
- Enlarge and enhance image quality to the next level.
- Magnify photos with options 200%, 400%, 600%, and 800%.
- Increase resolution of your image up to 4096×4096.
- Upscale and enhance your image up to 50MB.
Step 1.Open the 8X image upscaler. Click the "Upload Photo" button. Import the picture from your folder and click the "Open" button to confirm.
Step 2.Choose the "Magnification" level from 2x, 4x, 6x, to 8x. Hover your mouse over the actual output and see the before/after upscaling effect.
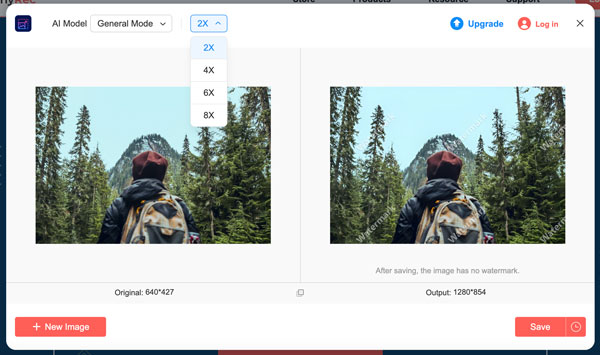
Step 3.Once satisfied with the result, click the "Save" button to upscale the picture. Download the final result to your computer.

Advanced Tips to Upscale and Sharpen Images with GIMP
You may find the upscaled image is not as clear as the original one after GIMP upscaling. No worries. Here're smart tips that can unpixelate images.
1. Sharpen Images
Open GIMP. Click "Enhance" from "Filters". Later, click "Sharpen" and adjust the image sharpness. So you can restore image details during GIMP upscaling.
2. Enhance Details with High-Pass Filter
Duplicate the upscaled image layer first. From "Filters", click "Enhance". Find and click "High-Pass". Set the blend mode as "Overlay".
3. Install AI-Based Upscaling GIMP Plugins
GIMP doesn't provide AI upscaling. But you can use third-party plugins to achieve it, such as Stable Boy, Picsart, NCNN Upscale, gimc, etc.
4. Use Nenotriple gimp-upscale for GIMP AI Upscaling
Go to GitHub and find "gimp_upscale", which was released by Nerotriple. Install it to GIMP. (Since you choose this solution, you must be familar with GitHub. So no extra steps.) Here you can upscale an image up to 800% using 6 AI models. To be more specific, you can upscale the entire picture or just the selection (nice try), along with upscale transparent alpha channels cleaning and many other functions.
FAQs about Upscaling Images in GIMP
-
1. Is GIMP free to use to increase resolution?
Yes. The app is 100% free to download and use for image editing. It is also an open-source program, open for developers to create software that aligns with its code. Still, you can donate to the developers of GIMP on Patreon for more favorable functions and updates.
-
2. Why it is better to use GIMP to upscale images?
Aside from the fact that it is free, GIMP is also a great alternative as it gives fantastic results when upscaling pictures. It supports almost all popular image formats and enlarges them in customized measurements, making them suitable for large printing.
-
3. How to reduce size using GIMP?
Other than increasing resolution, GIMP can also reduce file size. This can be done with the Scale tool. All you have to do when you are in the Scale Image dialog box is to change the resolution to more minor than the actual output.
-
4. Does GIMP's upscale image improve quality?
Yes. Enlarging has a factor for image quality, which can be good or bad, depending on your tool. In the case of GIMP, it simply upscales resolution and allows users to keep the original quality.
-
5. What are the best online alternatives for GIMP?
If you don’t want to use GIMP on your computer, it is best to use alternatives to resize photos online. You can try Upscale.media, Upscalepics, Fotor, Pixelcut, Zyro AI IMage Upscaler Online, and Image Upscaler. But for a guaranteed professional result, try AnyRec AI Image Upscaler for free.
Conclusion
Just as above mentioned, you can use GIMP to upscale images in various ways. If you want to upscale an image and increase resolution (from low resolution to high resolution), using AnyRec AI Image Upscaler is a better choice. No matter which tool you refer, you can upscale photos losslessly.