Content
Instructions
AnyRec DVD Creator can convert your videos and videos of all kinds of formats to physical form on DVD disc. Without any quality loss or compression, you can safely burn your videos to DVD discs. Moreover, AnyRec DVD Creator also enables you to burn videos to more stable digital forms like DVD folders or ISO files. There are also video-related features for you to polish before burning. You may start from here to learn how to use the DVD Creator to know more.
Purchase and Register
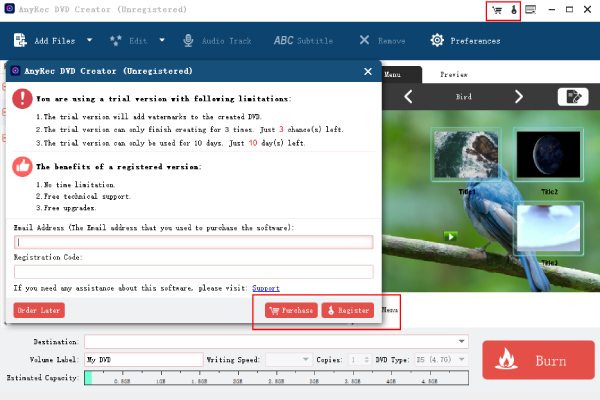
To enjoy the full convenience of AnyRec DVD Creator, you need to unlock all features first so that you can create a DVD without any watermark or restrictions. To achieve this, you need to launch the program. Click the Purchase button with the shopping cart icon. In the official purchase window, place an order, enter your email, and clear the payment. Later, go back to AnyRec DVD Creator. Click the key icon to enter the registration code, your email. Later, click the Register button to unlock the DVD-burning software finally.
Update
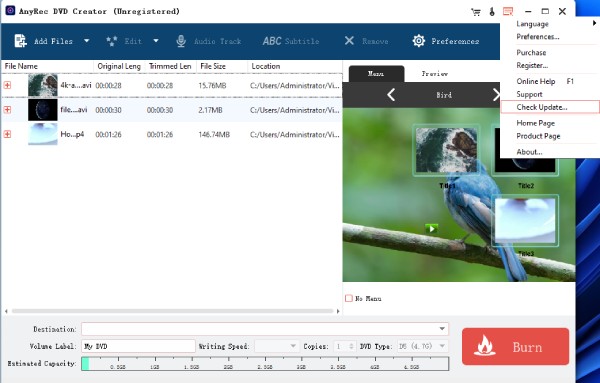
Keep AnyRec DVD Creator to the latest version to get more new features and functionalities. Click the Menu button after you launch the program and click the Check Update button to check if there is a new version manually. Or you can click the Preferences button on the main interface. Scroll down to the bottom and tick the box beside Check for update automatically. After that, AnyRec DVD Creator will check and update itself once there is an Internet connection.
Preferences
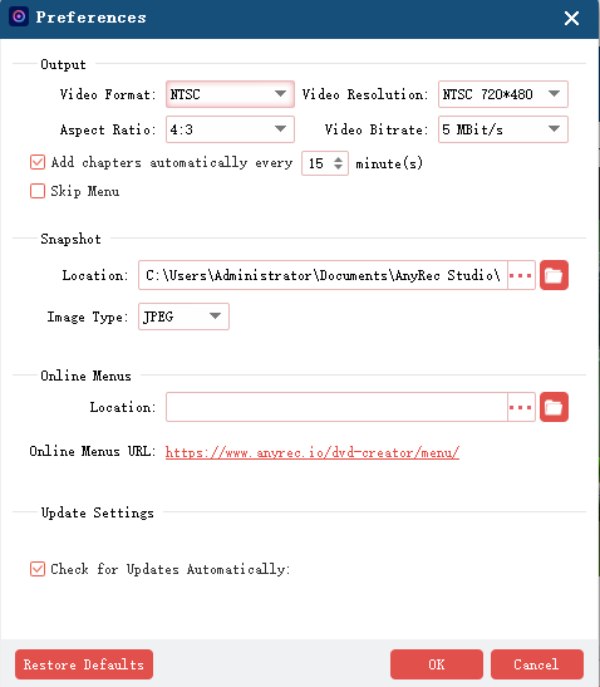
Apart from enabling the automatic update function in Preferences, you can also adjust other settings about AnyRec DVD Creator from here. For example, once you click the Preferences button on the main interface, you will see video format, resolution, aspect ratio, and video bitrates from the Output section. Meanwhile, when creating the DVD, you can also capture a screenshot of the video you added. Then, you can choose where to store these snapshots and decide the format here. The Online Menus here allows you to download menu presets from online sources. If you change any settings here, just click the OK button to apply them.
Create DVD
AnyRec DVD Creator helps you to create a DVD out of all kinds of videos with simple operations. No complex skills or procedures are required when burning your videos to DVD discs on your own since the DVD Creator will help you handle major work. Now, check out the steps below to see how.
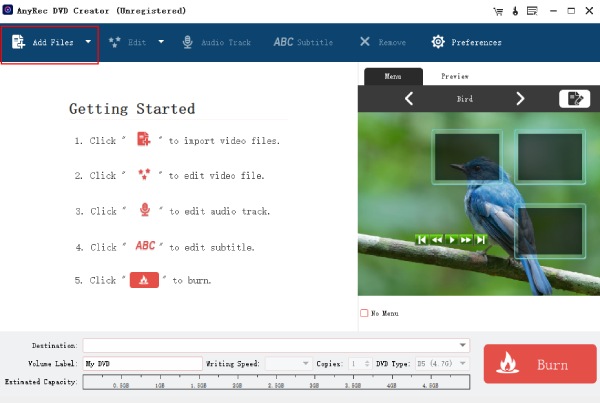
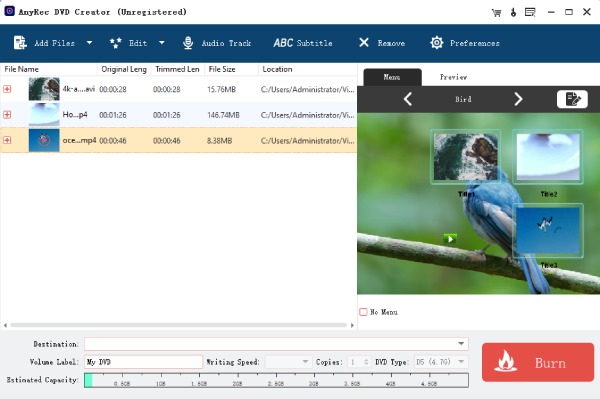
Step 1: Download and install AnyRec DVD Creator on your computer. Launch it and click the Add Files button on the main interface. You may also click the down arrow to add a whole folder with videos to the program. Insert a DVD disc into the default or external DVD drive that is connected to your computer. Once you add the videos, you will see their duration, file size, and location on the list.
Step 2: After adding files, click the Destination button to select a destination for these videos. Before burning, you may also click a video and check the Preview section on the right side to view it. Meanwhile, you can also change the Volume Label, adjust the Writing Speed, or even make several copies of the DVD.
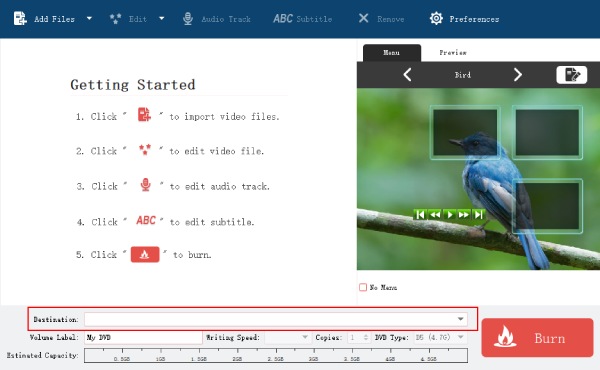
Step 3: After that, you may also click the Audio Track button to add extra audio tracks. Or you can click the Edit button to apply simple editing like trimming or cropping to the videos. Before burning, click the DVD Type dropdown button to choose one type. At last, click the Burn button on the right corner below to create your DVD.
Edit Video
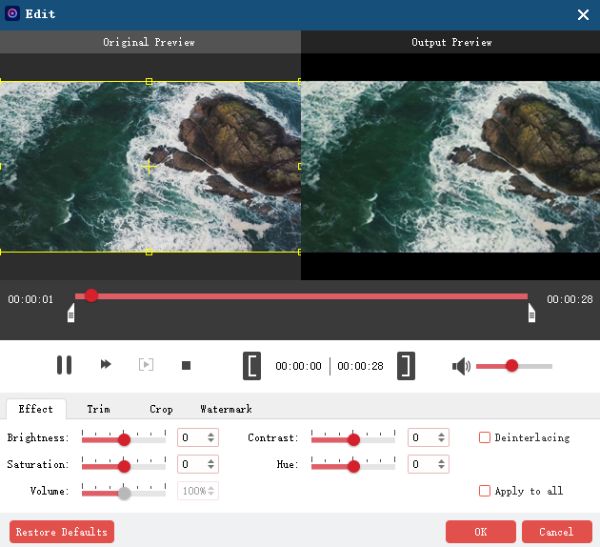
Before using the AnyRec DVD Creator to burn your videos to DVD, you can also edit the videos to get rid of the unnecessary parts, change the sequences, or adjust the picture effects. All the simple editing can be realized in the Edit tool from AnyRec DVD Creator with a few clicks.
Effect
After you import the video to AnyRec DVD Creator, click on one video and click the Edit Video button above to go on. Then, you will see the first tab - Effects, where you can adjust brightness, saturation, volume, contrast, and hue. Meanwhile, you can also tick the box beside Deinterlacing to enable it. Once you set it all, click the OK button to apply.
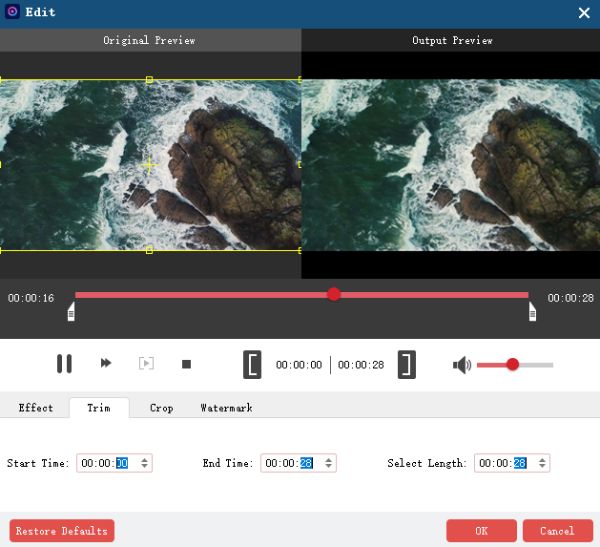
Trim
Once you are in the Edit window after clicking the Edit Video button, you may click the Trim button to cut your chosen video. On the Trim tab, set a start time and end time, or drag the time spot on the timeline to adjust the video length to trim it. Then, click the OK button to cut the video.
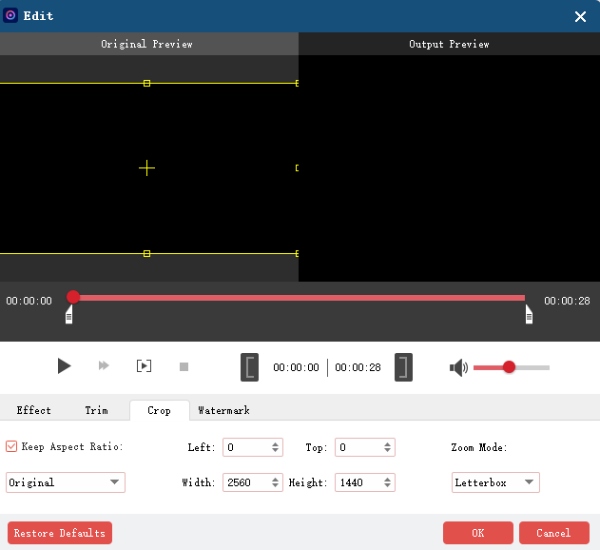
Crop
In AnyRec DVD Creator, you may also adjust the picture size of the imported video from the Edit window. Click the Crop tab. Then you can adjust the position of the video picture through the Left and Top options. Meanwhile, you can also change the width and height. Then, choose a scale mode by clicking the down arrow next to Letterbox. To save the changes you made, click the OK button.
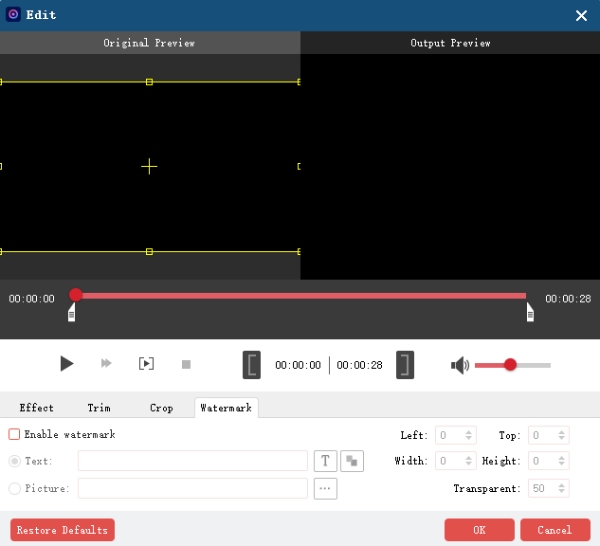
Watermark
To add your own unique watermark for the video in AnyRec DVD Creator, you need to first tick the box beside Enable Watermark on the Edit window. Then, there are two types of watermarks for you. You can enter the text to use as the watermark. Or you can click the three-dot icon to add a picture to use as a watermark. Afterward, you can directly drag the watermark on the Preview window to change its position or adjust it via the Left and Right options. You can also change the watermark's size and transparency.
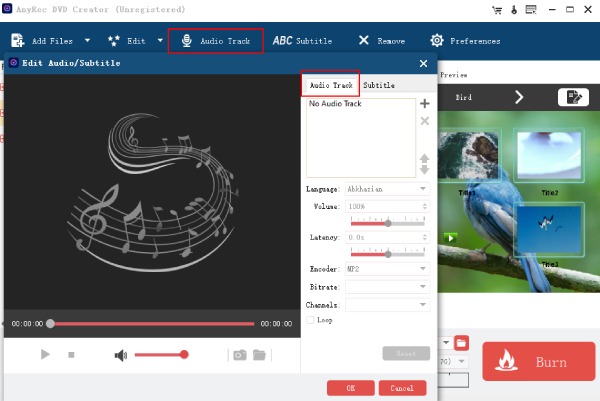
Audio Track
Apart from polishing the imported videos through the editing features, you may also enrich these videos in AnyRec DVD Creator via the audio track. After importing the videos, click one of them and click the Audio Track button to apply extra audio files for it, which you may use as the background music. Moreover, adjusting the audio language, volume, latency, encoder, bitrate, and channels can also be done here. After every setting is adjusted, click the OK button to confirm.
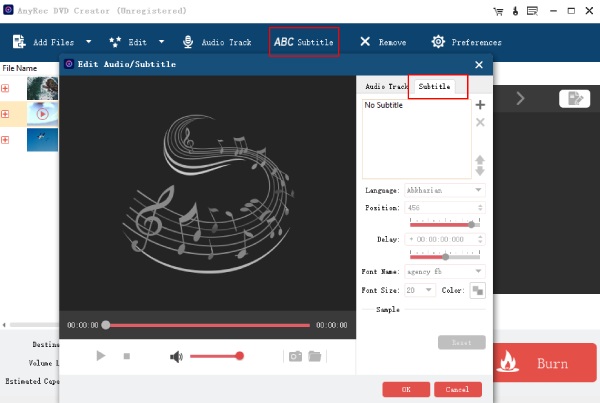
Subtitle
Adding subtitles for your videos before burning them to DVD is another feature in AnyRec DVD Creator. Simply choose one of the imported videos and click the Subtitle button above will enable you to go on. On the new window, you can import a subtitle file, and adjust its language, position, delay, font style, color, and size. If you set it all, click the OK button to save the changes.
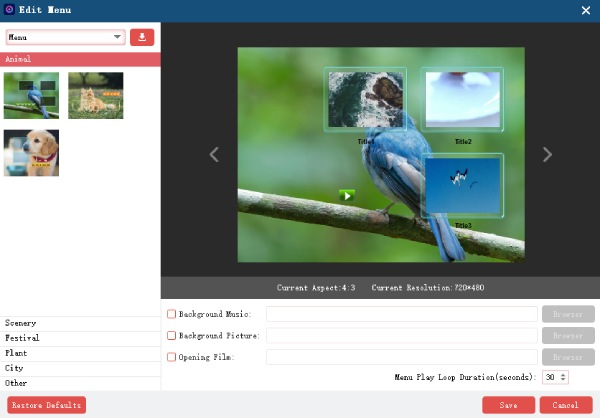
Edit Menu
The Edit Menu function is another highlight in AnyRec DVD Creator. Through this function, you may apply colorful menus to your DVD disk. To set up the menu, you need to click the Edit Menu button on the right side after you launch the AnyRec DVD Creator and import the video. On the new window, you can select the style of the menu, choose the style for the play button, and add background music, picture, and opening film. Finally, click the Save button if you make any changes.
Need More Help?
Feel free to contact us if you have any questions about AnyRec DVD Creator.
Contact Us