3 Efficient Methods to Record Video and Audio on Mac You Should Know
How to record video on Mac? If you are using macOS Mojave or above, there is a new Mojave Screen Recording feature to capture video on Mac with audio files. Of course, you can also choose a QuickTime player to capture onscreen activities. How do you capture internal audio and webcam footage with the screen video on Mac? Here are 3 frequently used methods to record the desired files on your Mac you should know. And this post will compare the capability of these recommended recorders.
Guide List
The Best Method to Record Video and Audio on Mac 2 Built-in Methods to Record Video on Mac with Audio Built-in Video Recorders V.S. Professional Video Recorder FAQs about How to Record Video on MacThe Best Method to Record Video and Audio on Mac
When you need to capture all onscreen activities, including the screen videos, microphone voice, system audio, and even webcam footage, AnyRec Screen Recorder is the all-in-one screen recorder for Mac and Windows. Besides the basic recording features, you can also add annotations, watermarks, callouts, and more others. Moreover, you can tweak the video codec, frame rate, and other settings.

Record screen video on Mac with internal audio and microphone voice
Tweak the frame rate, video codec, sample rate, and other settings
Edit the audio recordings, trim the unwanted audio file or share the files
Adjust recording area, remove audio noise, and enhance audio quality
100% Secure
100% Secure
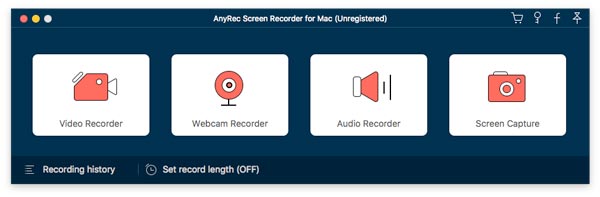
Step 1.Once you have installed AnyRec Screen Recorder, you can launch the program and click the "Video Recorder" button to record the video on Mac. To capture the internal audio with the recording, the program provides a virtual audio driver beforehand.
Step 2.Enable the "Display1" option and click the "Full" button to capture the full screen of your MacBook. When you need to record video and audio on Mac, you can turn on both the "System Sound" and the "Microphone" options. Moreover, you can also add an external camera.
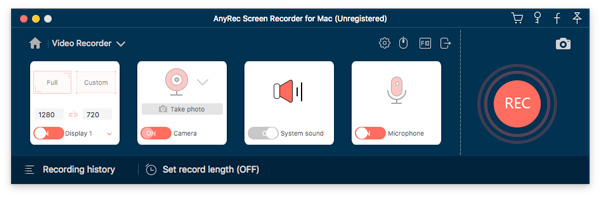
Step 3.Once you are ready, click the "REC" button to record the desired files on your Mac. During the recording process, you can add annotations, lines, callouts, and more other elements. You can also click the "Snapshot" button with the "Camera" icon to take some screenshots.

Step 4.After that, you can click the "Stop" button to save the recording on your Mac. When you get the desired file, you can trim the desired part of the video, rename the recording, save the video to your Mac, or even share them with social media websites.
2 Built-in Methods to Record Video on Mac with Audio
Method 1: How to Record Video on Mac via Mojave Screen Recording
If you have already upgraded to Mojave macOS or above versions, press the hotkey "Shift + Command + 5" to launch the "Mojave Screen Recording" feature on your MacBook. Just learn more about the detailed process to record video on Mac as below.
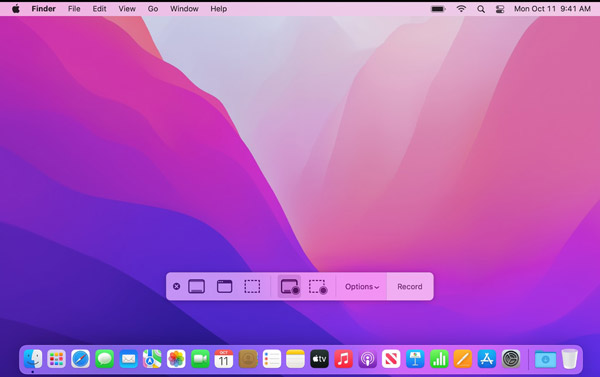
Step 1.Launch the Mojave Screen Recording onscreen control to click the "Record Entire Screen" button. If you just need to record a customized area, you can click the "Record Selected Portion" button.
Step 2.Once you are ready, you can click the "Record" button to capture the screen video on your MacBook. When the recording process ends, you can click the "Stop Recording" button to save the screen recording.
Step 3.There is a thumbnail of the recording video that appears in the lower right corner of your screen. After that, you can edit the screen recording, trim the files, and share them on social media websites.
If you need to set a scheduled recording, you can click the "Option" button and set the "Timer" option or choose where you want to save the recording, like the Desktop, Documents, or Clipboard.
Method 2: How to Record Video on Mac with QuickTime Player
QuickTime Player not only records onscreen activities on your Mac, but also captures the mirrored iOS content. When you need to record video and audio on Mac, you can download the SoundFlower to capture internal audio on Mac with the screen videos.
Step 1.Just download the Soundflower audio drive on your Mac beforehand. Moreover, you should change the settings on the Audio Midi setup to make sure the Soundflower is an option for sound output.
Step 2.Go to the "Applications" app to launch the "QuickTime Player" on your Mac. Choose the "File" menu to click the "New Screen Recording" button to capture the onscreen activities.
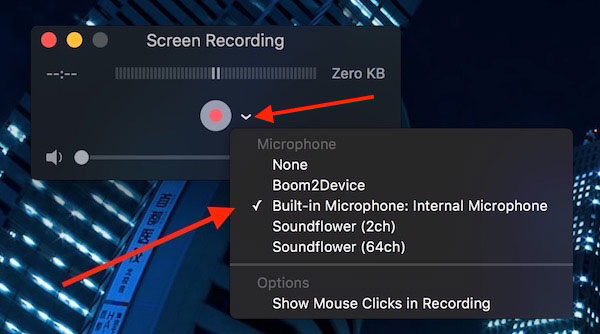
Step 3.Choose the drop-down arrow and click the "Soundflower 2CH" button from the "Microphone" section. Click the "Record" button in Quicktime Player to start the recording video on Mac.
Step 4.Once you have captured the desired videos, you can stop the QuickTime screen recording on Mac. It will save the screen video on your MacBook in the M4A file format.
Built-in Video Recorders V.S. Professional Video Recorder
Which should be your choice to record video on Mac, the built-in video recorders or the professional video recorder? There are many limitations of the built-in recorder in Mac.
Limited Editing Capabilities: Built-in recorder is primarily designed for recording video, and while it does offer some basic editing tools, they are limited compared to more advanced video editing software.
No Built-In For System Audio: Built-in recorder can record audio from a microphone or other input device, but it doesn't have a built-in option to record system audio, such as music or sound effects played on your Mac.
Limited Recording Settings: Built-in recorder provides only basic control over recording settings such as video resolution, frame rate, and codec options. If you need more advanced control over these settings, you may need to use a more specialized recording software.
Limited Recording Time: Built-in recorder can record videos up to 2 hours long, but it may not be the best option for recording longer sessions or events.
And there is a specific chart for you to check the difference between built-in recorders and AnyRec. You can compare with them in various aspects.
| Record Video on Mac | Mojave Screen Recording | QuickTime Player | AnyRec Screen Recorder |
| The recording of onscreen activities | Record screen videos, microphone voice, webcam footage. | Capture screen videos, microphone voice, webcam footage, and connected iOS devices. | Screen record video, internal audio, external camera, microphone voice, connected iOS/Android content, and more. |
| Restrictions for recording video on Mac | Cannot record streaming video and audio files. | Need to install a plugin to record internal audio with video. | Support all onscreen activities on your Mac. |
| Hotkey to manage the screen recording on Mac | Yes. But you cannot customize the hotkeys to record the screen. | Yes. But you cannot customize the hotkeys for screen recording. | Yes. It enables you to customize the hotkeys according to your requirements. |
| Supported recording file format | MOV | MOV | MOV, M4V, MP4, GIF, MP3, M4A, OGG, and more other file formats. Moreover, you can also tweak the settings for these file formats. |
FAQs about How to Record Video on Mac
-
Why Mojave screen recording does record sound on Mac?
Similar to QuickTime Player, Apple only enables you to record microphone voice files but does not support recording internal audio files, you have to download SoundFlower or other related virtual audio driver to record video on Mac with sound.
-
How to configure Settings for SoundFlower on Audio Midi setup?
Once you have installed the Soundflower audio driver, you can go to the "System Preferences" menu, click the "Sound" button and then the "Output" button. Now, you can choose the "Soundflower" option as the outputs. After that, you can record video and audio on Mac with QuickTime Player.
-
Can I record webcam footage with QuickTime Player?
Yes. QuickTime enables you to capture all onscreen activities. When you need to capture video with webcam, you only need to launch the external webcam on your MacBook. It will capture the screen video files with webcam footage.
Conclusion
When you want to record video on Mac, here are the 3 most frequently used methods. Both Mojave Screen Recording and QuickTime Player only enable you to capture the microphone voices. To capture video and audio files on Mac, AnyRec Screen Recorder is the versatile screen recorder you can take into consideration.