How to Record Voice on MacBook Pro/Air from All Microphones
There are many scenarios that you need to record voice on Mac, such as lectures, interviews, podcasts, ideas, meetings, and more. It is hard to choose the best voice recording software for all Mac users. Because different people focus on different functions in work and daily life. If you are new to voice recording on MacBook Pro or Air, here are some helpful suggestions.
Guide List
AnyRec Screen Recorder – Record Mac Screen with Voice Voice Memos – Sync Voice Recordings Across Mac and iPhone QuickTime Player – Record Voice to M4A Format GarageBand – Record Music and Podcasts on Mac FAQsHow to Record Voice on Mac with AnyRec Screen Recorder
- Good for: People who want to record and edit screen audio and video easily.
- Output Audio Format: MP3, M4A, WMA, CAF, FLAC, OGG, OPUS
No matter you want to record voice through Mac microphone, or record Mac screen video with your voice, AnyRec Screen Recorder is your smart solution. It can record screen video with audio from microphone with the original quality. The entire recording process can be completed in few clicks. So it is a good choice for both beginners and professionals.

Record voice directly or alongside screen video on Mac effortlessly.
Get customizable output audio formats and quality options.
Trim unwanted audio clips with the built-in trimmer.
Screen record with both internal and external audio.
100% Secure
100% Secure
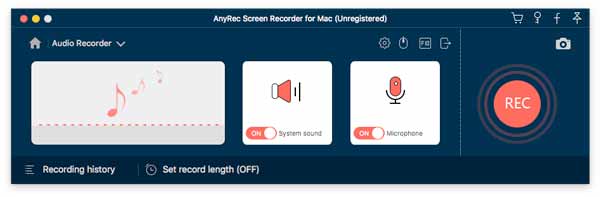
Step 1.Once you have already installed AnyRec Screen Recorder, you can click the "Audio Recorder" button. Enable the "Microphone" option to record microphone voice on Mac. Moreover, you can also enable the "System Sound" option to record internal audio on Mac.
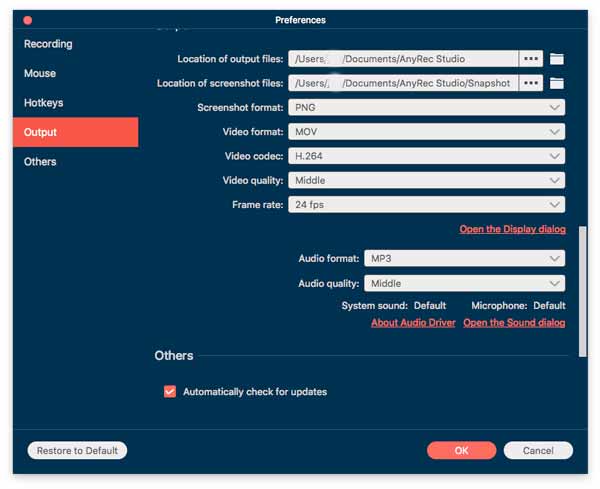
Step 2.Click the "Settings" button and choose the "Output" tab from the left menu. After that, you can adjust the audio quality and audio format. Moreover, you can click the "Open the Sound dialog" link to adjust the audio volume and check the audio drivers before recording audio files.
Step 3.When everything is ready, you can click the "REC" button to record the voice file from the microphone. Once you have captured the desired audio files, you can click the "Stop" button to save the microphone voice on your MacBook. After that, you can preview the video directly.

Step 4.Just play the audio recording on your MacBook. Click the "Clip" button to trim the desired audio with the start point and endpoint. After that, you can listen to the recording, rename the file, save it to another folder, or share the audio file with social media sites.
100% Secure
100% Secure
How to Record a Voice Memo on Mac
If you just need to record voice files on MacBook Pro, Voice Memos is the default app to get the desired files. Different from QuickTime Player, the voice recorder app saves the recorded audio files in M4A format. Moreover, you can also edit the audio files within the program.
- Good for: Free voice recorder that works on Mac, iPhone, and iPad.
- Output Audio Format: M4A
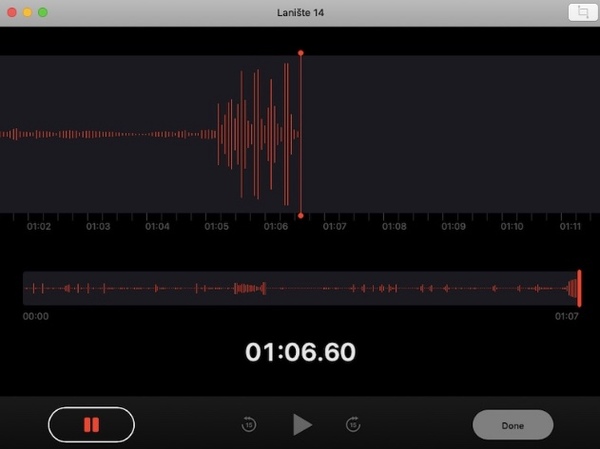
Step 1.Launch the "Voice Memos" app from the "Application" folder. Click the "Record" button to start recording voice memos from the built-in microphone on your MacBook.
Step 2.Click the "Done" button to save the audio recording file. You can find this voice memo by ~/Library/Application Support/com.apple.voicememos/Recordings folder.
Step 3.To polish the recording audio, you can select the recording from the left panel, then click the "Edit" button and choose the Trim option to cut out the desired audio.
How to Record Your Voice on Mac with QuickTime Player
- Good for: Built-in screen recorder that can capture voice from internal and external microphone.
- Output Audio Format: M4A
How to record voice from an external device on MacBook? Once you have connected the external microphone, you can select the device and capture the voice on Mac with QuickTime Player. But if you want to record internal audio on Mac, you need to install Soundflower or BlackHole add-on first.
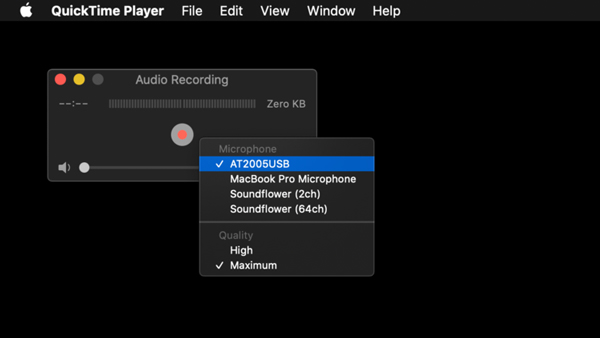
Step 1.Open QuickTime Player. Click the "New Audio Recording" button from the top "File" dropdown list.
Step 2.In the new recording window that appears, click the small arrow to the right of the "Record" button. Select your external Microphone as the recording input and make sure the meters register the signal.
Step 3.Click the "Record" button to make a voice recording on Mac. Later, click "Save" from the top "File" list to set a path folder.
How to Do Music Production on Mac with GarageBand
- Good for: Record and edit studio-quality voice for making music. Though the interface is complicated for beginners.
- Output Audio Format: M4A, AIFF, WAV, Apple Lossless file
To capture your voice on Mac for music production, GarageBand is more than a voice recorder for Mac, but also an audio editor to polish the recording. It’s rich with features and offers the best level of compatibility. Just learn more about the detailed process as below.
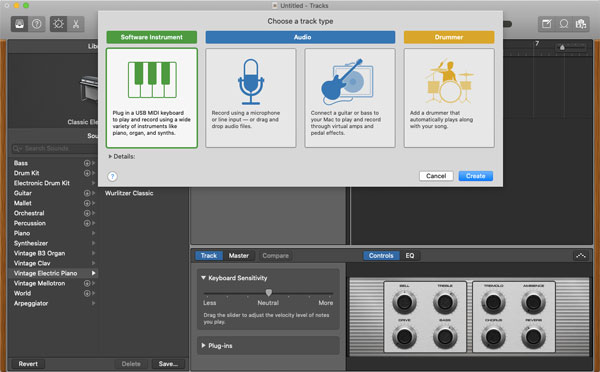
Step 1.Launch the GarageBand app on your MacBook. You can open up a new project file and choose the "Voice" preset to create a new session with five separate voice-ready tracks.
Step 2.Click the "Narration Vocal" button to approach recording vocals. You click the "Record" button before singing into the microphone and use the slider in this window to adjust your recording level.
Step 3.To stop recording, press the "Spacebar" key to save the recording on your MacBook. After that, you can edit the voice recording and remove any unwanted noises from your vocal tracks.
FAQs
-
How to set up an external microphone to Mac for recording?
Once you have connected the external microphone to Mac, you can tweak your apps to use that microphone instead of the default built-in microphone. Open the "System Preferences" menu and click on the "Sound" button. You can choose the external microphone and adjust the volume for recording audio on MacBook.
-
How to create a voiceover on PowerPoint on Mac?
Locate the slide you want to add voiceover. Go to the "Recording" tab. Click "Record Audio" from the "Audio" dropdown menu. Later, you can record audio on a Mac PowerPoint.
-
Why can’t record voice after installing macOS Mojave or later?
Choose the "Apple" menu and click the "System Preferences" button. After that, you can click the "Security & Privacy" button and then the "Privacy" button. Click the Microphone option and select the checkbox next to an app to allow it to access the built-in microphone on your Mac. After that, you can launch the audio recorder to record voice on Mac again.
-
How to edit a voice recording on Mac?
You can use the built-in audio trimmer within the above voice recorders. If you want to get more audio editing tools, you can try Audacity, Adobe Audition, AudioMass, and more.
Conclusion
All in all, recording voice on Mac is a straightforward process. For simple and free audio recording experience, you can use the default Mac apps, including Voice Memos, QuickTime Player, and GarageBand. But if you need smoother Mac recording experience along with advanced editing tools, AnyRec Screen Recorder is worth a try.
100% Secure
100% Secure