Premiere Pro Stuck on Encoding? 6 Fixes Here with Tips!
Similar to other editing software, no matter how powerful Premiere Pro is, it can still experience issues like getting stuck on encoding, leaving you frustrated. This ‘Premiere Pro stuck on encoding’ is caused by various factors, so how can you overcome these obstacles? Luckily, this guide here will give you six solutions to help you fix ‘Premiere Pro stuck on encoding’ alongside possible reasons why this happens. Scroll down now and get your projects rendered smoothly!
Guide List
Common Reasons Why Premiere Pro Stuck on Encoding How to Fix the Premier Pro Stuck on Encoding Issue More Tips to Avoid Encoding Issues in Premiere ProCommon Reasons Why Premiere Pro Stuck on Encoding
Before knowing the solutions for fixing ‘Premiere Pro stuck on encoding’, you should see why this might happen. Here are four common reasons why encoding on Premiere Pro feels like forever.
• Not Enough System Resources. Having corrupt media files will cause Premiere Pro to malfunction during encoding. This can be caused by improperly imported files, missing needed codecs, or even bugs and glitches in the media.
• Damaged Media File. Besides loose connections, the cable you've been using may be wear and tear that causes the webcam issue to arise.
• Out-of-date Software and Driver. If you use outdated versions of the editing software and driver, it will indeed cause instability, leading to encoding problems and, worse, other issues.
• Export Settings. Most of the time, incorrect export settings can also be the cause of Premiere Pro being stuck on encoding. For instance, if you’ve selected incompatible formats or resolutions, if you have used complex settings that your system can’t handle, or if you have several conflicting effects applied to your project.
How to Fix the Premier Pro Stuck on Encoding Issue
Knowing the potential causes of the issue ‘Premiere Pro stuck on encoding’ will help you determine the best approach to overcome it. Among the six solutions below, find the most ideal way for you.
Fix 1. Use AnyRec Video Converter to Convert Files
If you have the Premiere Pro stuck on encoding issue due to problematic media files, AnyRec Video Converter can assist by converting these media files into a more compatible format before uploading them into Premiere Pro. Doing so can avoid encoding issues that may arise from unsupported files. No worries about your video quality, as the program uses advanced technology that maintains high quality during and after the conversion process. You can get these media files in any format you like, including MP4, AVI, MOV, MKV, etc.

Convert files into PR supported formats like MP4, MOV, AVI, and more.
GPU acceleration to boast fast conversion speed without any quality loss.
Able to convert multiple video and audio files simultaneously.
Built-in editing features for trimming, rotating, merging, and more.
100% Secure
100% Secure
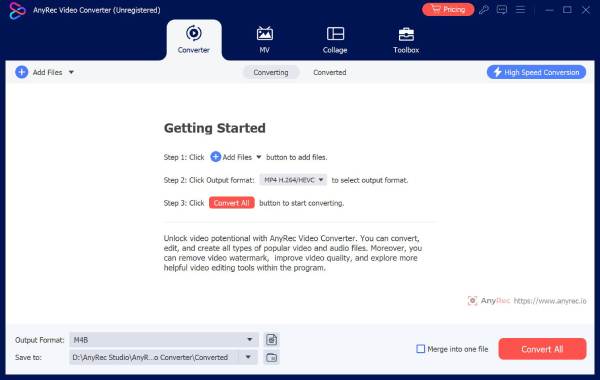
Step 1.Get the AnyRec Video Converter started on your computer. Import your files by clicking the "Add Files" button or dragging and dropping function.
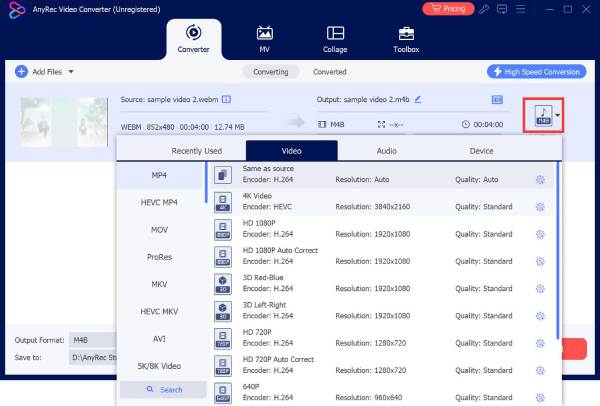
Step 2.Choose a compatible format using the "Video Format" dropdown list button, and go into the "Video" section. Go for formats like MP4 or ProRes in the list. Get the proper format to fix Premiere Pro stuck on encoding.
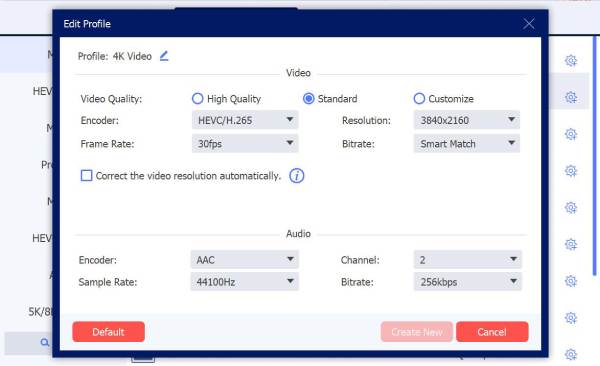
You can change their profile settings via the "Custom Profile" button. In this window, you can adjust resolution, frame rate, and more settings to your preferences.
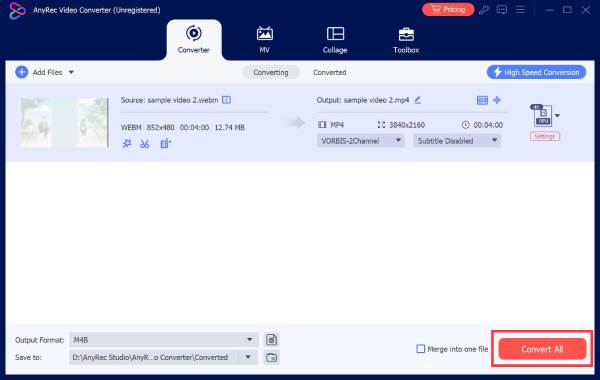
Step 3.Once all is done, designate a location and set a name for your file. Click the "Convert All" button in the main interface, and later, import them into Premiere Pro.
Fix 2. Close Background Applications
If your PC right now has multiple running applications, it can drain your system resources, such as CPU and RAM, resulting in Premiere Pro stuck on encoding issues. Thus, closing extra programs can free up resources and let Premiere Pro work correctly without interference. This may also solve Premiere playback choppy issue.
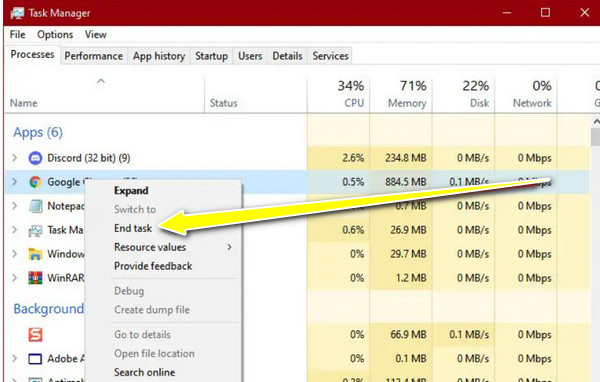
- 1. Go to the "Task Manager" by pressing "Ctrl +Shift + Esc" keys.
- 2. See all running programs in the background and determine the unnecessary applications that must be closed.
- 3. Right-click on them, and choose "End Task".
Fix 3. Update Premiere Pro and Drivers
Outdated software or drivers can cause conflicts during encoding, so it is better to make sure you have the latest version update of Premiere Pro and up-to-date drivers. By doing so, you can avoid compatibility issues and improve the software's performance.
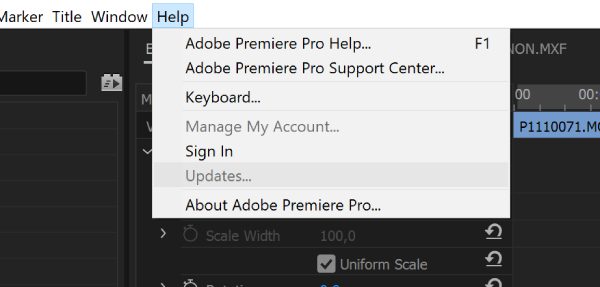
- 1. Click the "Help" menu and then "Updates" button to upgrade Premiere Pro to the latest version.
- 2. As for your driver, visit the GPU manufacturer’s website to get the latest drivers.
- 3. Later, restart Premiere Pro and try encoding your video again.
Fix 4. Use Software Encoding
Hardware encoding depends on your GPU, which is prone to issues depending on the system’s configuration. Try switching to software encoding, which lets the CPU handle the encoding process, which can solve the GPU-related problems for your ‘Premiere Pro stuck on encoding’.
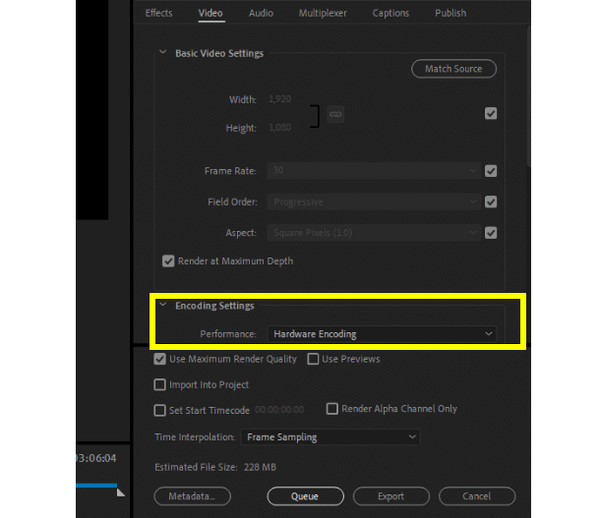
- 1. In the "Export Settings" window in Premiere Pro, go to the "Video" tab and locate the "Encoding Settings" section.
- 2. Switch from "Hardware" to "Software"; try encoding once again and see if the issue is gone.
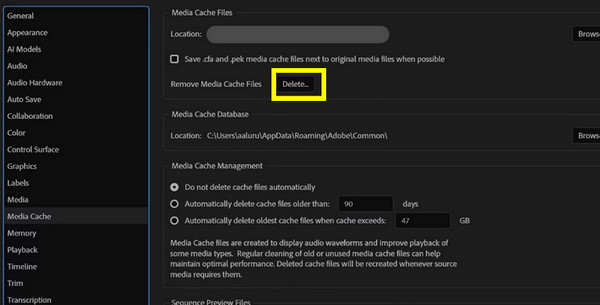
Fix 5. Clear Out Media Cache
Like any other editing software, Premiere Pro stores media cache files, too; however, these cache files can be corrupted, leading to many issues like Premiere Pro stuck on encoding when exporting. Thus, try clearing out the media cache and let Premiere encode smoothly.
- 1. Open Premiere Pro's "Export Settings" window, then reduce the resolution or change the bitrate settings to lower values.
- 2. Next, disable or remove some heavy effects like color grading on your video.
- 3. Then, reattempt the export process to check if the issue has been resolved.
Fix 6. Simplify Export Settings
Lastly, with complex settings or heavy effects applied to your video, Premiere Pro can be overloaded during encoding. In cases like this, minimize the complexity of export settings or turn off some effects to have a smooth export video experience.
- 1. Open Premiere Pro's "Export Settings" window, then reduce the resolution or change the bitrate settings to lower values.
- 2. Next, disable or remove some heavy effects like color grading on your video.
- 3. Then, reattempt the export process to check if the issue has been resolved.

More Tips to Avoid Encoding Issues in Premiere Pro
Following those reasons and solutions for the Premiere Pro stuck on encoding issue, it’s nice to take down notes on some key tips that can help you avoid encoding issues from happening again. Come behind the following listed tips below:
• Update Regularly. This applies to software and drivers. Keep both the Premiere Pro and your GPU drivers up to date to fix bugs and improve performance and compatibility.
• Use Compatible Formats. Consider using widely supported formats like H.264 and ProRes so that when you import into Premiere Pro, you won’t encounter any compatibility problems.
• Backup Projects. Make sure that you have a backup of your project files to avoid losing progress and to protect against corruption or sudden crashes.
• Work from an SSD. Utilizing a superb SS for your media file guarantees faster read and write speeds, which is necessary for a smooth editing and encoding process.
• Organize Your Timeline and Media. Having a clean timeline will lessen the chances of errors. Too many layers, effects, and disorganized files can confuse the program, resulting in encoding problems.
Conclusion
Dealing with Premiere Pro stuck encoding at 100 is indeed a nightmare, but if you understand the common causes and implement the proper fixes, you can overcome it. From updating software to adjusting export settings, and so on, there are so many solutions to the Premiere Pro stuck on encoding issue. If you are troubled by problematic files, try using AnyRec Video Converter, a powerful tool that converts these media files into a compatible format for Premiere Pro. Avoid any codec conflicts and enjoy a seamless encoding process with your new MP4 or ProRes files.
100% Secure
100% Secure