Record Desktop Audio with OBS: Ways, Alternative, Tips
Ever recorded a video in OBS only to realize the sound was not captured? It’s indeed a frustrating experience, so how can you precisely record desktop audio with OBS? High-quality audio is as crucial as crisp visuals, giving your audience engaging content. So, whether you are streaming or recording tutorials, this guide here provides a concise guide on how to record audio on OBS, capturing every game explosion, music, and sound without a hitch.
Guide List
How to Record Desktop Audio with OBS Get an OBS Alternative for Easier Audio Recording Quick Fixes for OBS Audio Recording ProblemsHow to Record Desktop Audio with OBS
OBS Studio is a popular free and open-source tool primarily used in video recording and live streaming. One of its key features is the ability to record desktop audio, which comes from your computer, including game sounds, music, or system notifications. If you’re having trouble doing so, this section here will walk you through the steps to get OBS to hear desktop audio.
Step 1. Configure Audio Settings in OBS
The first thing you need to do before you record desktop audio with OBS is configure your audio settings properly; follow the instructions below:
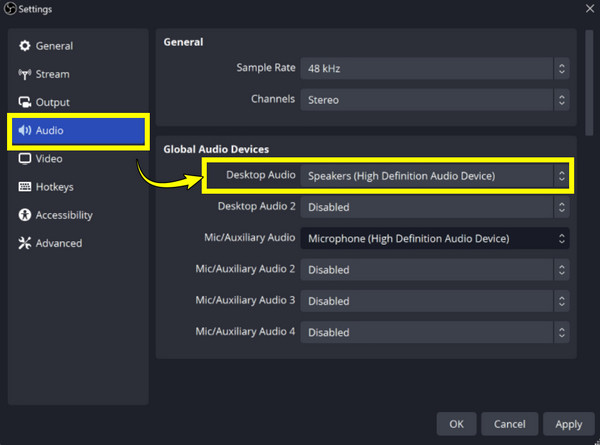
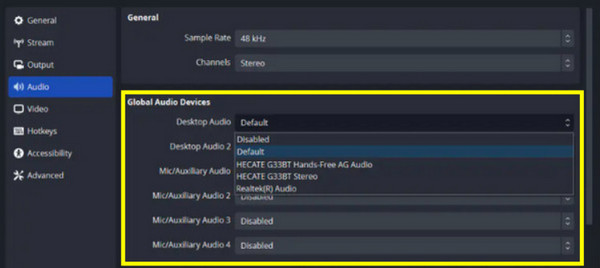
- 1. Launch OBS Studio, then click the "Settings” button and head to the "Audio” tab from the left-hand menu. Here, look for "Global Audio Devices”; select "Default” for desktop audio to capture sound from your system.
- 2. Suppose you have multiple audio devices like headphones; choose a specific device under the "Desktop Audio” drop-down menu. After all that, click the "Apply” button and then "OK” to save changes.
Step 2. Add Desktop Audio Source in OBS
Upon configuring your OBS capture PC audio, the following step is to add the desktop audio source; here’s how:
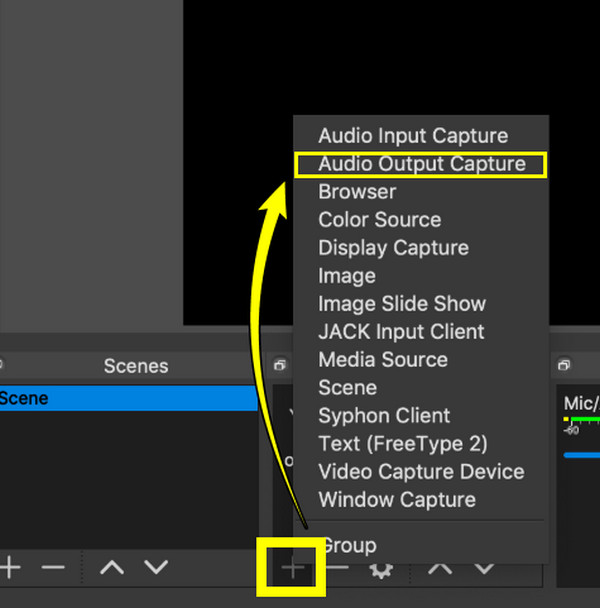
- 1. In the main window, from "Sources", click the "Add" button. Choose "Audio Output Capture" from the options to allow OBS to record desktop audio. Give this new source a name, then click the "OK" button.
- 2. Following that, determine the specific audio device you want to capture from the drop-down list. Click the "OK" button to successfully add the desktop audio source to your scene.
Step 3. Adjust Desktop Audio Level in OBS
After adding the desktop audio source to be recorded in OBS, you can adjust the audio level in OBS recording settings to make sure it is not too quiet or too loud during the session. Here’s how to do that:
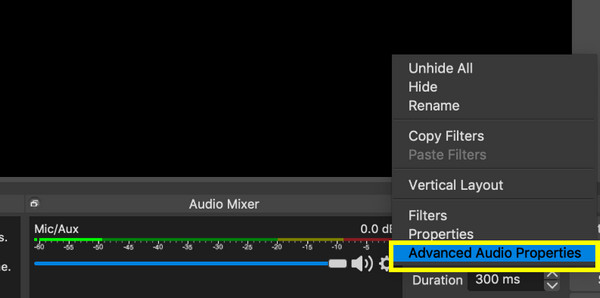
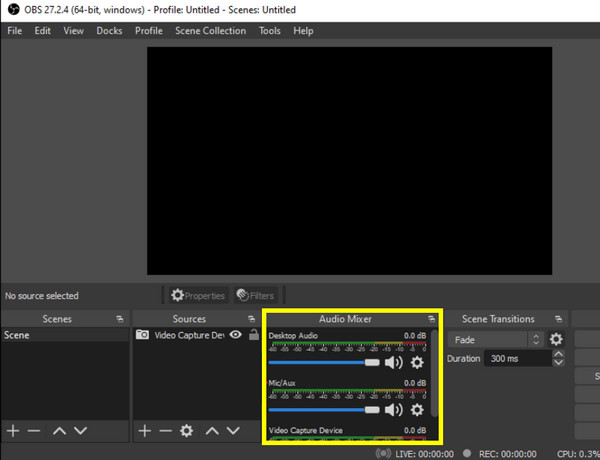
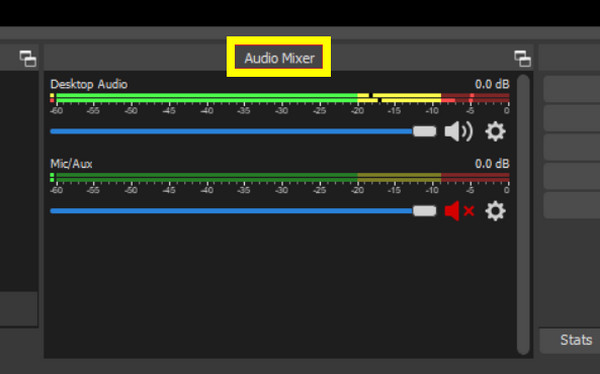
- 1. From the "Audio Mixer", look at the slider for your audio source. Move the slider to adjust the volume level; please keep the volume level in the green zone for a perfect sound.
- 2. You can also head to "Advanced Audio Properties" to adjust the volume by right-clicking on the audio source.
Step 4. Record Just Computer Audio in OBS
Most of the time, you may wish to record audio only with OBS by capturing only the system sound and excluding microphone or other audio sources. Here’s how you can achieve this:
- 1. Inside the "Audio Mixer" section, mute or lower the audio volume of other audio sources, like microphone, game audio, and others, that you don’t intend to record. Ensure that only the "Desktop Audio" source is unmuted.
- 2. Otherwise, if you don’t want to include any audio completely, go to "Settings", then "Audio" and disable the "Mic/Auxiliary Audio". Once done, start recording by clicking the "Start Recording" button.
Get an OBS Alternative for Easier Audio Recording
While OBS Studio is a popular tool for recording both video and audio, its learning curve and complexity are not suitable for everyone. For this, record system audio easily with high-quality using AnyRec Screen Recorder. With its friendly interface, it streamlines the overall process of recording audio compared to when you record desktop audio with OBS on Mac and Windows. Both system sounds and mic input are covered, which is perfect for all your audio needs! Also, you can even customize the recording settings, ensuring superb quality without any complicated configurations. Before hitting the record button, you can apply its noise reduction and mic enhancement features, guaranteeing precise and professional-quality recordings.
Capture both system and mic audio easily, either separately or at once.
Enhance audio with noise cancellation and microphone enhancement features.
Fine-tune your audio settings, including format, sample rate, etc., to suit your needs.
Say goodbye to audio recording issues with a simple sound test first.
100% Secure
100% Secure
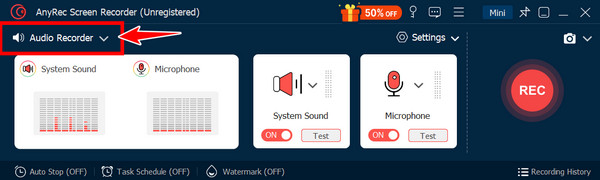
Step 1.Start by clicking the "Recording mode" dropdown once you have launched AnyRec Screen Recorder. From the available options, choose the "Audio Recorder" button.
Step 2.Next, toggle on "System Sound" to record audio from computer and "Microphone" to record your voice; adjusting the volume as needed can be done by pulling their sliders.
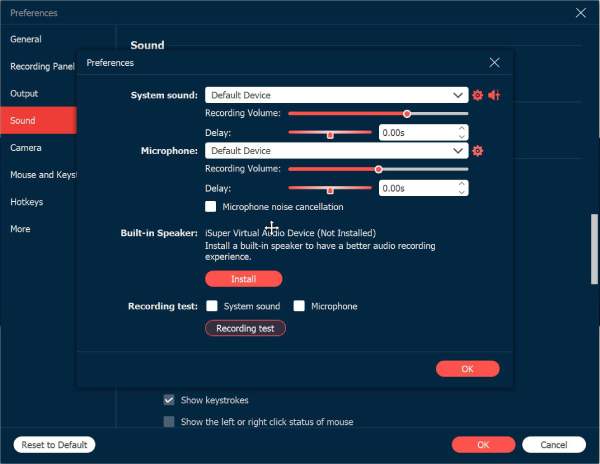
For even better sound, go to "Settings" then "Sound" and then check the "Microphone noise cancellation" box.
Step 3.Once you have configured everything to your liking, click the "REC" button to start recording. The process is simple and free of OBS desktop audio recording issues. You can adjust the volume during the session.

Step 4.After you’ve finished recording, click the "Stop" button to review your file and remove any unnecessary segments. Click the "Done" button to save the final recording to your computer.
Quick Fixes for OBS Audio Recording Problems
If you’re facing audio issues while recording desktop audio with OBS in MP3 and other formats, know these problems have some quick fixes to help. Whether it is no sound, distorted audio, or lower volume, the following solutions cover a range of ways to fix OBS not recording audio.
Fix 1. Check Audio Settings.
The issue is sometimes caused by simple incorrect settings, so you must check it on "Settings" and then head to the "Audio" tab. There, ensure correct devices are chosen for both "Desktop Audio" and "Mic/Auxiliary Audio".
Fix 2. Ensure Desktop Audio is Unmuted.
Perhaps you get no sound in OBS because it is unmuted. For this, look at the "Audio Mixer" and ensure the "Desktop Audio" slider is not muted; adjust the level as needed.
Fix 3. Update Audio Drivers.
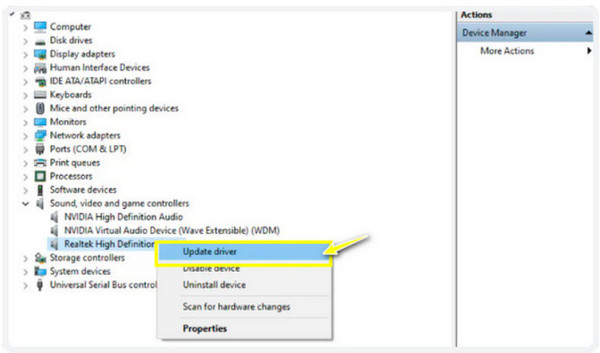
Outdated drivers can interfere with OBS’s record sound abilities. Go to "Device Manager" on your computer, then look for the "Sound, video, and game controllers" category, and right-click on your audio device. Choose the "Update driver" option and complete the on-screen instructions.
Fix 4. Check for Any Conflicting Software.
YOther running apps in the background could be conflicting with OBS. Please close other apps that might be using the audio device, then restart OBS.
Fix 5. Adjust OBS Encoding Settings.
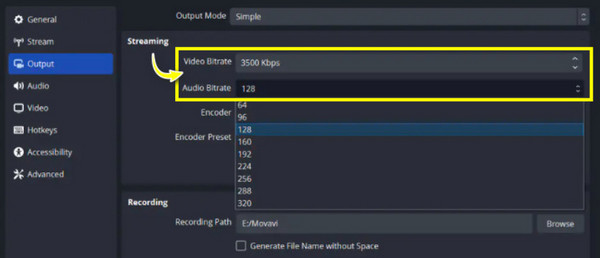
An incorrect encoding setting can cause audio issues, too, not letting you record desktop audio with OBS. Simply go to "Settings" to the "Output" tab, then check the "Streaming" section to set "Audio Bitrate" to 128, then the "Video Bitrate" to 3500. Next, uncheck the "Use CBR" box from the "Encoder Settings".
Conclusion
To wrap everything up, knowing how to record desktop audio with OBS is a straightforward process that can hugely enhance the quality of your content. Regardless of whether it is for your tutorial, streaming, or gameplay, having the right settings will ensure everything is properly set up, allowing you to capture clear desktop audio. But what if it suffers from issues? Have no trouble with the OBS alternative, AnyRec Screen Recorder. This tool offers a seamless audio capture for both system and mic input, ensuring high-quality results and a simple setup. With its wonderful features in both screen and audio recording, it is a fantastic option for all users!
100% Secure
100% Secure