How to Take Screenshots on Chromebook with the Full or Specific Area [Free]
How to take a screenshot on Chromebook? Since Chromebook has a different keyboard from the computer in Windows and Mac operating systems, you can't use the same shortcuts to capture the screen on Chromebook. But don't worry. Although Chromebook doesn't support installing any software, it is not difficult to take screenshots on Chromebook through the shortcuts on the keyboard. Moreover, you can use Stylus and Google extensions to take captures on Chromebooks with more functions. Whether you want to capture the full screen or a specific area, you can use the following 4 methods in this article.
Guide List
How to Take Screenshots on Chromebook with Full Screen 2 Ways to Take A Screenshot with Specific Area on Chromebook How to Take Screenshots on Chromebook through Extensions Bonus Tips: The Best Way to Take Screenshots on Windows/Mac FAQs about Taking Screenshots on Chromebook EasilyHow to Take Screenshots on Chromebook with Full Screen
Although there's no Print Screen button on Chromebook to capture screen, it also provides keyboard shortcuts to take screenshots on Chromebook. It's the easiest way for you to take quick captures whenever you need. Please follow the steps below:
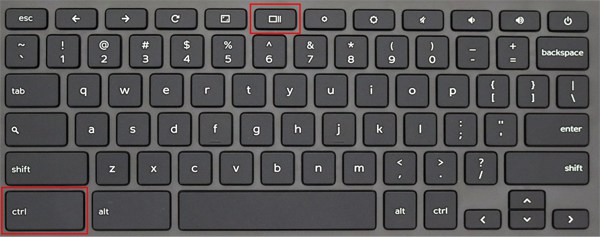
Step 1.Find the "Show Windows" button with a rectangle and two vertical lines at the top of your Chromebook. Now, you can press the "Ctrl" button and then press the "Show Windows" button to take full screenshots on Chromebook.
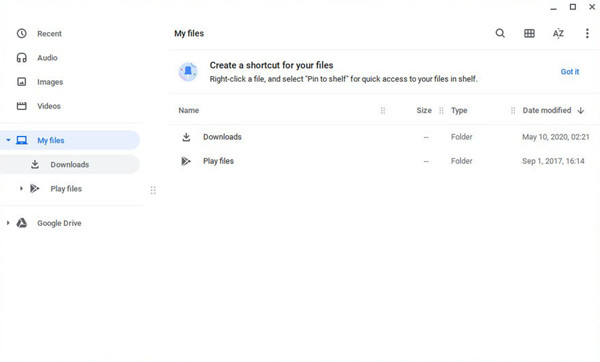
Step 2.Your screenshots will be saved in local files automatically. Click the "Windows" button at the left bottom of your computer and open the Files app. Then click the "My Files" button and click the "Downloads" button in the left pane. You can also press the "Alt+Shift+M" buttons to open the downloads file quickly.
Tips
If you have synced your files with Google Drive, you can also watch and spread the screenshots taken on Chromebook on other devices.
Further Reading
2 Ways to Take A Screenshot with Specific Area on Chromebook
1. Shortcuts on the Keyboard to Take Partial Screenshots on Chromebook
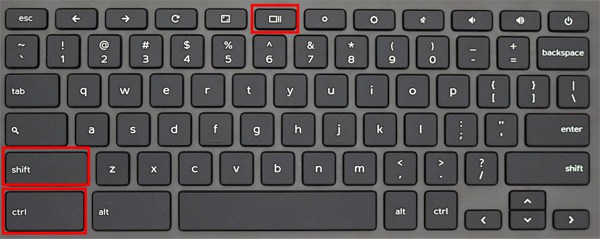
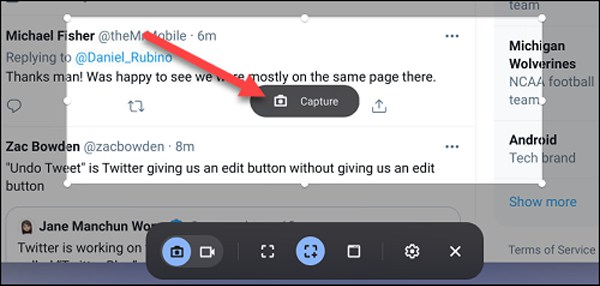
Press the "Ctrl+Shift" button and then press the "Show Windows" button on the keyboard. Then you can click and drag your cursor to choose the desired part to capture. After that, you can also change the area with different resolutions by adjusting the borderlines. At last, click the "Capture" button in the center to take a screenshot on Chromebook.
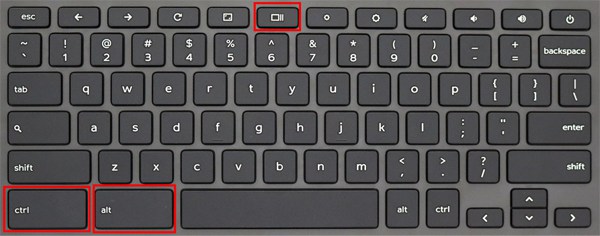
Besides the mentioned shortcut, you can also take screenshots of a window on Chromebook through "Ctrl+Alt+Show Windows" buttons. After pressing the buttons, you can easily click the desired window to choose to capture. And then click the "Camera" button to save the screenshots.
In these ways, your screenshots will be copied to the clipboard, and you can choose to edit or delete them through the popping-up window at the right bottom corner.
2. Use Stylus Tool to Capture Screenshots on Chromebook
Stylus is a very powerful built-in tool to capture screenshots on Chromebook with the full-screen, partial area, and selected window. But you should check whether your Chromebook has the Stylus tool or not at first. Here are the detailed steps:
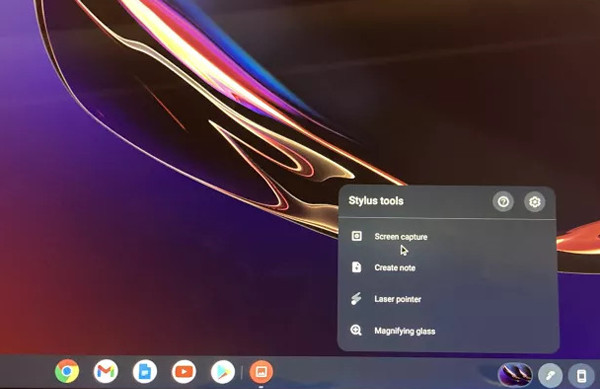
Step 1.Firstly, you need to connect your pen to the Chromebook. Click the "Stylus" button with a pen shape at the right bottom corner of your computer. Then click the "Screen Capture" button to open the snipping tool.
Step 2.A small toolbox will pop up at the bottom of the screen. There are three capturing options for you to choose from. These three icons mean full-screen, partial area, and selected window with a left to right order. You can choose the suitable one and take the desired screenshots on Chromebook according to your need.
How to Take Screenshots on Chromebook through Extensions
The mentioned three official methods are easy to use, which are mainly for taking screenshots on Chromebook quickly at any time. But if you want to capture the screen with more advanced features, you should rely on the Chrome extensions without downloading any software.
Step 1.Navigate to Chrome Extensions
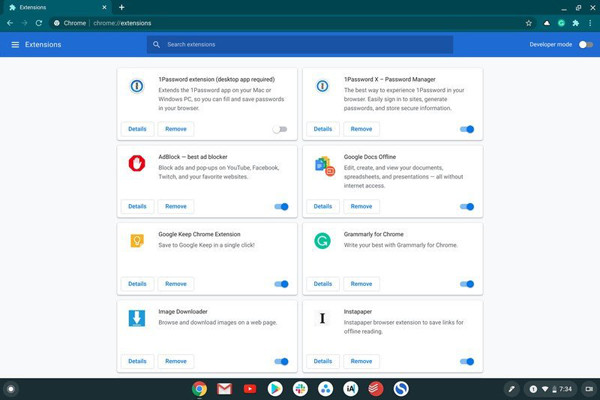
Open Google Chrome on your Chromebook. Click the "More" button at the top right corner and click the "Extensions" button on the More Tools option. Then you can find and add any screen captures in the searching bar.
Step 2.Search for Snipping Tools
There are many powerful screenshot extension tools on Google Chrome. Here are 3 recommended snipping tools for taking screenshots on Chromebook with different features.
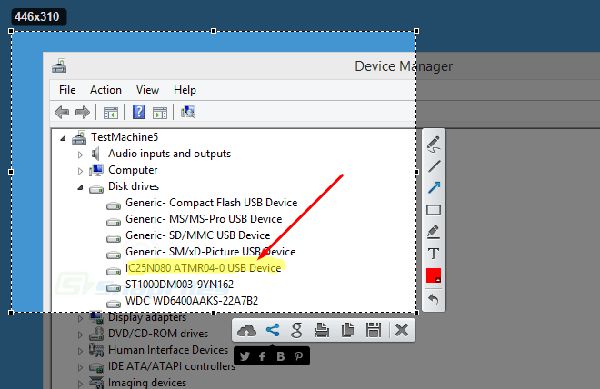
Lightshot: It's one of the easiest screenshot tools to take screenshots on Chromebook with editing features. You can add lines, shapes, and texts freely to the captures. After that, the screenshots can be saved in Google Drive and local files.
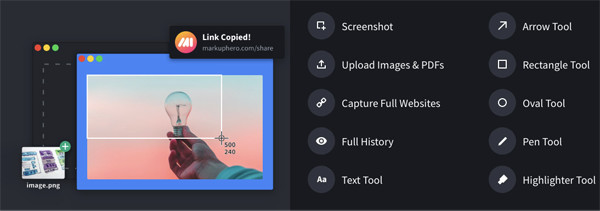
Markup Hero: With Markup Hero, you can capture screenshots on Chromebook easily with annotations and images. Moreover, you can directly share the screenshots with friends or other devices through unique links.
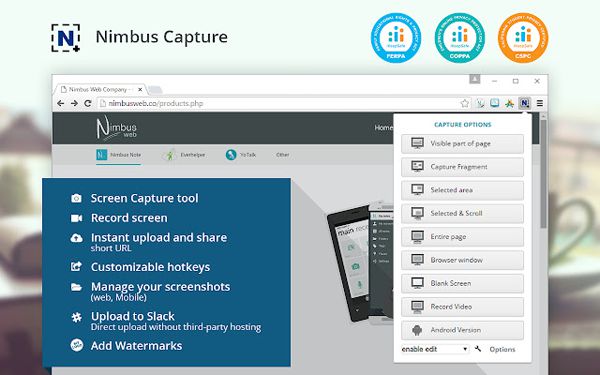
Nimbus Capture: It's not only a snipping tool but also an online screen recorder. It provides three modes, including the selected region, entire page, and browse window. With the powerful editing tools, you can crop the screenshots, blur the sensitive information, etc.
Bonus Tips: The Best Way to Take Screenshots on Windows/Mac
If you are a Windows or Mac user, you can also take quick screenshots on your computer with shortcuts on the keyboard. As the same as taking screenshots on Chromebook, it provides you no additional features to crop, edit, add marks to the captures. In this way, AnyRec Screen Recorder will be your best choice.

Capture screenshots on Windows/Mac with simple clicks.
Provide full-screen, customized region, and select window option.
Able to edit the screenshots with shapes, lines, callouts, etc.
Easy-to-use hotkeys to take screenshots at any time.
100% Secure
100% Secure
FAQs about Taking Screenshots on Chromebook Easily
-
1. Can I change the file folder to save the screenshots taken on Chromebook?
No, you can't. Since Chromebook only has a File app to save all the downloaded contents, you can only take screenshots on Chromebook and save them on the My Files folder.
-
2. How to take the full screenshots on SamSung Chromebook?
You can simply capture the whole screen on SamSung Chromebook by pressing "Crtl+Show Windows" button. In this way, you can't crop or edit the screenshots further. Thus, you can also rely on Chrome extensions to take full screenshots and edit them with more editing functions.
-
3. How to take a screenshot on Chromebook with Tablet Mode?
This method is only available when you are using a two-in-one tablet with Chrome OS, which means your tablet has an external volume button. Then you can simply press the "Power" and "Volume-down" button to capture the full screen.
Conclusion
By using any of the mentioned methods, you can take screenshots on Chromebook easily. You can use shortcuts on the keyboard to do fast capture. By using Stylus, you can choose the desired mode from the full-screen, selected region, and certain windows according to your need. Moreover, there are many powerful snipping tools that can be installed as extensions on Chrome Web Store.
 How to Record Video on Chromebook with Built-in, Online and Extension