[Verified Working] The Best Ways to Take Screenshots on Any Device
In many cases, the easiest way to share information is to create a quick screenshot from a part of the screen. It is a simple, effective, and intuitive way populated by numerous users. Ranging from creating a quick infographic to capture a snapshot for reposting on the Internet, a handy, well-crafted screenshot toolkit is central for any use case.
To boost your productivity, we have curated a list of 8 ways that are verifiable working methods to capture part of the screen. We will also review their major features, advantages, and disadvantages, which contain both free, open-sourced, and paid commercial software.
Guide List
Universal Best Tool to Screenshot Part of the Screen How to Take a Partial Screenshot on iPhone/Android 3 Other Methods to Capture a Screenshot on Part of the Screen FAQs about Screen Capturing Part of the ScreenUniversal Best Tool to Screenshot Part of the Screen
What is the easiest way to crop a screenshot from a customized region? One of the best ways is using professional recorder software that not only has powerful and customizable features but has universal platform support as well. AnyRec Screen Recorder is one of the highly-rated toolkits that is tailor-designed for your particular need. It has packaged with rich features such as:

Capture and crop screenshots on Windows with simple clicks.
Provide full screen and selected region for you to choose freely.
Editing tools with multiple shapes, lines, arrows, texts, etc.
Shortcut to crop a screenshot on Windows anywhere and anytime.
100% Secure
100% Secure
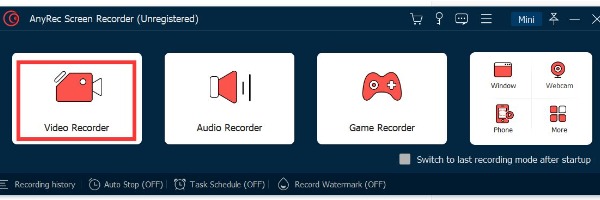
Step 1.Free download the AnyRec Screen Recorder from the official website and launch it immediately. Then click the "Video Recorder" button at the main interface.

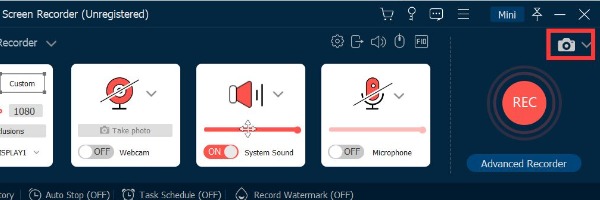
Step 2.Click the "Screen Capture" button with the Camera icon at the right. It will pop up the screenshot tool immediately.

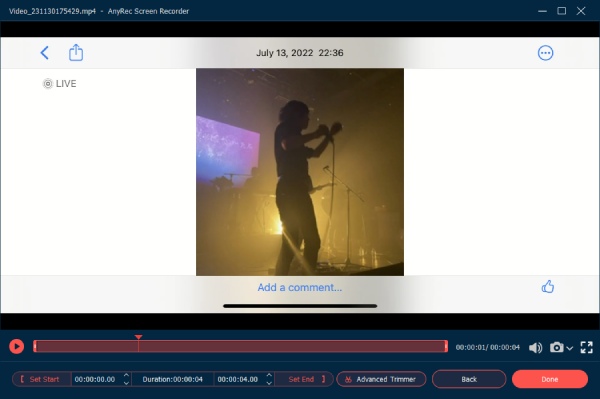
Step 3.You can move the mouse to select any place on the desktop for screenshots. After selecting the screen, you can directly click the "Save" button to save the screenshot. If you want to edit screenshots, this tool provides you with basic editing tools, such as adding text and pictures, adding arrows, etc.

100% Secure
100% Secure
How to Take a Partial Screenshot on iPhone/Android
When you use iPhone or Android to chat with friends, it is common to share some screenshots. The following provides you with specific guidelines on how to take screenshots on iPhone.
Method 1. Capture Part of the iPhone Screen in an App
Step 1.Zoom in to the webpage until the visible screen matches the part you want to create a screenshot.
Step 2.Press the "Side" button and "Volume Up" button at the same time to save the screenshot of only a part of the screen.
Method 2. Capture Part of the iPhone Screen by Cropping the Screenshot
Step 1.On a newer iPhone with Face ID, press the "Side" button and "Volume Up" button simultaneously to create a regular screenshot of the full screen.
Step 2.Go to the Photos App, locate your screenshot, and tap "Crop" to cut off the unwanted part of the screenshot.
If you want to take screenshot on your Android, you can obtain two easy methods from this post. The following provides you with specific guidelines on how to take screenshots on Android.
Method 1. Use the Power Button and Volume Button with Your Android
Step 1.Press and hold the "Power" button and the "Volume down" button at the same time to complete the screenshot. Then the screenshot will be automatically saved in your gallery.
Method 2. Capture the Android Screen by Using the Advanced Functions
Step 1.Tap "Settings" on your Android to tap "Buttons and Gestures".
Step 2. After that, you should tap "Quick Gestures" and tap "Three-finger screenshot". When the gesture function is turned on, you can take a screenshot by dragging three fingers from the top to the bottom of the screen.
3 Other Methods to Capture a Screenshot on Part of the Screen
Print Screen Key (Windows 10)
Possibly the easiest way to capture a screenshot on your Windows 10 devices. The Print Screen key has been introduced to PC keyboards starting from the early 1980s. It locates at the upper right side of the keyboard, often labeled in shorthand as the "PrtScn" key.
Press the key on any given Windows 10 PC screen (check to see how to screenshot on Windows 11), your screenshot will be saved to your clipboard automatically. Open up any program to paste the screenshot for further manipulation and editing.
- Pros
- Free screenshot tool. (Obviously)
- No additional software is needed. (Technically)
- Cons
- It only captures a full-screen screenshot, which means you still need additional Photo Editing software such as Microsoft Paint and Photoshop.
Game Bar (Windows 10)
The screen capturing overlay built-in for Windows 10 users is the darling recorder software for many gamers. To launch the Game Bar, simply press the "Windows Key + G" key combinations at any given time. Click the "Camera" button to create and crop a screenshot instantly.
- Pros
- Super easy and efficient way to capture screenshots.
- Easily create screen recording videos.
- Cons
- Only allows capturing full-screen snapshots, no option to create a screenshot from only a part of the screen.
Lightshot (Windows 10 & Mac)
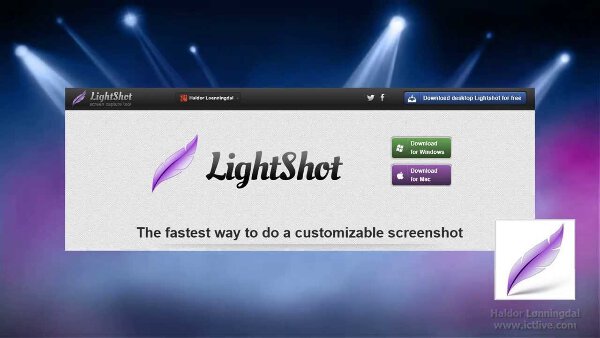
Lightshot is designed as the replacement app for the Print Screen Key. It natively supports Windows 10 with some editing capabilities.
- Pros
- Good lightweight application as a Print Screen key replacement.
- Free Software with Mac OS X support.
- Cons
- Editing features are too basic.
- The Cloud uploading feature seems counterproductive.

Further Reading
FAQs about Screen Capturing Part of the Screen
-
How to take a partial screenshot on Chromebook?
Chromebook operates on Google's special tailored version of Linux named Chrome OS. To grab a screenshot from part of the screen, press the "Ctrl + Shift + Show All Windows" keys on your keyboard. Then, drag your mouse to select the desired part of the screen to create a partial screenshot on Chromebook.
-
How to screenshot a selected area of the screen on Android?
If you are using a Samsung device, launch the Edge Panel and use the Smart Select feature to crop a certain area like the screenshot. For other Android devices, check the specific instruction given by your particular manufacturer's user manual.
-
How to perform a partial screenshot on MIUI 12?
Xiaomi has introduced partial screenshot functionality in their latest MIUI 12 ROM. To enable the feature, go to Settings > Additional Settings > Button shortcuts > Partial screenshot and turn on the option.
Conclusion
For most of the users, good screen capture software could greatly enhance one's workflow and productivity. We strongly suggest you consider the options we reviewed, and use professional software to make a screenshot from only part of the screen.
100% Secure
100% Secure
 How to Crop a Screenshot on Mac