Show Taps/Wipes When Recording on iPhone - Tips and Tricks
A clear presentation is key when creating iPhone tutorials, avoiding questions like “How did they do that?” from your audience. And showing taps/wipes when recording on iPhone can significantly help. Those little visual cues can level up your tutorials and gameplay videos, highlighting interactions. So, without wasting time, this post provides a practical guide to show controls while recording, alongside tips and more details to “wow!” our audience.
Guide List
Record and Show Finger Taps on iPhone Screen Record Taps, Swipes, and Keystroke on iPhone and iPad Change Finger Taps During iPhone Screen Recording Troubleshoot Taps and Wipes Not Showing on iPhoneRecord and Show Finger Taps on iPhone
While iOS does not have a way to visualize swipes during screen recording, it does have a built-in feature to show taps when recording on iPhone instead. This compelling visual cue can elevate your tutorials or any recording tasks. Here’s how to activate this feature:
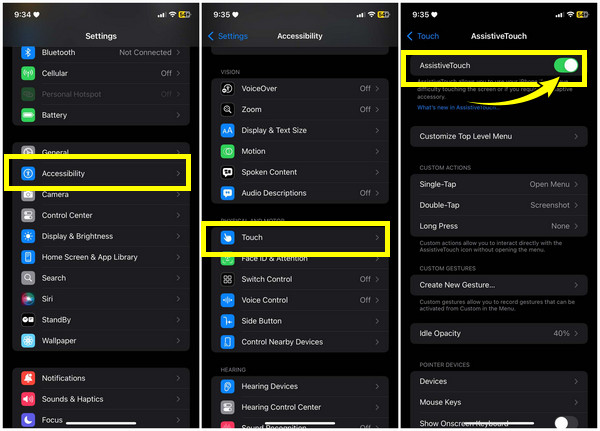
Step 1.Go to the “Settings” app, and select “Accessibility” to “Touch”. Tap the “AssistiveTouch” to toggle it on; a small circular button will appear on your screen.
Step 2.Optionally, turn your way back to “Settings”, and then “Control Center” to “Customize Controls”. Locate “AssistiveTouch” in the list and tap the “Add” button next to it. The feature can be found in the Control Center for quick access.
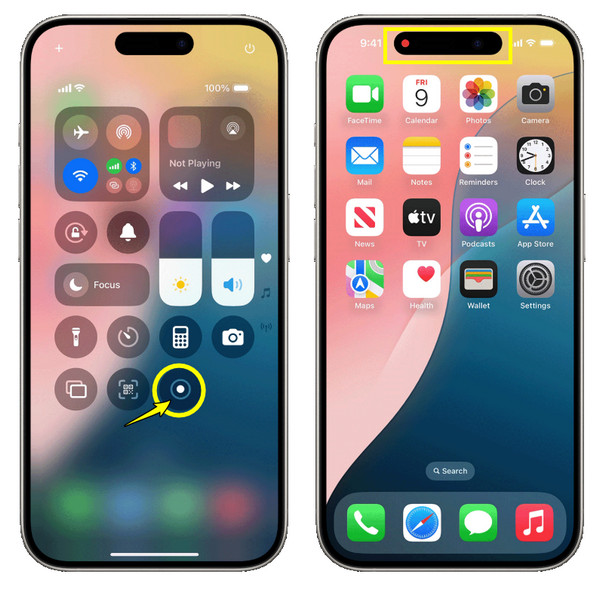
Step 3.Open “Control Center” by swiping down from the top-right corner or swiping up from the bottom of your screen. Tap the “Screen Recording” button, and a countdown will appear.
Step 4.Start interacting with your iPhone screen now, and it will show each tap visually in the recording. Once done, tap the “Red bar” above and select the “Stop Recording” button.
Screen Record Taps, Swipes, and Keystroke on iPhone and iPad
Want to have no problem showing taps or cursor when recording on iPhone or iPad? If so, look no further than AnyRec Screen Recorder! Thanks to its Phone Recorder feature, you can capture every interaction on your iOS device, including visual feedback for taps, swipes, and keystrokes. The program can record all these interactions with smooth performance, guaranteeing that there’s no lag or delay during the recording season. Not only does it support 1080p to 4K resolution, but it also lets you customize the touch feedback to your liking. With features like these, you can be sure that every tap and wipe is recorded in perfect clarity.

Every tap, swipe and interaction on iPhone/iPad is visible.
Adjust the size, color, and more to match your recording needs.
Set the recording settings, like resolution, format, etc.
Ensure no lag or delay during intense actions or lengthy recordings.
100% Secure
100% Secure
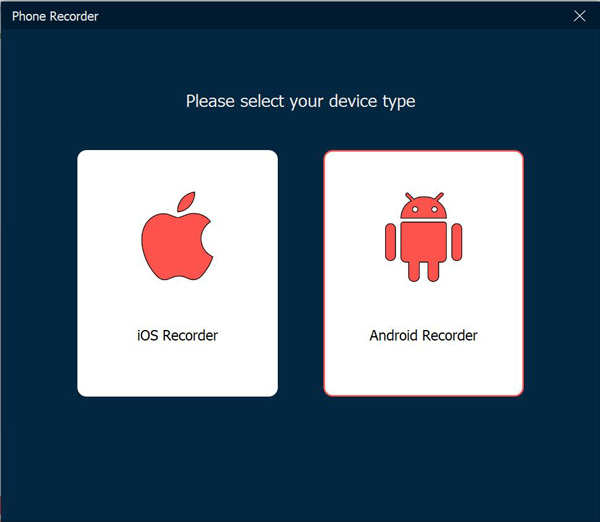
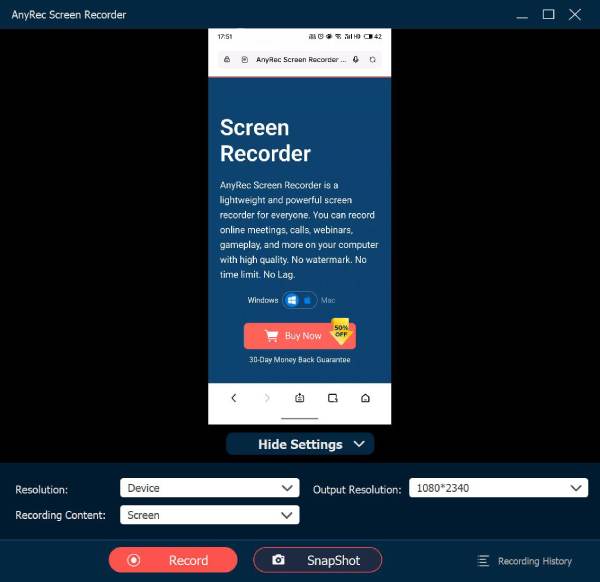
Step 1.Inside the AnyRec Screen Recorder main screen, click the “Phone Recorder” button from the recording modes list. Then, choose “iOS Recorder” to capture iPhone or iPad on-screen activities.
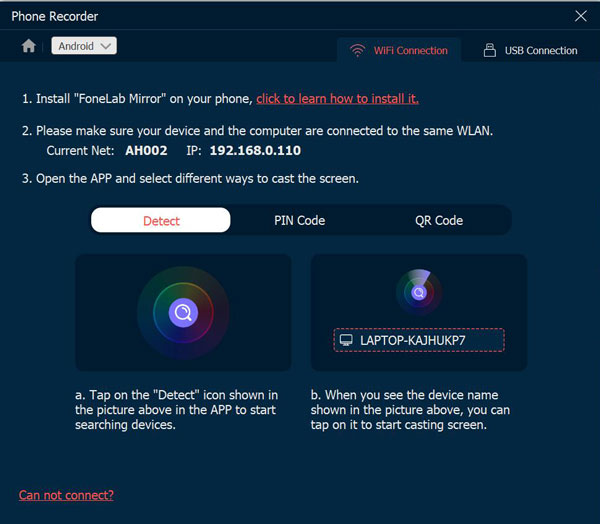
Step 2.Ensure your iOS device and computer use the same network, then access the “Control Center” and tap on the “Screen Mirroring” button, then look for “AnyRec Screen Recorder” from the available options.
Step 3.Once connected, you can begin recording your iOS device’s screen on your computer now. And it will show all the taps, swipes, and keystrokes during recording. If finished, you’ll be directed to the preview window, where you can trim extra sections before saving.
100% Secure
100% Secure
Finger Taps During iPhone Screen Recording
Looking to change finger taps while recording on iPhone? There are a few tools designed to make your tap more visible for viewers and valuable for tutorials, demonstrations, or any content. Here are the two best tools that can help you adjust and show finger taps during iPhone screen recordings:
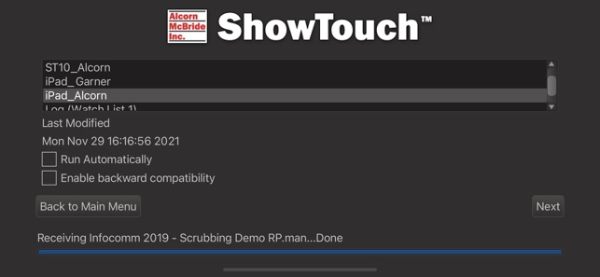
1. ShowTouch
This tool lets you visually show finger taps while recording iPhone screen. Once you have enabled ShowTouch, it will add an effect to your taps, making them more visible to viewers. It works by overlaying visual effects like a circle or dot on each touch interaction on your iPhone screen, guiding your audience through the steps you are demonstrating.
Step 1.After opening ShowTouch, you may be prompted to grant permission to use the recording feature. Next, it will begin highlighting your taps with visual effects.
Step 2.If ready, access the “Screen Recorder” in “Control Center” now to start recording. Each time you tap, you will see visual effects on your screen. You can adjust settings or more options within the app, too.
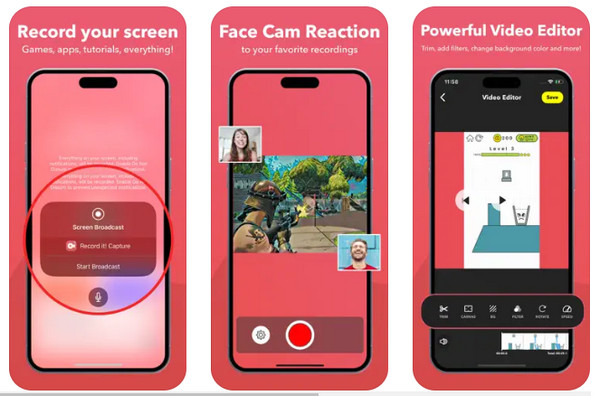
2. RecordIt!
Meanwhile, RecordIt! is another iPhone application to capture on-screen activities with a highlighting finger taps feature. Similar to the previous tool, RecordIt! has an option to customize and show taps when recording on iPhone, making it more interactive and easier to follow along. After the screen recording, you can directly share your videos, perfect for detailed tutorials or demos.
Step 1.Run RecordIt! on your iPhone, then go to its “Settings” and look for an option to enable “Tap Highlighting” or similar options to activate visual feedback for each tap.
Step 2.Following that, start recording your iPhone screen by tapping the “Record” tap. It will show every tap with a real-time operation, marking the area of your touch. Later, save the video and share it from the app.
Troubleshoot Taps and Wipes Not Showing on iPhone
What if you’re facing issues with taps and wipes not showing up on your iPhone screen? Taps may be too small to see, have no visible gestures, or do not present touch indicators, and these can be caused by underlying causes. So, check out below some troubleshooting steps for the not showing controls during recording issue:
1. Taps Too Small to See
If the touch indicators like circles or dots are too small to be visible in the screen recording, adjust the size of the taps. You can check the app’s settings to ensure the size is large enough to be seen in the recording. Or change the color of the touch to a more noticeable one.
2. No Wipes/Gestures are Visible
Some apps may not have full support for all types of gestures. In this case, check the app compatibility as well as make sure the gesture feedback is enabled in the recording app settings.
3. Recording Does Not Include Touch Indicators
In scenarios like this, you must check if the app is running or is set up to display the touch feedback before doing the screen recordings. Sometimes, touch feedback won’t work due to glitches, so you can restart the app or the iPhone itself to clear any issues.
Conclusion
To wrap things up, as you’ve seen today, knowing how to show taps/wipes when recording on iPhone can significantly improve the clarity and engagement of your content. Whether you’re creating tutorials, demos, or presentations, a precise touch is key to making your videos easier to follow. And if you’re looking for an alternative solution to capture all taps, swipes, and even keystrokes, consider the AnyRec Screen Recorder. Its phone recorder is made to capture all high-quality on-screen actions on iPhone and iPad. Enjoy this friendly and powerful tool for a smooth recording experience now!
100% Secure
100% Secure