How to Turn Off HEIC on iPhone 16 and Convert Existing Files to JPEG
“Is it possible to turn off HEIC on iPhone?” This question has been around since Apple used HEIC as the default image format. HEIC has many benefits that you can’t find on JPG. The best example is how HEIC can enhance the quality through its broader dynamic range and transparency. Still, many operating systems and programs are not supporting the format, not allowing you to open and share photos with other devices. If you do not know how to turn off HEIC on your iPhone, especially for those new iPhone 16 users, this post will tell you how to do it. And you can also learn the detailed steps on how to convert the existing HEIC images to JPEG.
Guide List
Part 1: How to Turn off HEIC on iPhone When Taking Photos Part 2: The Best Way to Transfer and Convert Former HEIC Photos to JPG Part 3: The Default Way to Convert Formats When Transferring to Windows/Mac Part 4: FAQs about Turning off HEIC on iPhonePart 1: How to Turn off HEIC on iPhone When Taking Photos
As mentioned, HEIC is the default image format from iOS 11 to the latest version. So, taking a selfie or picture means it will be saved as HEIC, which is to say, in high quality. However, since the format is yet to replace JPEG and is not universally supported, you can still turn off HEIC on your iPhone. By disabling High Efficiency for photos, remember that the quality may reduce but at least will provide wider compatibility for programs and operating systems.
Step 1.The most straightforward way to turn off HEIC on your iPhone is to launch "Settings" on your device. Scroll down and select the Camera option.
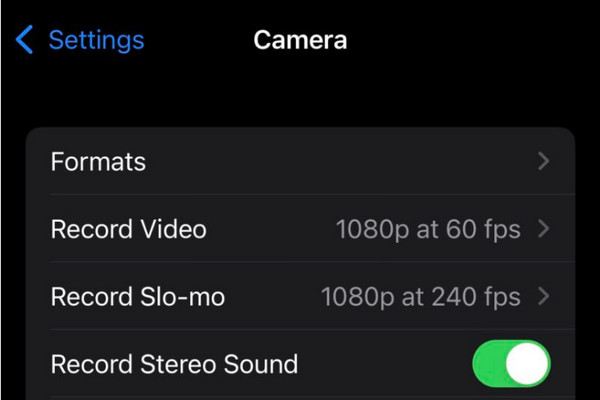
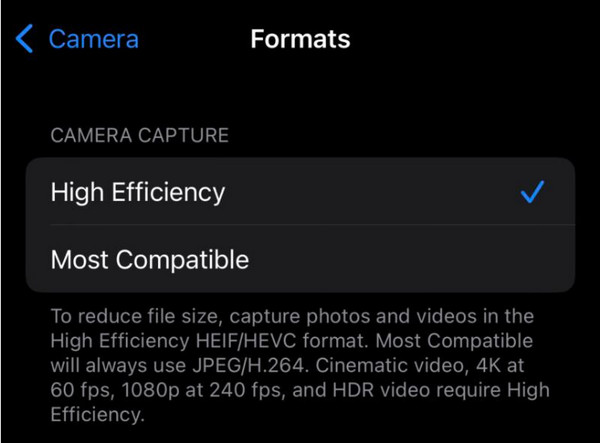
Step 2.Go to the "Format"menu, where two options exist. Tap the "Most Compatible" option to change the format. You can see the note about the outcome of changing the image format, including a bigger file size for JPEG and H.264.
Part 2: The Best Way to Transfer and Convert Former HEIC Photos to JPG
Transferring files is easier when you use AnyRec PhoneMover. It supports moving bulk files to Android, iOS, Windows, and Mac devices. But the best part of the software is its built-in HEIC converter, where you can convert HEIC to JPG or PNG. It keeps the original image quality and EXIF data. The software can also remove duplicate files and save storage space. AnyRec PhoneMover’s fast transferring speed is one of the most reliable features you can experience, and you don’t have to turn off HEIC on your iPhone because of its converter. Try the best all-in-one file-transfer software on Windows!
Enable to convert HEIC to compatible image formats, so users don’t need to turn off HEIC on their iPhone devices.
No file size limitations when transferring, moving, and sharing videos, music, and pictures.
Support transferring text messages and documents while categorizing each content for an organized list.
An excellent alternative for iTunes to manage media files on Apple devices like iPhones, iPad, etc.
100% Secure
Step 1.Click the "Free Download" button on the AnyRec webpage. Download and install PhoneMover on your computer, and while waiting, download MobieSync on your smartphone. Launch the applications once the installation is done.
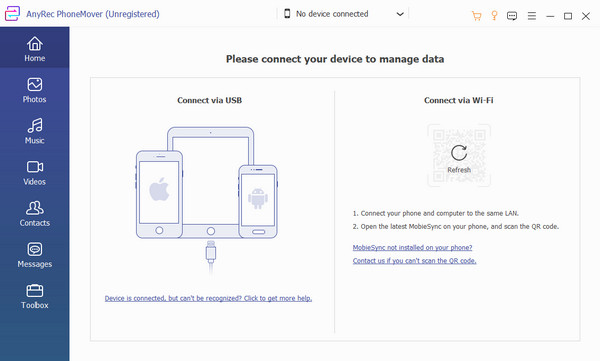
Step 2.Connect a USB to both devices or use the MobieSync app to scan the QR code. Ensure your devices are connected to the same Wi-Fi. Once the connection is successful, you can see the mobile unit posted on the software’s interface.
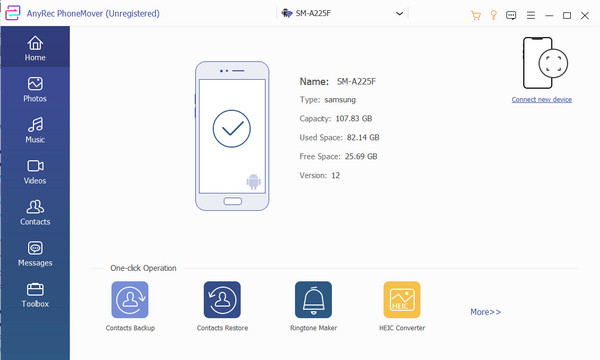
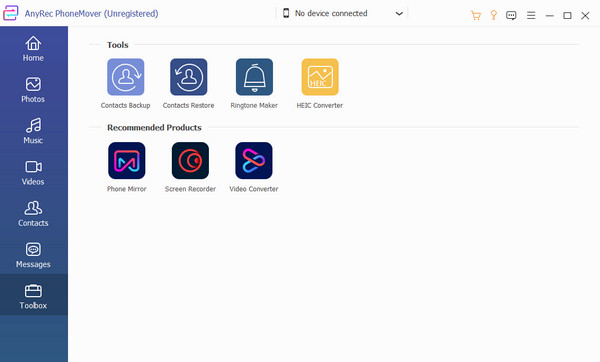
Step 3.Go to the "Toolbox" menu from the left pane of the interface. Select the "HEIC Converter" option and choose the source to upload pictures. If you already transfer the images from your phone, choose the "Add Files from PC" option, which will open the import folder.
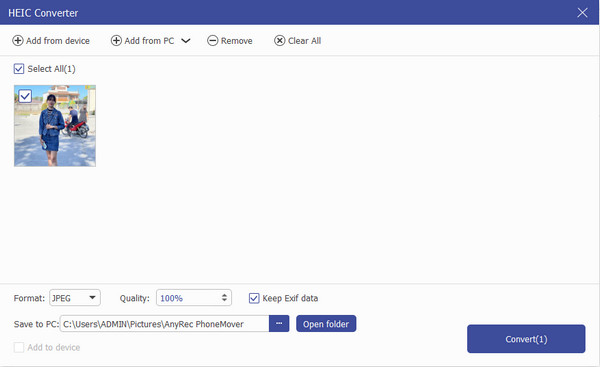
Step 4.In the next window, you can add another picture by clicking the "Add" button from the top part. Select the desired format, quality, and the designated folder on your computer. Finally, click the "Convert" button to process. Repeat the steps for another batch conversion.
Part 3: The Default Way to Convert Formats When Transferring to Windows/Mac
After turning off HEIC on your iPhone, you still need to convert the existing HEIC files when sharing or to transfer them. But if you are using the latest iOS version, you can use the default way to convert while transferring files to Windows or Mac. This part will show you how to convert HEIC to JPEG on iPhone automatically.
Step 1.Go to "Settings" on your iPhone and find the "Photos" menu. Select the settings and go to the bottom part of the list.
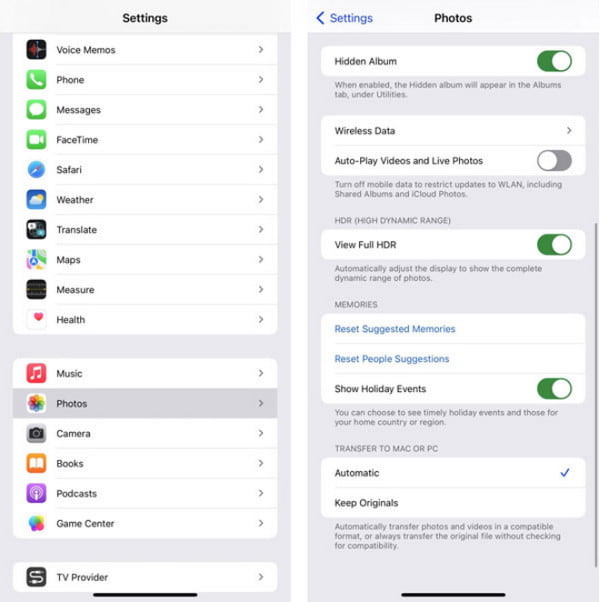
Step 2.Under the Transfer To Mac Or PC menu, toggle on the "Automatic" option. Transfer the HEIC files from your photos to a computer, which will convert them to a compatible format.
Part 4: FAQs about Turning off HEIC on iPhone
-
1. How to convert HEIC files using Preview on Mac?
To convert, open Preview on your computer and click the File menu. Select the Export option, and a format pop-up will appear. Choose the desired file format, like convert HEIC to PDF, and you can press and hold the Option key to open the specialized formats. Click the Save button to confirm.
-
2. What is the point of HEIC?
HEIC pictures are with a smaller file size and better image quality. The only thing that hinders HEIC from being an excellent image format is that it’s yet to be supported by operating systems. But if you don’t want to get an error when opening an unsupported file, you better turn off HEIC on your iPhone.
-
3. Can I open HEIC files on Windows?
Yes. Although Windows does not fully support HEIC, you can open a file with the help of the HEIF Image Extension app, which you can get on the Microsoft Store. It is free to download and install. However, it will ask you to pay $0.99 for the HEVC Video Extensions package.
Conclusion
Now that you know how to turn off HEIC on your iPhone, you can easily share JPEG files with other devices. Existing HEIC files can be transferred and converted to a compatible format, and AnyRec PhoneMover will effectively do this in a blink of an eye. Try the software by clicking the Free Download button.
100% Secure
