Unblur a Picture with Photoshop/Topaz/PhotoDirector/AnyRec
Whether you capture photos for work or as a hobby, it is still frustrating to see blurry results. But what will be the possible solution to unblur pictures for a clear result? While there are various tools to help you, only a few can give you the best result. By reading this article, you will see the recommended solutions and how to unblur a picture using them. These methods will definitely allow you to post on social media with confidence.
Guide List
Part 1: Unblur the Whole Picture to Upscale Quality [Windows/Mac] Part 2: Use Deblur Effect for a Blurry Picture [Android/iPhone] Part 3: FAQs about Unblurring an ImagePart 1: Unblur the Whole Picture to Upscale Quality [Windows/Mac]
A computer is the best place to learn how to make a picture clearer and the tools that can be installed for professional editing. If you are unsure which software to use, see the recommendations in this part.
1. Topaz Gigapixel AI on Windows and Mac
This software is a handy solution that provides a higher percentage of upscaling photos. It has a neural network, which is trained with over a million pictures to learn people’s faces, animals, and other objects. By having a wide range of knowledge, Topaz can upscale image files with issues such as low-res, blurry, and captured photos on drones and phones. Not only can it enhance the sharpness, but it provides three processing modes for different specific needs:
Standard: A general function for all types of pictures.
Architectural: Ideal for an image with too many crisp edges like typographical imagery and cityscapes.
Compressed: The last processing mode. This is suitable for image noise, like old family photos or low-quality pictures downloaded from the internet.
Features:
- Enable to do a batch conversion with excellent enlargement results.
- Offer a preview function before exporting images.
- Simple interface for a quicker way to enhance.
- Allow most image formats like JPG, PNG, GIF, etc.
Step 1.Open the blurry picture to the Topaz Gigapixel AI’s interface. You can also import multiple images to enlarge altogether.
Step 2.The main tools will be at the right panel of the app. It includes the resizing mode, AI Model, noise suppressor, blur remover, and additional settings.
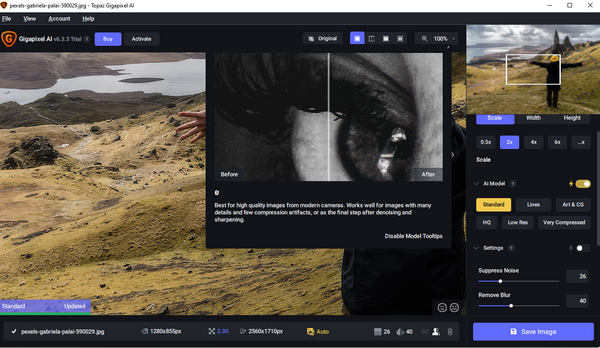
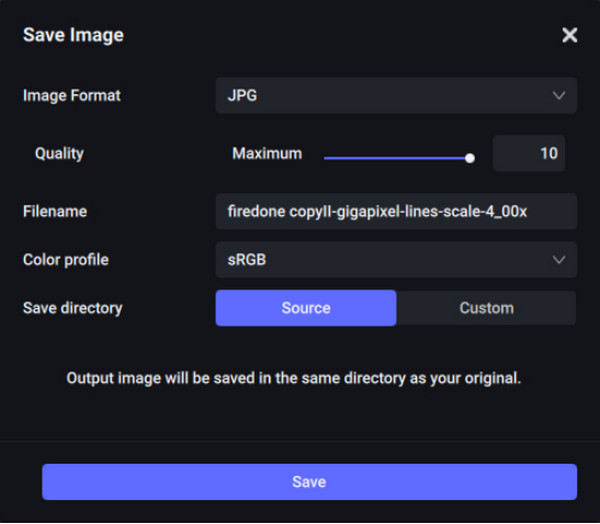
Step 3.Check the comparison to see the changes in the image. Click the "Save" button and configure the output format, quality, file name, and save directory.;
2. Photoshop
Adobe Photoshop is a capable editing software to remove blur from photos. It has unmatched tools with powered neural filters, photo correction, and typography functions; all can be found on its slick interface. Since it is known as one of the most powerful photo editors, it still has major updates by adding more features like Color Trnsfer, Landscape Mixer, and so on. While you can rely on this software, remember that it requires practice and lots of tutorials on the internet. But to shrink images, follow the steps below:
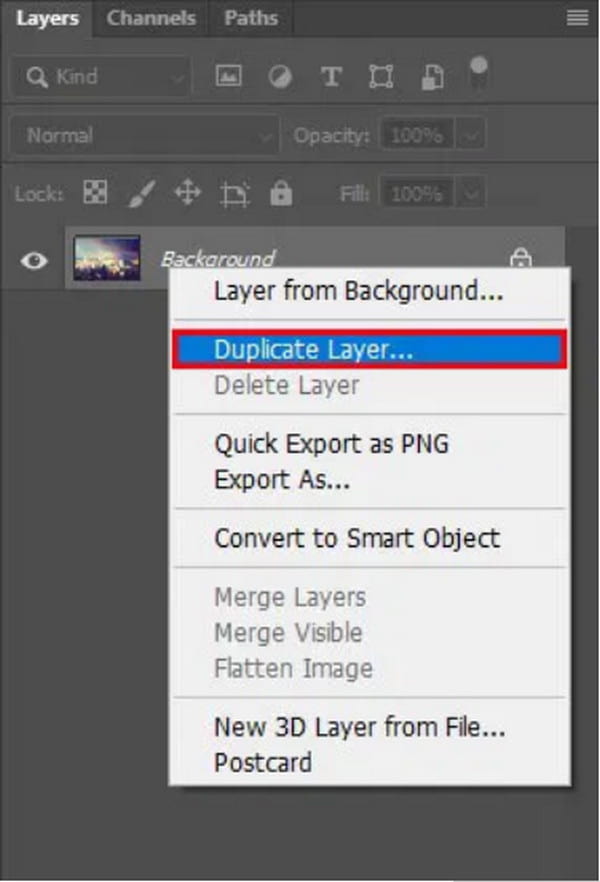
Step 1.Open Photoshop on your computer and head to the "File" menu. Select the "Open" option and choose the blurry photo from your folder. From the Layers menu, right-click the uploaded image and select "Duplicate Layer" from the drop-down list.
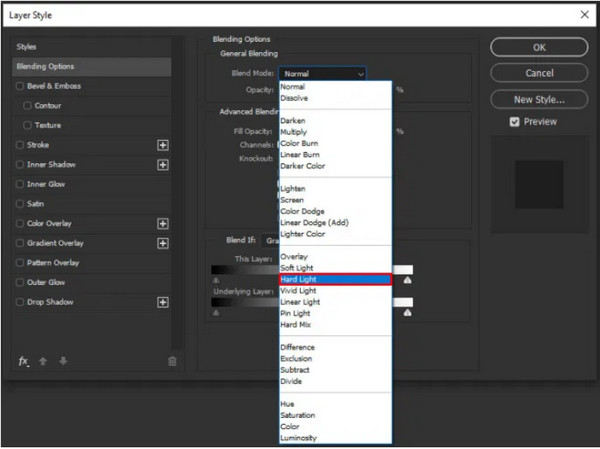
Step 2.From the "Filter" tool at the top left part, hover your cursor over the "Other" option and select "High Pass". A dialog box will open where you can set the radius to 10%. Additional settings are to set the layer’s blend mode to hard light and adjust the opacity.
Part 2: Use Deblur Effect for a Blurry Picture [Android/iPhone]
Everyone has a mobile device that accompanies taking pictures. Aside from iPhone’s great camera function, Android is not late to take a shot since many releases from the past years. But unexpected events are inevitable; how to unblur a picture on your phone? PhotoDirector is a mobile app that helps to enhance blurry pictures. Even for a shaky camera, editing with this app is easier, with more functions to offer. Its Photo Sharpener is effective to apply, even for a downloaded photo with low quality. Moreover, it is powered by AI technology for effects like animated overlay, styles, and filters. PhotoDirector also offers tools for:
- Removing unwanted objects with excellent precision in deleting or eliminating them.
- Provide thousands of stickers, effects, and frames for a flexible picture editing.
- Save output images to the best quality, like HD 4K camera resolution.
- No distraction on the interface with advertisements and promotions pop-ups.
With all of these features, PhotoDirector is the suggested app to use on Android and iOS. It also offers in-app purchases for seasonal stickers, filters, and more. Now, let’s see how to make a blurry picture clear with PhotoDirector:
Step 1.Open the App Store or Google Play on your smartphone and search for the PhotoDirector app. Tap "Install" and wait until the app is downloaded. Tap "Open" to launch PhotoDirector.
Step 2.Head to the Edit menu and select the blurry picture. With just one tap, the photo will be uploaded quickly on the app. Now, go to the "Tools" menu. There are many functions to see there, but for this step, tap "Deblur".
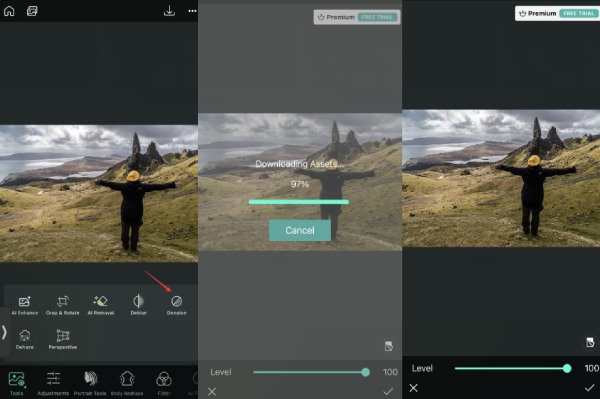
Step 3.With the level slider, choose the effect’s intensity to apply to the file. Drag the button to your right to reduce the blurriness and enhance it quickly. Once done, tap Save to download the newly edited output to your phone.
Bonus Tips: Enlarge Pictures Without Blurring Pictures
For an additional solution, AnyRec Free AI Image Upscaler is an online tool that helps to enhance a pixelated photo in just one click. It provides Magnification levels to increase upscale by 2x, 4x, 6x, and 8x to make the output cleaner, crisper, and sharper. Popular image formats are also supported, including TIFF, JPEG, BMP, and so on.
Features:
- A free online tool to remove blurry parts on pictures without distorting the quality.
- Offer a real-time preview for a side-by-side comparison of the magnification result.
- Protect user privacy by deleting the uploaded images by the site’s server.
- Simple interface with AI algorithm for a guaranteed high-quality picture.
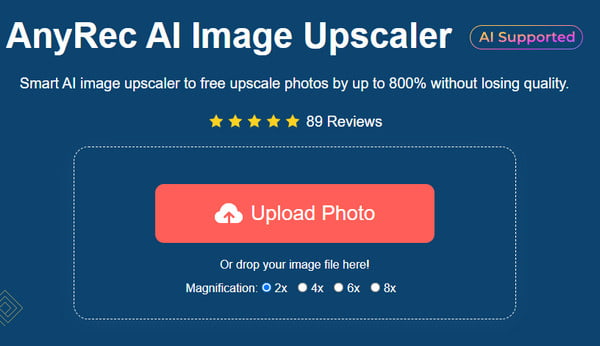
Step 1.Visit the online tool and click the "Upload Photo" button to import the blurry image from your gallery. Click the "Open" button to upload the selected file to the website’s interface.
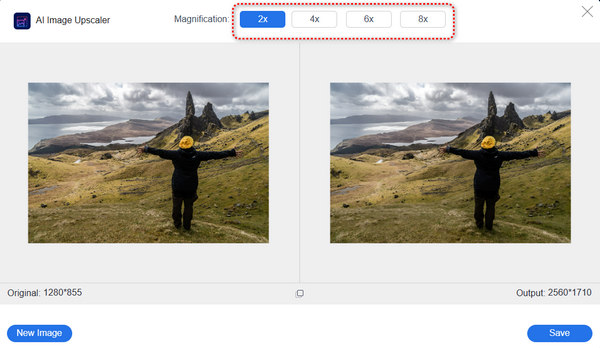
Step 2.After uploading the photo successfully, choose the "Magnification" level. Hover your mouse over the original picture from the left corner. You will see the changes to the right part.
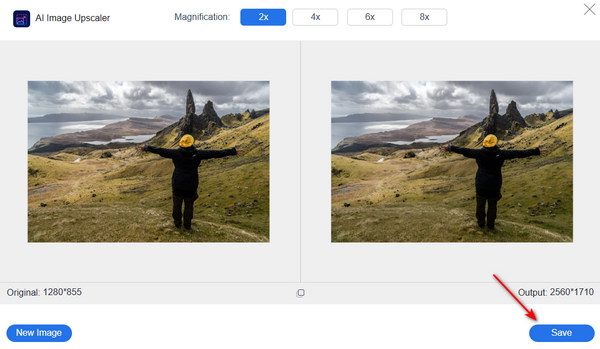
Step 3.When done with editing, it is time to export the output. Click the "Save" button to process your new picture; it will only take a few moments.
Part 3: FAQs about Unblurring an Image
-
1. What are the effective tips to avoid getting blurry images?
It takes time to learn how to make a picture less blurry. Still, you can avoid this extra work by trying these helpful tips: Use a wide-angle lens, focus the camera on the main subject, use a larger aperture setting, and try a tripod for a steady way of handling your camera.
-
2. What are the common causes of blurry pictures?
There are many reasons for a fuzzy shot. It could be the incorrect shutter speed usage, too much camera movement, main subject movements, Missed focus, insufficient depth of field, and softness of the lens you use. But you can definitely fix them by changing the camera settings and some practice in photoshoots.
-
3. How to correctly blur a picture’s background?
There are many ways to capture a picture with a blurry background. Change the aperture mode to A or AV. Choose the smallest f-value for a DLSR camera. Keep the subject closer to the camera or zoom in on the subject.
Conclusion
In spite of the fact that fuzzy images are inevitable, you can always learn how to unblur a picture to depixelate images. And you can try all the recommended tools in this article for professional editing experiences to unblur an image. As a bonus tip, AnyRec Free AI Image Upscaler is a simple and easier method of upscaling pictures up to 800%! Visit the website to fix your blurry photos.
