3 Quick Ways on How to Do Webcam Mic Test and Then Record
There’s nothing more frustrating than a webcam and microphone not working correctly during important meetings. So, do a webcam mic test first! Whether you want to guarantee your voice and video are being transmitted clearly or to avoid awkward silences, do a quick webcam micphone test! No matter your operating system, dive in here to see the three easy and effective ways to do the test, ensuring you can speak with confidence.
Guide List
Test Computer Webcam and Microphone Online Test Webcam and Microphone on Windows 11/10 Do Webcam Microphone Test on Mac Record Your Face and Voice After Webcam & Microphone TestingTest Computer Webcam and Microphone Online
Without installing anything, you can quickly test webcam and microphone online, making the process more convenient. One such tool from your web browser for testing both webcam and mic is Screenapp. This web-based tool ensures your webcam gives a clear video and your mic picks up sound before you even join in a session. No signup and personal details are required; Screenapp offers a fast and secure way to do webcam mic checking online straight from your browser.
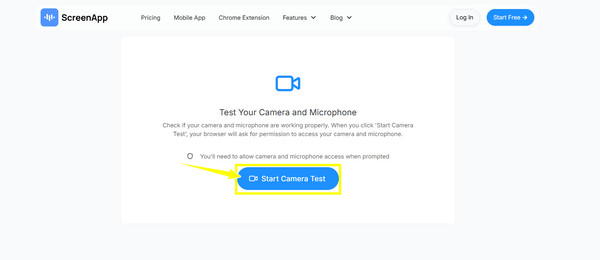
Step 1.Start your browser and visit the Screenapp.io Webcam and Mic Tester website. On its main page, look for the “Start Camera Test” button; please click on it to initiate the process.
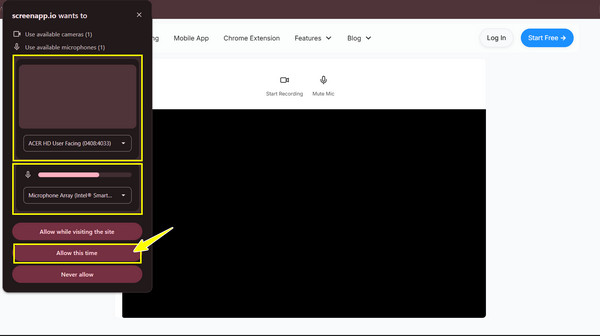
Step 2.Please grant the website access to your webcam and microphone by clicking the “Allow this time” button. After that, you’ll immediately see your live video feed on your screen. If the image looks clear, your webcam is working properly.
Below it, you should see an option to test your mic. Start speaking and inspect if the sound levels react to your voice by raising the level; if so, your mic is working properly, too.
Step 3.Once you’re done with the checking, you can exit the test and use your webcam and microphone with confidence for your recording session or important meetings or calls.
Test Webcam and Microphone on Windows 11/10
Thankfully, Windows offers a built-in tool that makes testing the webcam and microphone so easy. As there will be times when your webcam and mic won’t function normally due to some issues, testing them first can help you identify these issues and fix them before you do an important task. With the right steps, you can quickly do a camera and microphone test on Windows 11/10 directly within the system settings and the Camera app.
Here are the steps to check if the webcam and microphone is working on a Windows system:
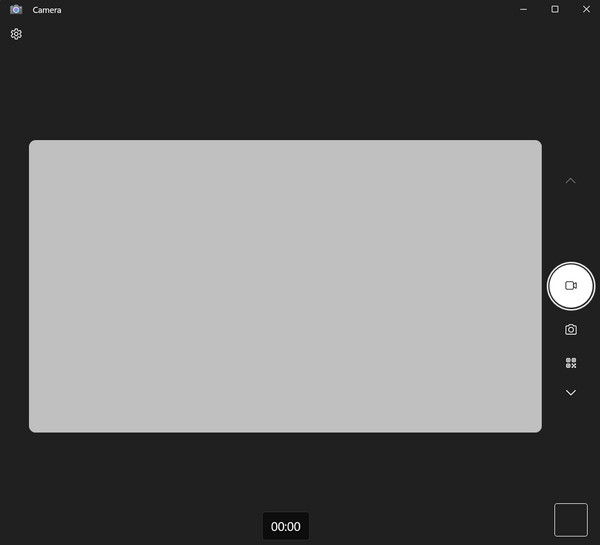
Step 1.On your PC, head to the “Search” bar below and type “Camera”. Select the “Camera” app from the results. If prompted, allow the app to access your webcam in the pop-up. Now, you must see your live feed view from your webcam on your screen.
Step 2.Afterward, slide to the “Volume” button in the taskbar, right-click on it, then select “Open Sound Settings”. In the “Input” section, ensure the correct mic device is selected from the “Choose a device for speaking or recording” dropdown menu.
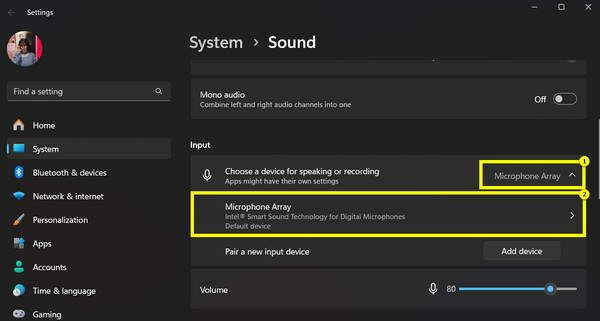
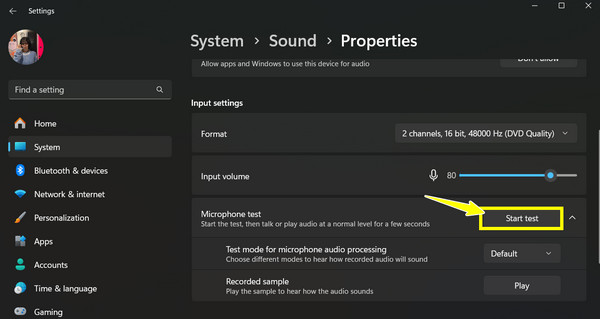
Step 3.Click on your microphone name to test it; here, click the “Start test” button, and then start speaking. If it is working correctly, the percentage should be higher. That’s how you do a quick webcam mic test on Windows!
Do Webcam Microphone Test on Mac
For Mac users, testing webcam and microphone can be done directly within the system settings as well as the Photo Booth app. Whether you're getting everything ready for a virtual meeting or video call, testing both webcam and mic is necessary for clear communication. Any crucial adjustments can be made immediately once you do a quick test on Mac, and once everything is good to go, you can start recording.
Below is the complete guide on how to check webcam and microphone on Mac:
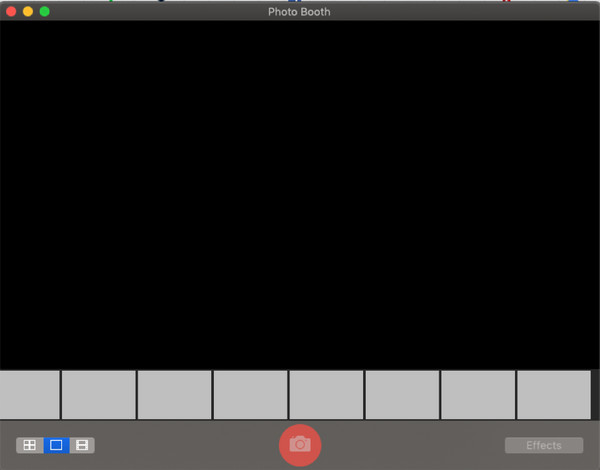
Step 1.Find the “Finder” on your dock, then go to “Applications” and open the “Photo Booth” app. Once it opens, you should see a live feed from your webcam. If you’re seeing yourself clearly on your Mac, your webcam is working correctly.
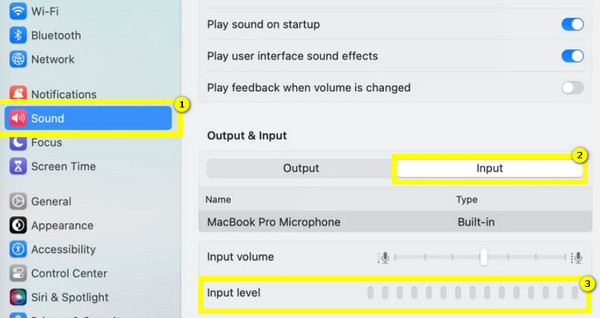
Step 2.Meanwhile, for your microphone, click the “Apple menu” in the upper left corner and then choose “System Settings” or “System Preferences”. Click on “Sound” then go to the “Input” tab. Here, you can choose the correct mic then start speaking with the tested mic. If the input level bars move with your voice, the microphone is working properly.
Record Your Face and Voice After Webcam & Microphone Testing
After doing a webcam mic test to make sure they are functioning properly, the next step is to record your face and voice for various purposes, like creating tutorials, presentations, and more. For this, use a tool like AnyRec Screen Recorder, giving you an all-in-one solution for recording your webcam and audio with high quality. Whether you wish to record for a live stream, call, or personal video, this software has robust features and easy-to-use controls, so even beginners can record with ease. In addition to that, it provides a variety of customization options, from adjusting the quality and volume to selecting a specific frame for your webcam deed. All can be achieved with excellent quality in mind.

Record in up to 4K resolution, ensuring clear video quality for all.
Capture both webcam and mic without degrading the quality.
Enhance your recordings with annotations, arrows, shapes, etc.
Adjust resolution, frame rate, bitrate, and more to your needs.
100% Secure
100% Secure
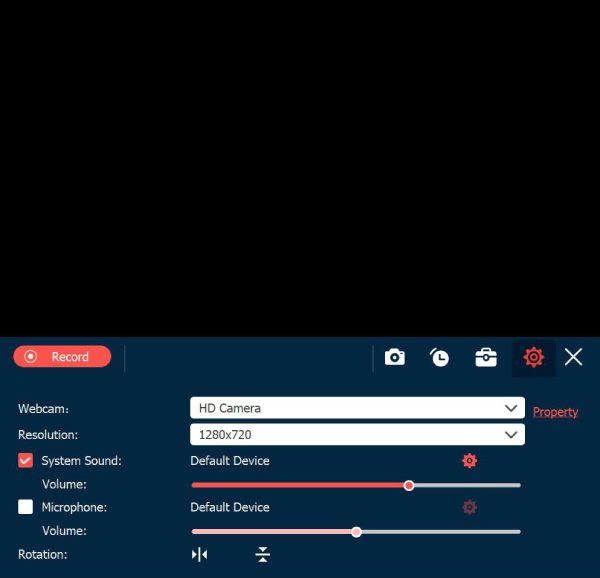
Step 1.Once you have the AnyRec Screen Recorder open, go ahead and select the “Video Recorder” option. Then, ensure that the “Webcam” toggle is enabled to let the software detect your connected webcam. If it is recognized, choose the right webcam from the menu options.
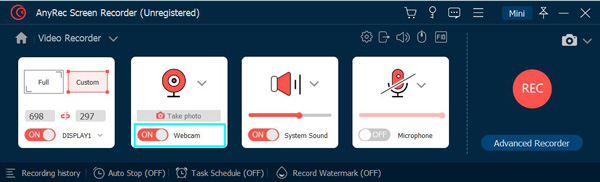
Step 2.For audio along with the webcam, make sure the “Microphone” button is switched on. Then, adjust the webcam capture area and audio settings as needed. You can do a quick webcam mic test here by clicking the “Test” button on each option.

Step 3.As soon as everything is set to your liking, click the “REC” button to begin recording your webcam and mic. Use the floating toolbar to add annotations, take screenshots, and do more during the process.
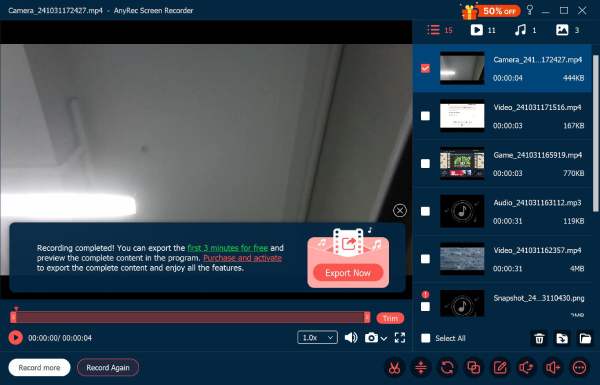
Step 4.Once you have finished recording, you'll be taken to the preview window to review your webcam and mic recording. If necessary, trim out extra parts. When you’re satisfied, click the “Save” button to finalize your recording.
Conclusion
To have a smooth video call, meeting, or recording, it’s crucial to do a webcam mic test. Whether with the help of built-in system tools or online testing platforms, you can quickly confirm both your webcam and microphone are functioning at their best. Once you’ve confirmed both are working properly, why not start recording your webcam and audio? AnyRec Screen Recorder is the best tool for doing such a thing! It captures high-quality video and audio with customizable settings to acquire the quality you need. You can also reduce the background noise when recording! Give it a try now and have a smooth video and audio recording experience!
100% Secure
100% Secure