Beginner’s Guide: How to Do Video Masking? [Detailed Steps]
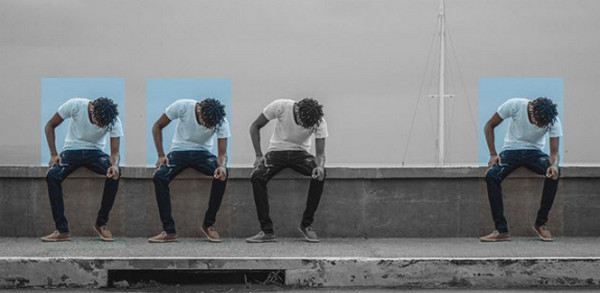
To individually edit different areas of a single capture, video masking is used. Sometimes, it is used to hide unknown elements in the video. Otherwise, it produces mind-blowing effects, like making a person appear multiple times. Wondering how masking video editing works? Thankfully, here will show details about video masking, covering five ways to mask videos and three masking editors on Windows/Mac. Make sure to follow this post up to the last part!
Guide List
What is Video Masking? Different Types of Masks 5 Ways to Make Masking Videos with Stunning Effects Top 3 Video Masking Editors on Windows/Mac FAQs about Video Masking EffectsWhat is Video Masking? Different Types of Masks
As you see above, masks are a video editing feature that lets you utilize video overlays to hide unknown objects, duplicate subjects, or transform your footage. You can decide the portion of a video with a template or custom frame, and then it lets you produce cinematic effects. From basic fixes, such as blurring out objects, to pro-level hiding unwanted objects, video masking undeniably impacts the video editing world.
How is video masking performed? You just need to simply determine if there’s something you wish to block out or focus on. Later, create a mask, like cutting and applying a shape over your screen digitally. Then, overlay the layers and get fantastic effects. It unquestionably adds excitement to your videos, making them much more enjoyable to watch and look professional. But do you know that each type of video mask comes with different purposes?
Understanding each will help you know which one is to use in your video to have excellent footage and take your video to another level. To understand each, get to know Still, Text, and Video masks below.
- Clipping Masks create a window effect where your audience can see a limited part of your video. This type permits you to create an interesting shape that allows your viewers to peek at your video and a blurred layer to block out the rest. Clipping masks can also be applied to highlight a specific part by lighting it or increasing its sharpness.
- Static Masks are simply the ones that have fixed shapes; all you need to do is position it over the area you want to focus. Once this mask is created, it won’t change location or shape. Also, it is the simplest way to overlay scenes or even make yourself double in your videos.
- Object Masks use objects rather than text to generate shapes for video masking. It can be used similarly to a clipping mask, where you create an outline to see part of your video. Otherwise, use it as the inverted one to block it out partially or fully.
- Text Masks are normally masks that use the shape of text. It has this incredible effect of letting your audience read the title and concentrate on the moving video at the same time.
- Inverted Masks do the opposite of clipping masks; instead of creating a window to watch the part of a video, they make a solid shape to get rid of that one part. If you desire to keep parts private by blurring out sensitive information while still giving that incredible effect, use inverted masks.
- Dynamic Masks are usually inverted and are primarily designed to block moving objects. Imagine a car driving with a license plate you want to blur out; the dynamic mask will do its magic to keep the license plate blurred, even if it moves in your footage.
5 Ways to Make Masking Videos with Stunning Effects
Now that you have an idea of what video masking will help you achieve your desired masking effect if you’d like to learn how to use or apply them, keep reading the following five tutorials.
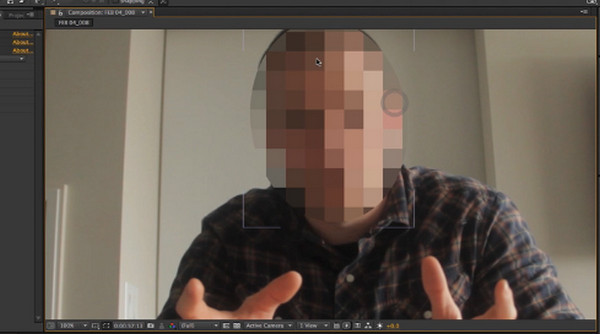
1. Blur Face/Object to Hide
For sure, you’ve seen this a million times. Blurring something in your footage is probably the most used video masking effect. It is mainly used for faces that need protection or some object that includes sensitive information. To achieve it, you simply select an area you wish to hide from your audience and apply masking to it.
2. Remove Objects
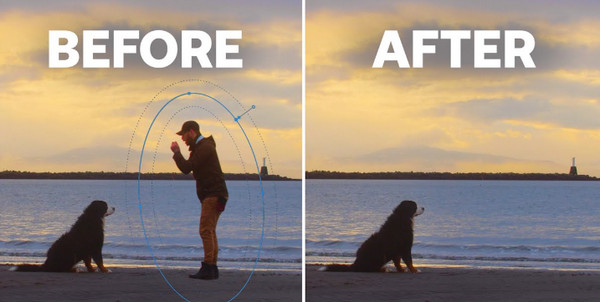
Alongside blurring out objects, removing them directly is among the common uses of video masking. For instance, you could have an incredible shot of scenery, and then somebody walks into it, and you can just get rid of it by applying a mask. The recommended type of masking to use here is the inverted mask so that you can block unwanted objects from your scene.
3. Create Titled Sequences.
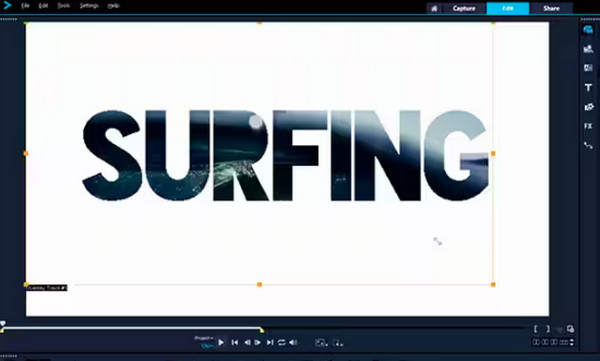
Adding effects to your titles is an effective way to grab your viewer’s attention. The usage of this video masking allows users to concentrate on the title and, at the same time, lets you get a peek at what’s behind it. Remember that a constructed text mask works best with short words created from large-size bold letters.
4. Focus on Faces
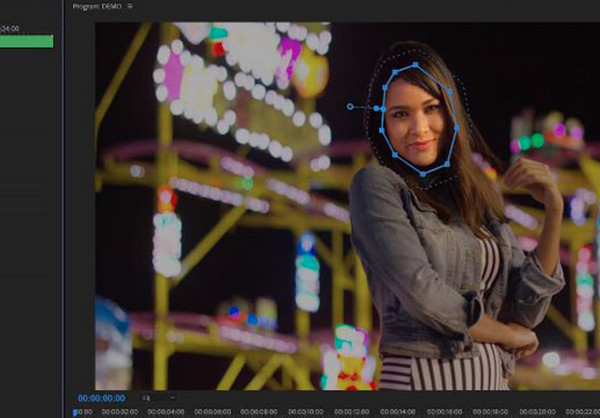
On the other hand, this way of using video masking will let your audience’s eyes concentrate on the faces instead of some object behind them. You could re-shoot or form a mask to lighten the video layer when you discover the faces are too dimly lit. Overlay the brightened layer with your original footage, thus making the face stand out more.
5. Clone Yourself
Are you curious how an actor plays two characters simultaneously in the same scene? It makes use of masking video editing! The actor plays the two characters separately, then half of the footage uses a mask, then overlays them to generate the entire scene. If you wish to try it out to talk to yourself, this approach is simple yet brilliant!
Top 3 Video Masking Editors on Windows/Mac
Following the usage of video masking and its type, of course, you should not forget the tools that can help you achieve the incredible masking effect you desire. Thus, this part will briefly introduce you to some of the best masking video editors today.
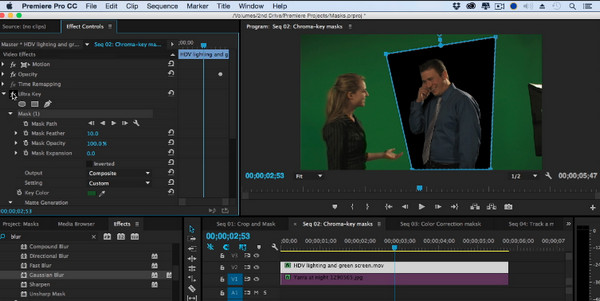
1. Adobe Premiere Pro
With its wide range of editing features and precise video masking controls, Premiere Pro allows you to create masks or use the rotoscope tool to isolate subjects in your video footage easily. If you desire to use it to create a mask, use this masking video editor’s Shape tool to make pre-made square or circular marks. Otherwise, use a Pen to create shapes that you freely separate.
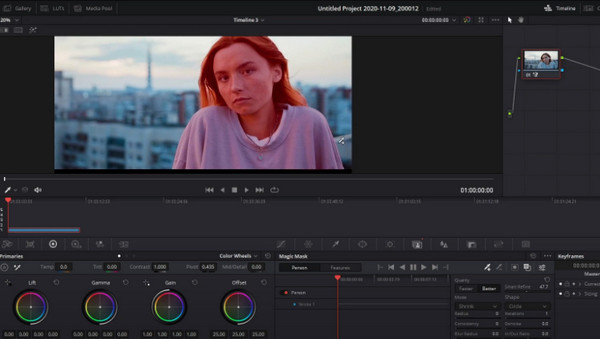
2. DaVinci Resolve
As for this masking video editor, DaVinci Resolve merges editing, motion graphics, color correction, audio production, and visual effects. Its mask tools are versatile in a way that they can be combined easily. Simply use the shape or the pen tool, and then you can proceed straight to adding multiple masks to the layer, display text behind the subject, focus, remove, and others. It also provides an online version of video editor.
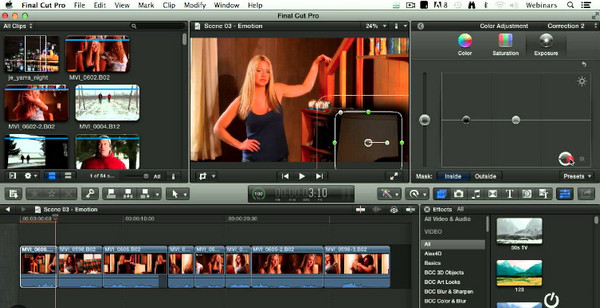
3. Final Cut Pro X
Another professional solution that provides powerful video masking tools is the Final Cut Pro X. Using this incredible masking video editor; you can benefit from its color and shape masks to control the areas from which you hope to apply the color corrections and effects and the control point and drawing techniques that can assist you in creating custom masks.
Video masking is indeed among the powerful tools that video editing enthusiasts love to use. Besides masking effects, to get more incredible effects and filters, pre-made themes, and various editing tools, use AnyRec Video Converter, which has these all! Inside its built-in video editor, you can find the rotator, cropper, options for adding watermarks, audio, and more. You can then specify output settings, like resolution, format, quality, etc. It is your all-in-one H.265 converter and editor that includes all the essentials to make your video look more amazing than before!
Provide many cool effects, collections of filters, and pre-made themes.
Make your video more interesting by putting multiple ones in one frame.
Set the video output settings, like the aspect ratio, quality, resolution, etc.
Utilized AI algorithm to enhance video quality and improve video within clicks.
Secure Download
Secure Download
FAQs about Video Masking Effects
-
What are the things you need for video masking?
Firstly, you need the video footage you want to edit and apply masking effects. It could be shot with something you want to blur, block out, or eliminate. The last thing you should have been the tool that will assist you in executing the effects you need.
-
Where are the tools for masking in Davinci Resolve?
The tools can be located on the Color tab inside the Window option under the video preview window. You can see there the masking tools you can add, such as circle, linear, and the pen that’ll help you create shapes for masking.
-
What’s the exact purpose of masking video editing?
It provides great solutions to mask or change things in the video footage. It could blur out sensitive information, eliminate unwanted objects, focus on faces or specific subjects, and even make a subject double.
-
Can I use a video masking technique to create reflection?
Yes. If you are really into details, you can use them to create reflections. To do it, duplicate the object, apply color grading, flip it, and set it up under the original object, proper perspective.
-
Are there online tools that include video masking effects?
Yes. You can make a video with Clipchamp masking tools and other reliable assistance, like FlexClip, Illusto, and others in the market that offer free masking tools.
Conclusion
After understanding the concept and technique of video masking, you can now put incredible effects on your footage. Not only does it blur out specific parts of your video, but it is also powerful in focusing, adding reflection, multiplying objects, and more. Once you have that perfect effect, you can do further editing to make your footage more eye-catching with your chosen trustworthy video masking editing software. Have an enjoyable editing experience, and don’t forget to share the results!
Secure Download
Secure Download


