6 Ways to Make a Picture Smaller on Mac (including macOS 14 Sonoma)
If your save too many high-resolution pictures on Mac, your computer will crash, slow down, and overheat frequently. What to do if you want to keep all those pictures? You can convert images to JPEG and reduce image resolution during this time. It is easy to make pictures smaller on Mac. You can do as the following solutions show to compress large pictures on Mac in bulk or individually.
6 Ways to Make a Picture Smaller on Mac FAQs of Photo Compression on Mac6 Ways to Make a Picture Smaller on Mac
Many factors increase the picture file size, including image formats, pixel dimensions, image content, and more. To save memory space on Mac, you can convert, resize, and compress a picture and make it smaller than before.
1. Reduce a Picture Size with Preview
Mac Preview supports many popular image formats, including JPG/JPEG, PNG, PSD, TIFF, HEIC, etc. So here you can resize the photo size in macOS with Preview.
Step 1.Open your picture with Preview.
Step 2.From the top Tools drop-down list, click "Adjust Size".
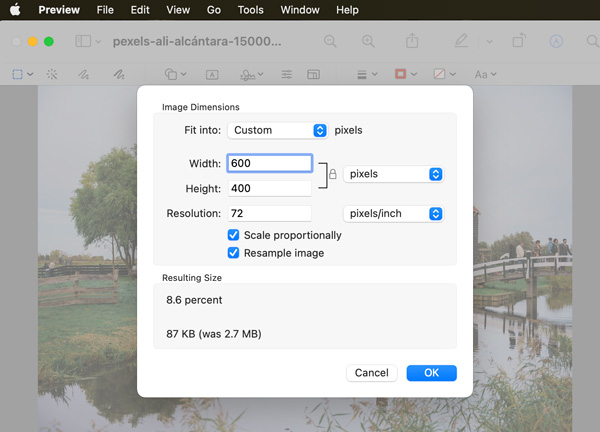
Step 3.In the "Image Dimensions" section, you can adjust the image "width" and "height" in "pixels", percent, etc.
Step 4.Set custom "Resolution" by "pixels/inch". Make sure to tick before "Scale proportionally and Resample image".
Step 5.Preview the smaller image file size in "Resulting" Size directly.
Step 5.Click "OK" to get your resized picture.
Though you can open WebP pictures with Preview, you cannot resize WebP with Preview. Preview will notify you to duplicate the image to TIFF before editing.
2. Resize an Image with Photos
You can also use Photos (or iPhoto on older Macs) to compress images for free. Here is the tutorial you can follow.
Step 1.Open "Photos". Click "New Album" from the top "File" drop-down list.
Step 2.Drag and drop all the pictures in large file sizes into this album.
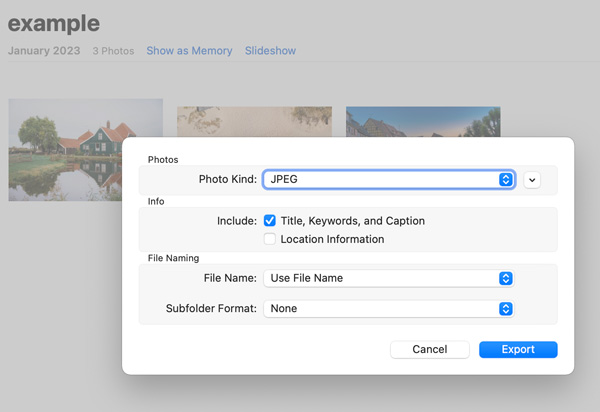
Step 3.Click "File" on the top bar. Then click "Export" followed by "Export album".
Step 4.Set the output format as "JPEG" in "Photo Kind".
Step 4.Click "Export" to convert images to JPEG on Mac.
3. Compress Images to 200/100/50 KB or Lower Online
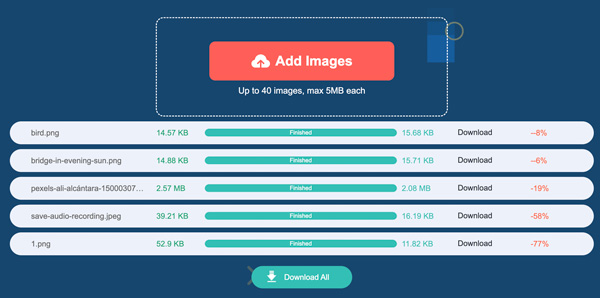
It is also a good idea to reduce image file size online. You can keep the original image format with lower quality. To compress JPEG, PNG, SVG, and GIF online without watermark, you can use AnyRec Free Online Image Compressor. Here you can compress up to 40 pictures by up to 80% for free. The maximum file size limit is 5MB.
Step 1.Visit the online image compressor on your browser.
Step 2.Click "Add Images" to browse and upload images in batch.
Step 3.The image uploading and compressing process starts automatically.
Step 4.Click "Download All" to get all your pictures with small file sizes.
4. Change Format to Reduce Picture File Size on Mac
Just as mentioned above, you can convert PNG to JPG, TIFF to JPG, BMP to JPG, and more to free up storage space on Mac. If you want to reduce image size in JPG, PNG, and GIF formats, you can do as the following steps show.
Step 1.Open an online image converter on your browser.
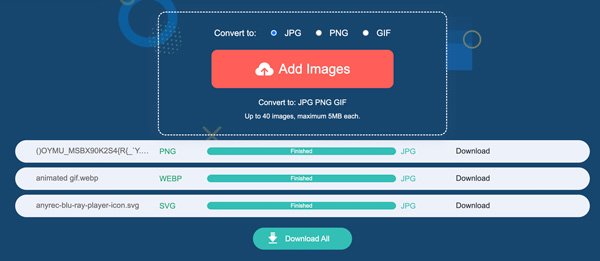
Step 2.Set the output image format as JPG, PNG, or GIF.
Step 3.Click "Add Images" to upload your pictures in WebP, SVG, and other formats.
Step 4.Click "Download All" to get all pictures in JPG format.
5. Organize Photos into a Folder and Zip It
If you want to make a backup of those pictures, you can compress pictures into a ZIP file. By doing so, you can compress images on Mac without losing quality. Also, you can get more available storage space without extra effort.
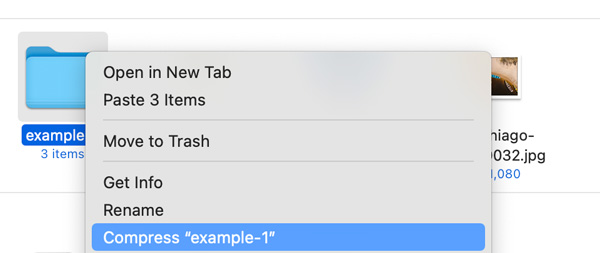
Step 1.Collect all images you want to compress into a folder.
Step 2. Right-click on this folder. Then click "Compress "your folder name"".
Step 3.Find it with the same folder name ending with .zip.
6. Shrink Picture File Size with Microsoft Word
If your pictures are squared, you can use Word as your free picture compressor too. Moreover, you can change the picture quality from maximum ppi to 96 ppi. Or you can keep the original quality based on your need.
Step 1.Open a new empty Word document. In the "Insert" section, click "Picture from File" from the "Pictures" list.
Step 2.Select all pictures. Then click "Wrap Text" followed by "Square".
Step 3.Then the new "Picture Format" tab appears next to View on the top. Click it.
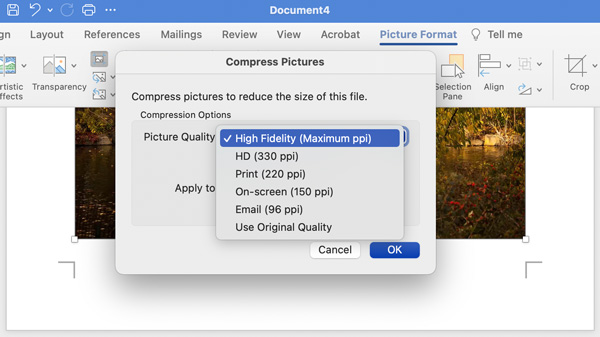
Step 4.Find and click the icon next to "Transparency". You can move your mouse above it and see "Compress Pictures".
Step 5.You can adjust picture quality, delete cropped areas of pictures, and do more changes based on your need.
Step 6.Click "OK" to finish the photo compression.
FAQs of Photo Compression on Mac
-
Can you batch resize images with Preview?
Yes. Go to Preview "Preferences". In the "Images" section, tick before "Open all files in one window". Then select all pictures and open them with Preview. Select those pictures in the window’s sidebar. Later, click "Tools" on the top bar. You can click "Adjust Size" and then resize multiple images on Mac.
-
What to do to fix “Cannot export selected items” in Preview?
Click "OK" to close the popup. Later, hold the "Command" key on your keyboard. In the Preview’s left sidebar, unselect some pictures in different formats. Later, you can try again to compress photos using Mac Preview.
-
How to reduce JPEG to 20KB?
If you want to compress images less than 20KB in JPG/JPEG, and other formats, you can use online photo size reducers to adjust the compression level. So you can adjust the photo compression level by percentage and preview the file size quickly.
Conclusion
As you can see, many online and offline JPEG/PNG/GIF/WebP/HEIC compression tools exist. If you want to make pictures smaller on Mac for personal use, there is no need to download or pay for extra tools. You can run Preview, Photos, online image resizer, online image converter, and Word to solve the problem. Or you can create a ZIP file to reduce the file size of hundreds of thousands of pictures in seconds.